
I know of only two pattern companies out there with designs for a 40L or larger technical pack: Stitchback Gear and Prickly Gorse Gear. For my backpack project, I selected the Stitchback Gear Metamorph Pack.
I chose this specific design because it offers both straight and curved waistband options, features a fully removable and interchangeable hipbelt system, and allows for endless modifications depending on the custom accessories you sew. This pack can easily transition from a lightweight summer setup for fly fishing and hammocking in the Uintas to a rugged winter setup for hiking with spikes. The pack layout itself is simple, which I absolutely love.
I’m writing these posts in the order in which I think you should sew all the parts of the bag. Sewing the hipbelt first will help with fitting the frame and shoulders later. It’s important to know exactly where you want the hipbelt to sit, so take your time on this first piece.
The Hipbelt
ℹ️ Note that throughout this post, I will use the terms men’s and women’s, wide and narrow, and straight and curved interchangeably.
The Stitchback pattern states that it includes both a men’s and women’s hipbelt in three different sizes, labeling the men’s version as “wide” and the women’s as “narrow.” Personally, I find these gendered labels unhelpful, since hip shape varies widely across all bodies regardless of gender. Calling a waistband “straight” versus “curved” is slightly more accurate, but even those terms can be confusing. The best approach is simply to create a prototype of both waistband shapes and see which one naturally contours to your body at the correct placement.
Sizing
The hipbelt comes in three different sizes, but I’ve got to say the sizing is extremely limited! There should be a gap of 4-9″ between the ends of the hipbelt. The wide/straight hipbelt comes in lengths 27, 30, and 33 inches. The narrow/curved hipbelt comes in lengths 25, 28, and 31 inches. I made the narrow in 31 inches for me and the wide in 30 inches for Ryan.
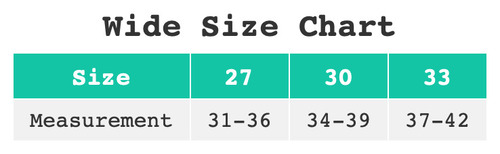
If I extrapolate from the recommended 4-9 inch spacing between the ends of the hipbelt, the wide/straight hipbelt will fit a circumference of 31 to 42 inches. That’s an extremely limited range.The placement of the hipbelt isn’t exactly the waist or hip, so I’m using the term circumference.
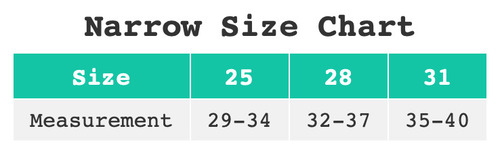
The narrow hipbelt fits a circumference of 29 to 40 inches only. It will be a real pain in the ass for anyone to draft a smaller or larger hipbelt outside of this limited range.
Reviewing Proper Fit

I started this multi-part series by reviewing how a pack should fit and the physical implications of getting it wrong. I probably focused a bit too much on the shoulders and not enough on the hips in that post, but I think most people completely overlook the shoulders when fitting a pack. Let’s dive deeper into hipbelt placement.
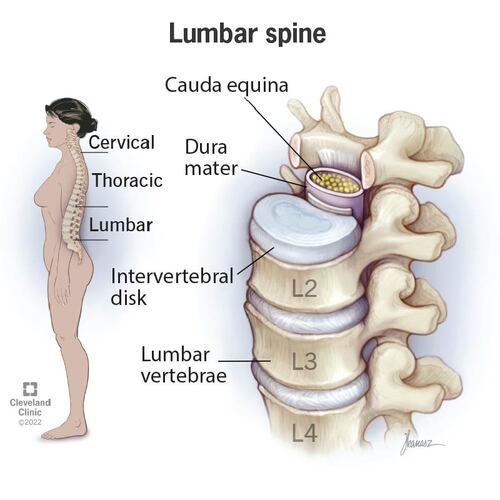
The key is that you want the hipbelt to sit on your hips and not on your soft stomach. For a traditional internal frame pack like this, 70 to 80% of the total pack weight should be carried by your hips. The integrated lumbar pad should rest just below the lumbar section of your spine.
If you watched the recent YouTube video from Backpack Engineering, you saw him build a running pack with a belt that fastens way up above the waistline. That specific style of hipbelt carries 0% of the pack weight; its only job is to stabilize the bag and reduce bounce while running. The fitting guidelines I am sharing here are for heavy-haul packs where you intend to transfer the weight fully to your hips to protect your shoulders.
Poor Fit Examples
The examples below show hipbelt placements that are comically wrong! And yes, these photos are taken directly from consumer websites selling these packs. I’m embarrassed for the companies that can’t even get product photos with the packs fitting the models correctly.
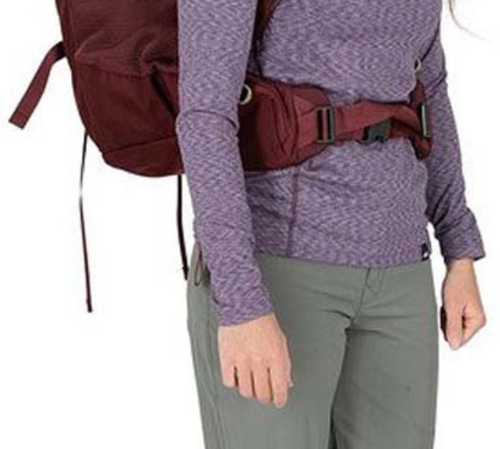

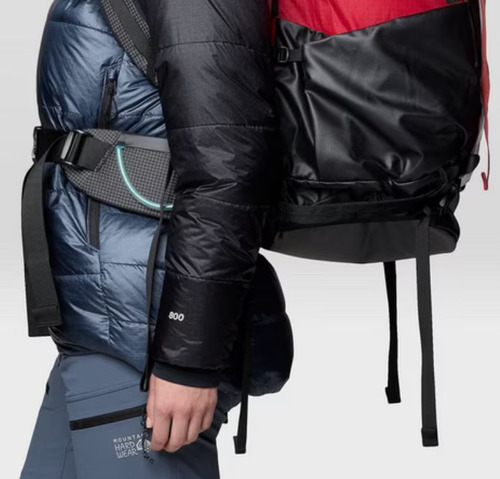
This last one is completely ridiculous. Come on Mountain Hardwear, the hipbelt isn’t suppose to support the boobs!
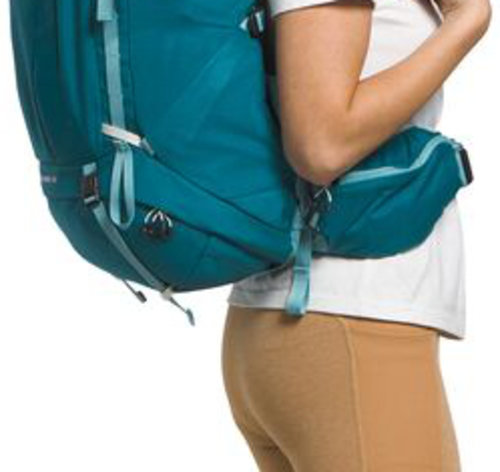
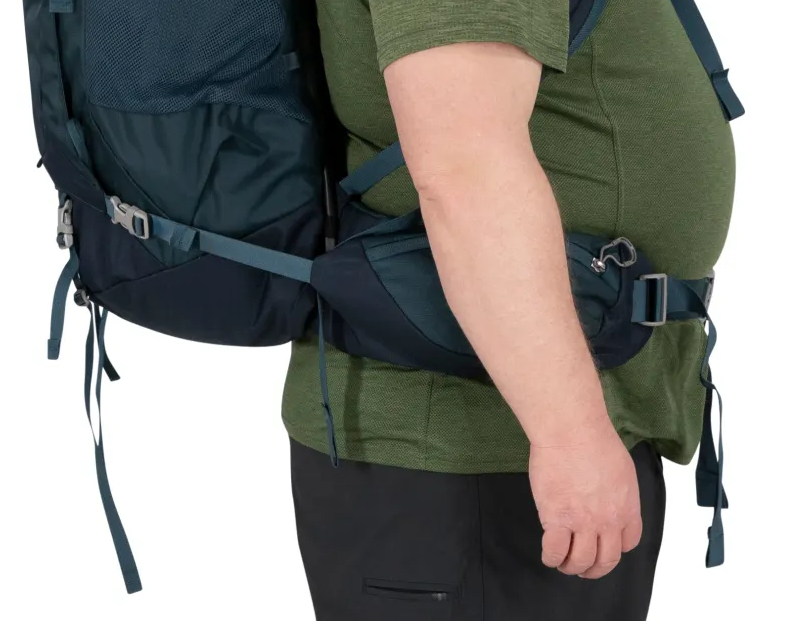
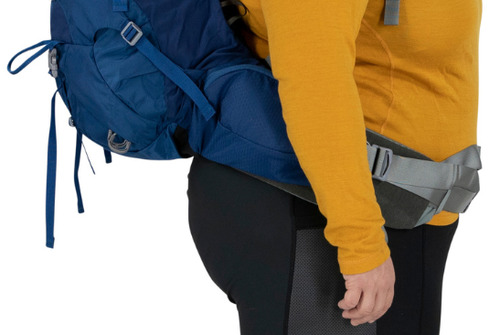
Correct Fit Examples
The hipbelt placement in these examples is significantly better. The side wings of the hipbelt are centered perfectly over the iliac crest where they belong, and the lumbar pad sits precisely below the lumbar spine.
Pattern
I was curious to see how Stitchback patterns would approach drafting a curved waistband. When I made my previous lumbar pack from Stitchback, there was no alternative shape option for the hipbelt, so I had to slash and adjust the pattern piece myself.
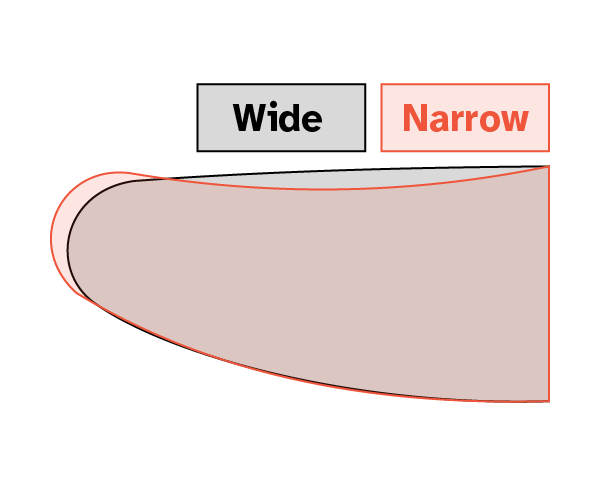
Here is the wide/straight medium (30 inch) versus the narrow/curved large (31 inch).
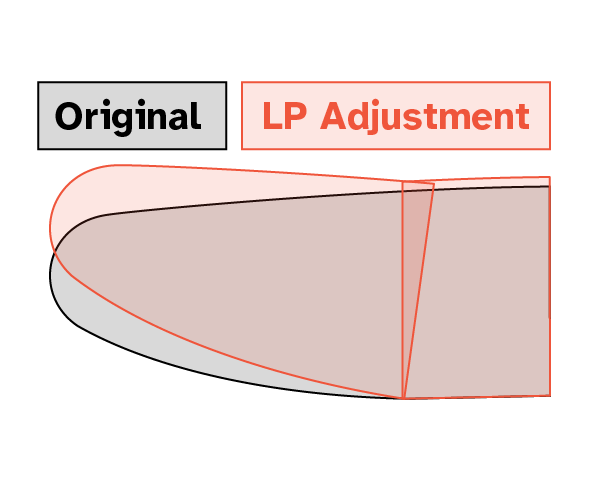
To refresh your memory, this is how I altered the lumbar pack pattern to introduce more curvature: I shortened the top edge by removing a wedge from the pattern body. This manipulation made the hipbelt narrower at the upper edge and wider at the lower hem, matching the natural flare of my hips.
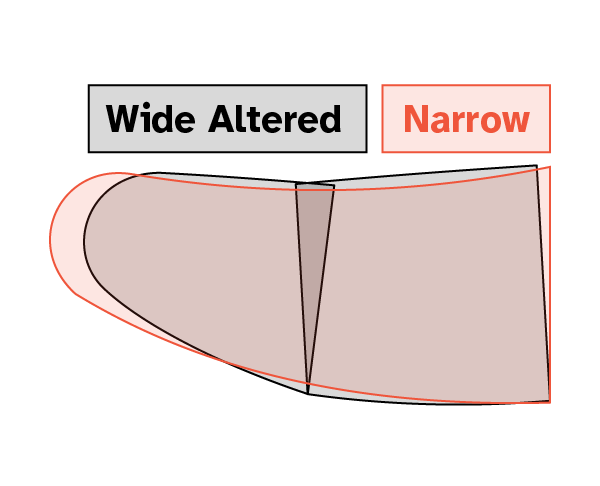
We can achieve the exact same structural results with the Metamorph pattern pieces, though it is slightly less elegant than using the original piece. If you take the wide/straight version and remove a matching wedge, you can successfully mimic the narrow/curved hipbelt. This confirmed that my original pattern alteration approach was correct.
On my LP adjustment, my wedge was located further back toward the hip because that is where my specific muslin was gapping. However, from a pure drafting standpoint, it makes perfect sense that Stitchback centralized the wedge removal directly in the middle of the hipbelt wing.
Prototypes
In part two of this series, I shared resources and ideas on how to approach prototyping this project, along with a full breakdown of my final materials. Let’s look at the specific strategy I used for the hipbelt.
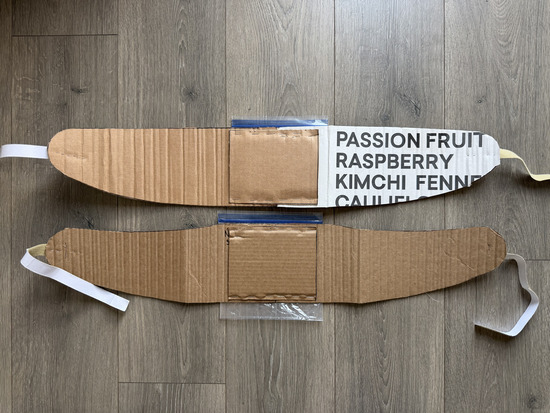
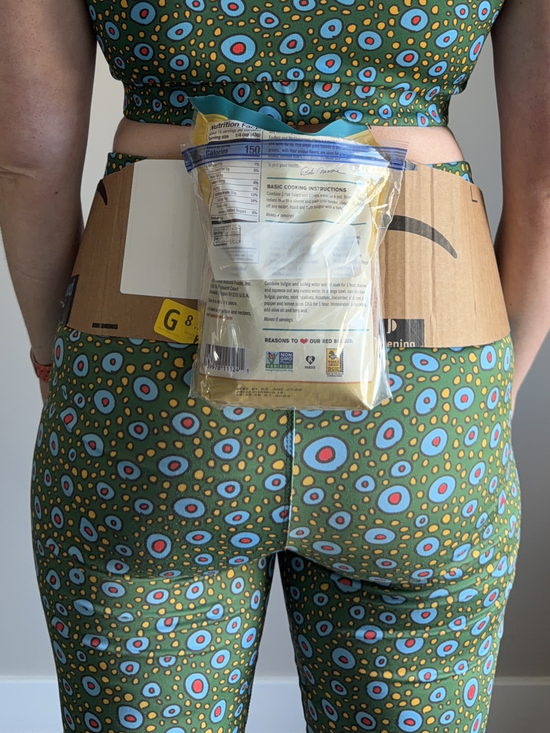
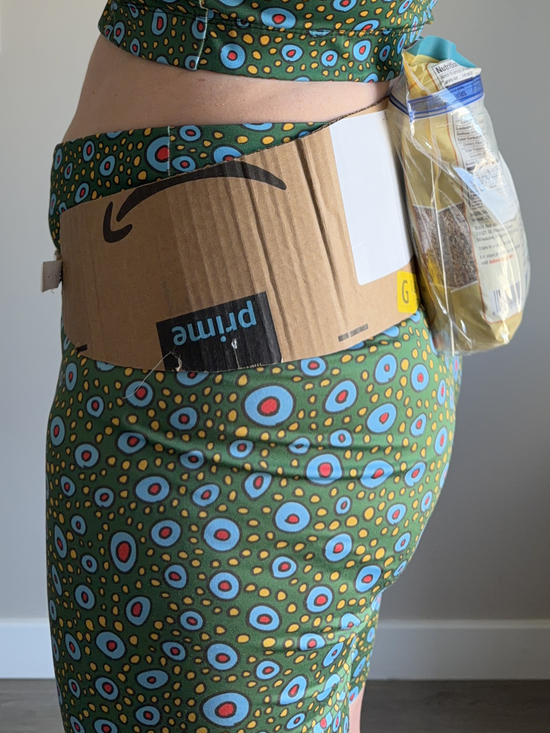
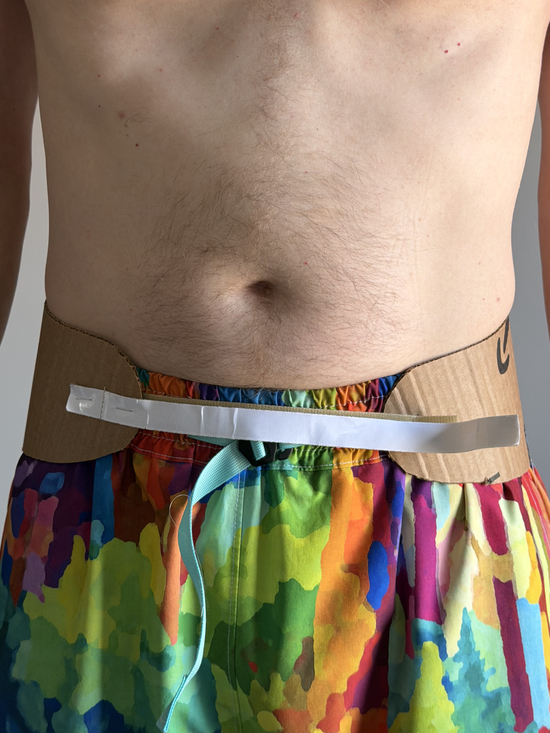
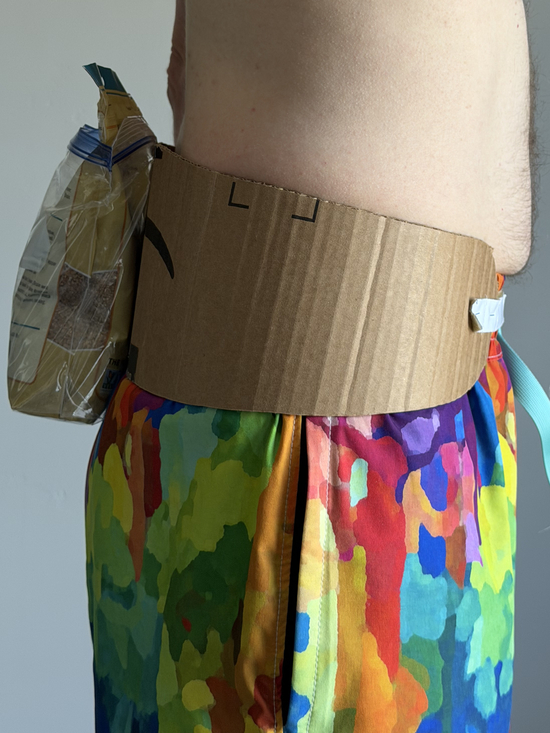
You can easily build your initial fitting prototypes out of heavy-duty cardboard. I traced the pattern using a permanent marker and cut it out with a utility knife, using basic scissors to navigate the tight curves at the ends. Instead of sacrificing actual webbing, I used adhesive-only hook-and-loop tape that I stapled to each side to mimic the webbing and buckle closure. Feel free to use staples, hot glue, or whatever scrap items you have on hand to hold your prototype together. I even stapled a quart-sized Ziploc bag to the back of the cardboard belt so I could drop in some weight to test how the hipbelt behaved under a load.
Wide
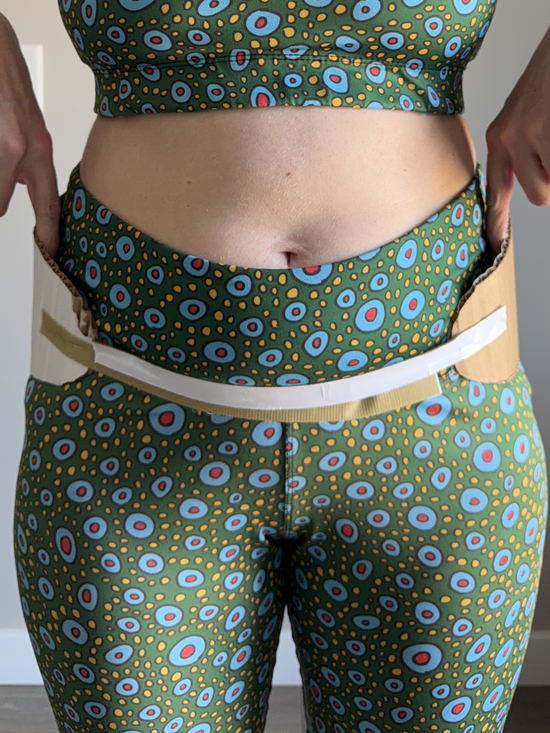
The wide/straight hipbelt does not suit my anatomy at all. It leaves massive gaps around the circumference of my hips, so I knew immediately that this version was a no-go for me.
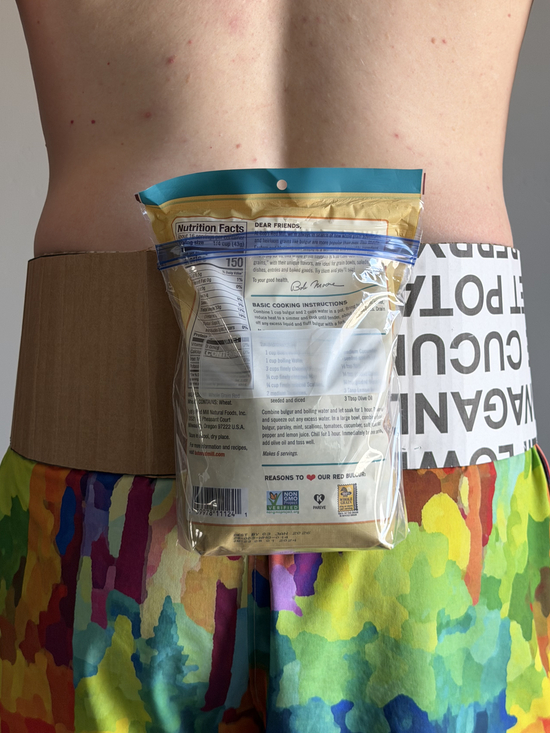
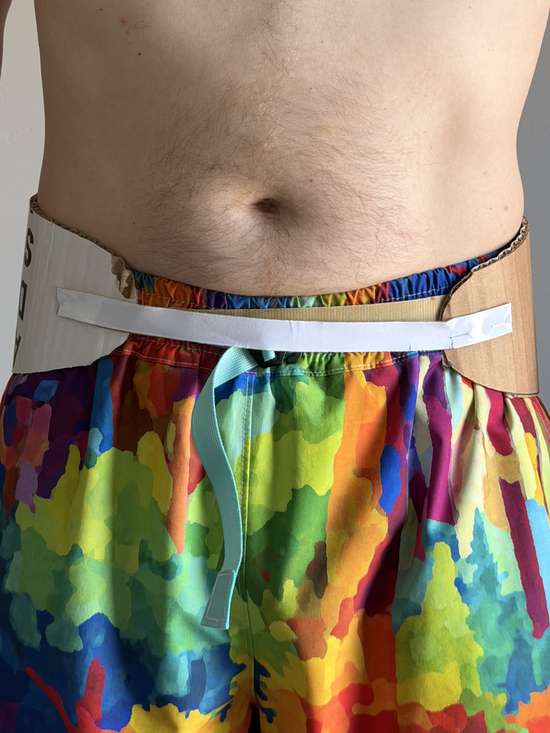
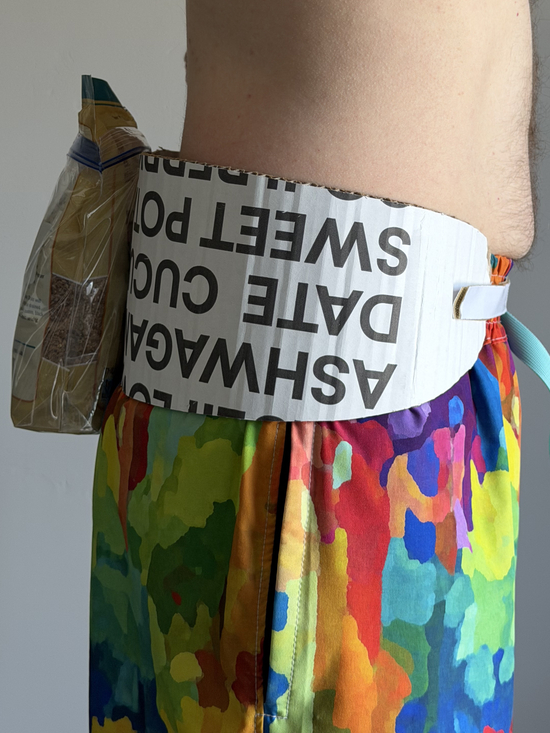
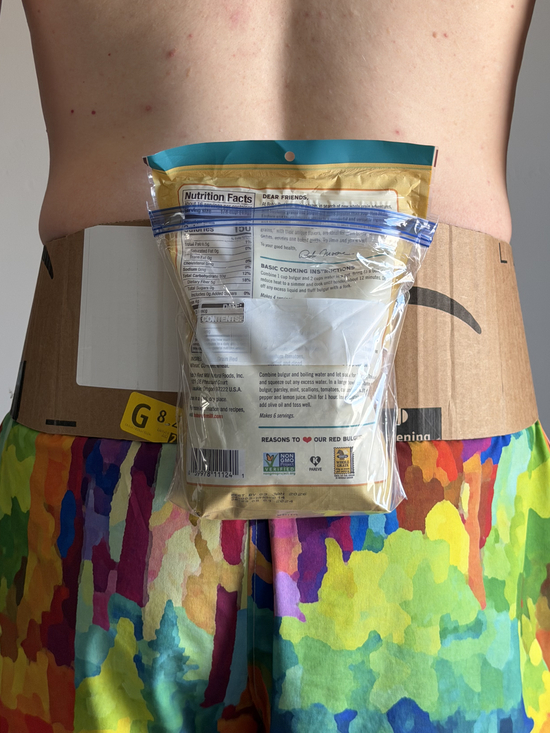
Ryan has an interesting fit profile. The wide belt technically wraps around him nicely, but we hit a weird issue with a prominent gap right at the center back.
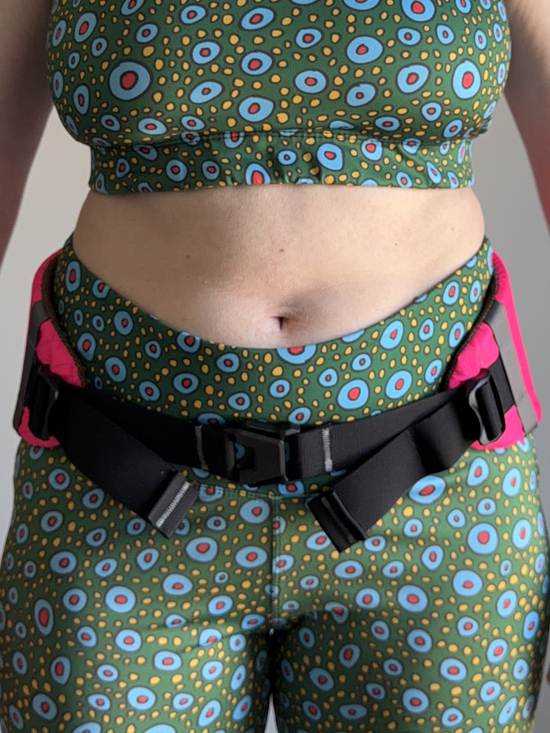
Narrow
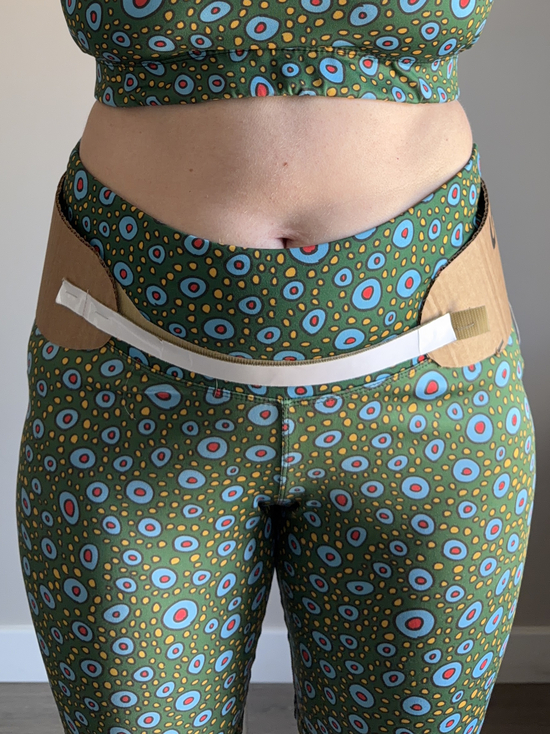
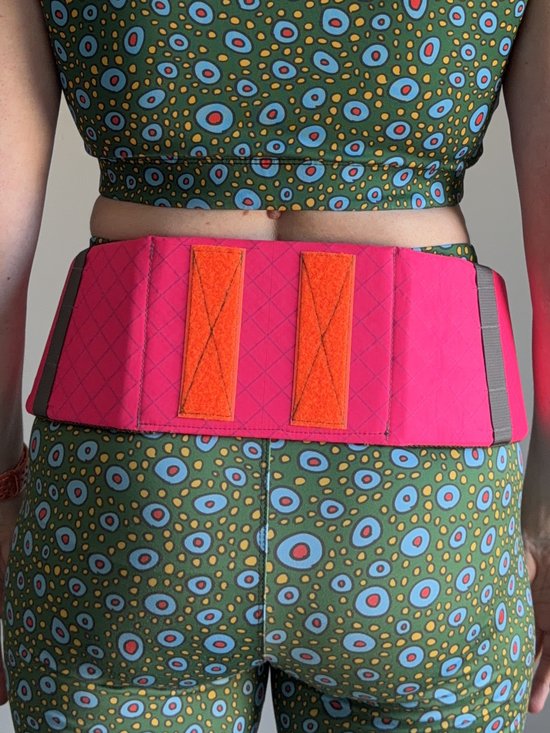
The narrow/curved hipbelt fits my body significantly better. The curved profile wraps my hip bones perfectly, and the gapping is completely gone.
This leaves us at an interesting impasse for Ryan. The narrow, curved belt actually looks like it fits his frame slightly better because the center back gapping is much less severe. However, since he has never experienced issues with the straight hipbelt on his lumbar pack, he ultimately chose to go with the wide/straight version for this build.
The beauty of this modular pattern is that if Ryan changes his mind after a few miles on the trail, I can easily sew an alternate hipbelt and swap it onto his pack. I love that I will never have to rebuild an entire backpack just to fix a fit issue; I only have to remake the belt.
Construction and Pattern Drafting Issues
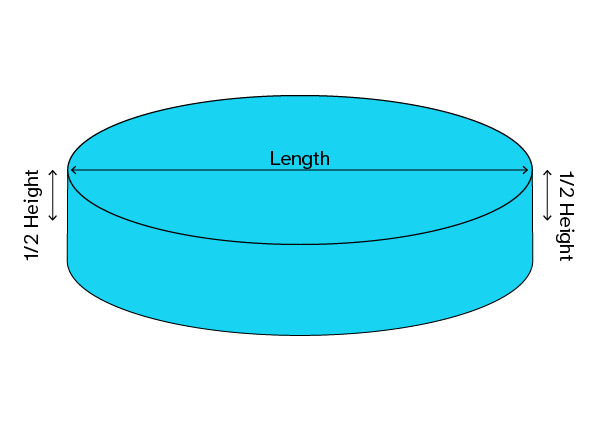
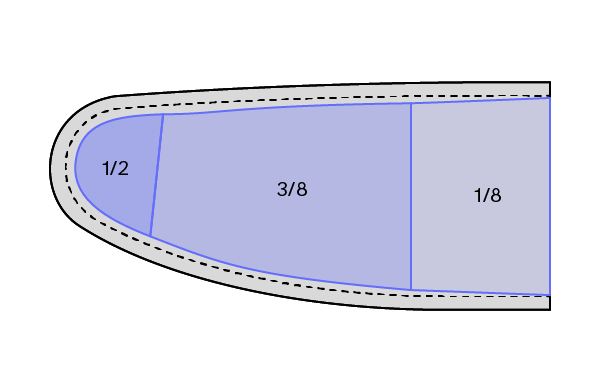
The inner core of the hipbelt is constructed by laminating several layers of foam together. The final foam core ranges from 1/8 inch to 1/2 inch in total thickness.
I ran into two major issues during assembly that you will want to correct on your pattern pieces before cutting into your good fabrics.
Issue #1
The biggest issue is that the included foam pattern pieces do not account for the 3D volume of the foam itself. If you cut the foam exactly as drafted, it will be much too large to fit inside the fabric housing, forcing you to aggressively trim and shave down the foam edges during assembly. I didn’t like having to guess how much foam to trim. I spent way too much time go back a forth between trimming and then trying to shove it into the housing.
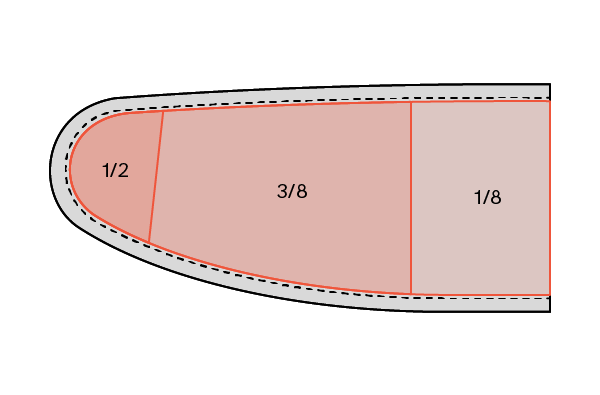
To visualize what I mean by this, look at the illustration above. In grey is the fabric hipbelt housing, the dotted black line represents the stitch line, and in red is the foam core showing its various thicknesses. To fit the foam neatly inside the hipbelt, the pattern must make room for that dimensional thickness.
For example, if the design goal is to have the fabric seam line hit exactly along the middle edge of the foam, the fabric envelope needs enough room to cover the flat surface length plus half of the foam’s thickness on either side.
I have edited the foam pattern pieces in my updated illustrations so there is now the correct clearance between the fabric stitch line and the raw foam edge that precisely accommodates half of that thickness. When you sew the top and bottom fabric pieces together, the seam line will naturally fall right along the center of the foam’s edge.
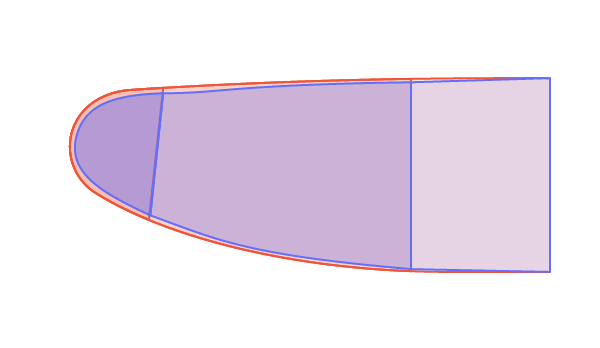
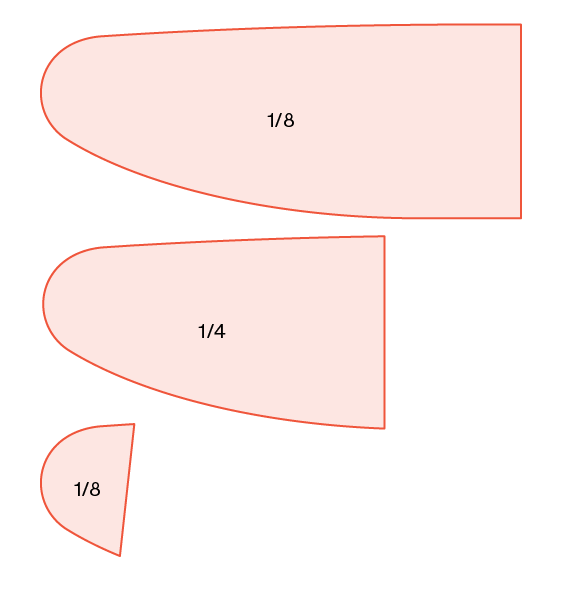
If you compare the original factory foam template to my updated version, you can see that you will spend a lot of time cutting and refining the rounded end if you don’t adjust it first. It’s a pain in the butt to cut the foam once it’s glued together and get a clean, smooth edge. I tried my best and used a sanding block to try and get rid of some of the jaggedness, but it was still rather amateur-looking in the end.
Issue #2

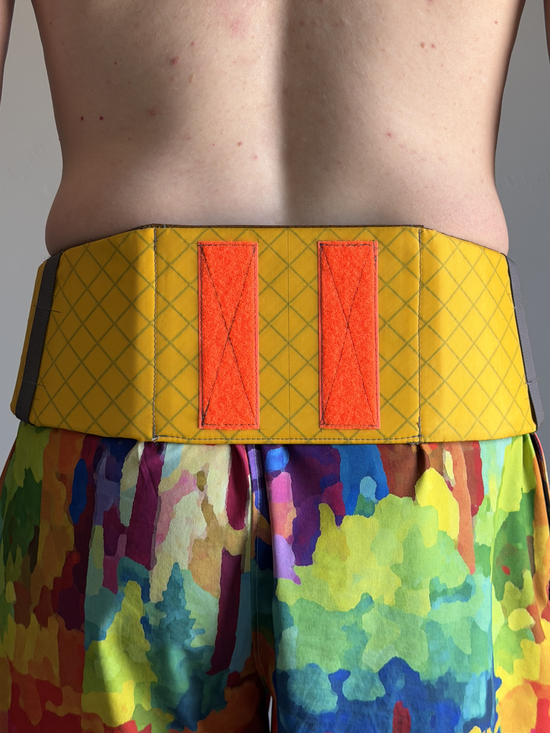
The other issue is that the stitch lines on the webbing don’t make enough room for the velcro later. If you want to add gear pockets to your belt, you must adjust these stitch lines to better fit the 3/4 inch hook-and-loop tape used to mount them.
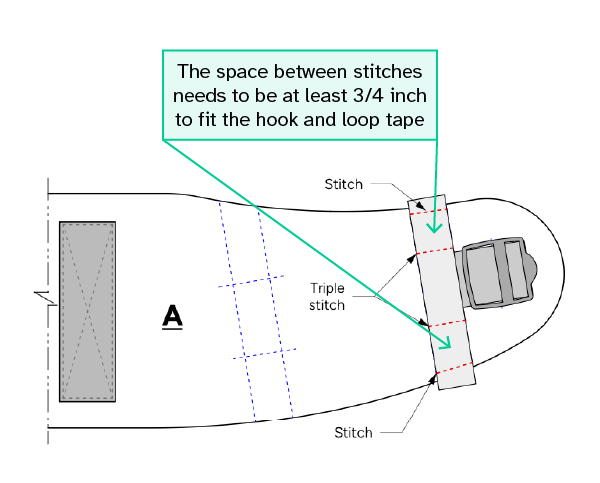
I’ve marked the two problematic areas. You need to consider your seam allowance, plus the thickness of the foam in this area, and then measure 3/4 inches for the triple stitches. Right now the triple stitches are too close to the stitch line and don’t account for the foam thickness.
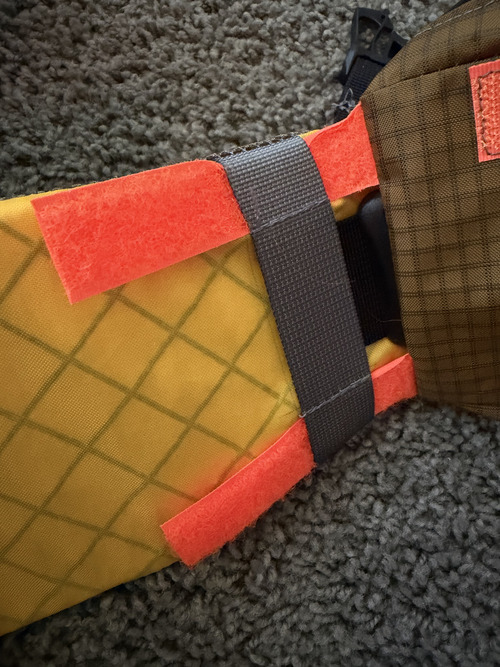
You can see exactly how tight this clearance is on my final completed hipbelt. The top hook-and-loop tape is slightly folded over on itself in order to fit.
Final Hipbelt
For a comprehensive breakdown of the specialty technical fabrics and hardware used in this build, please refer back to my previous materials post.
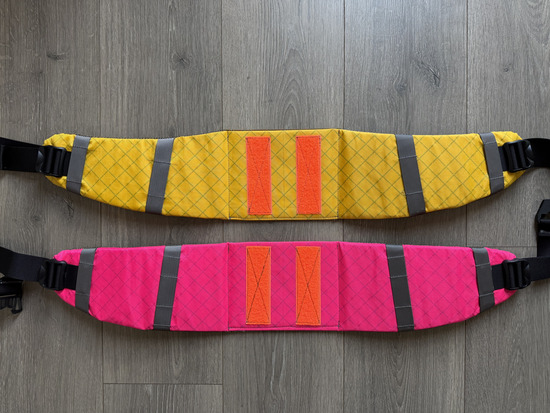
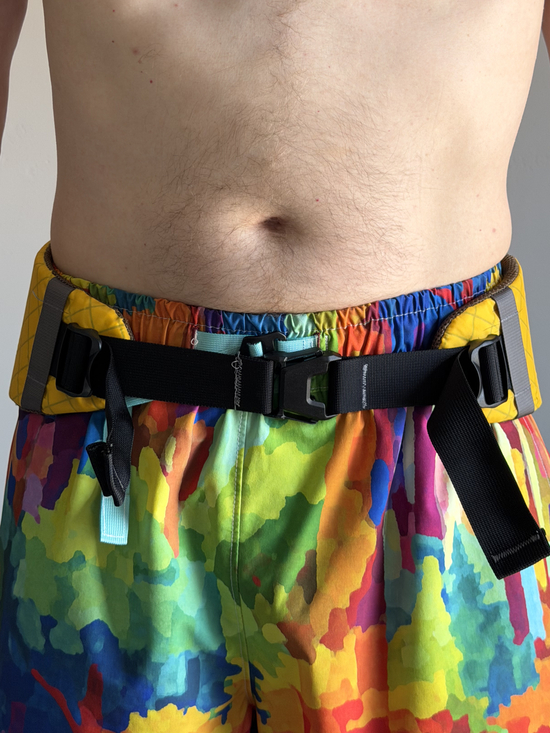
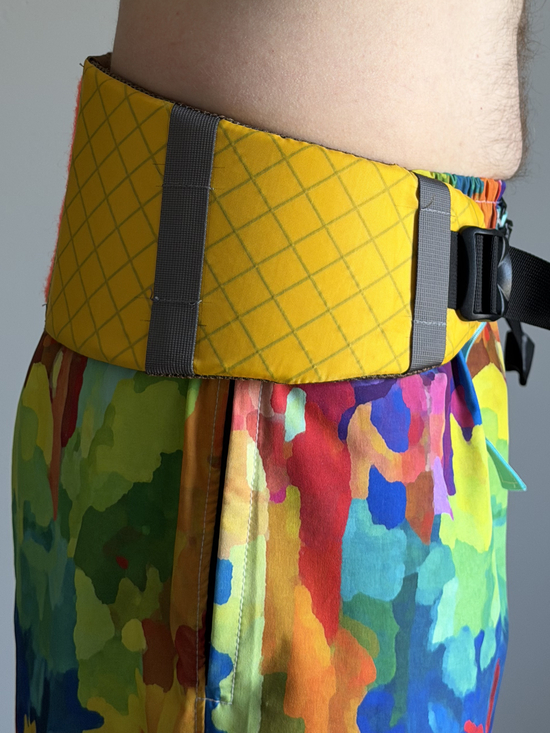
Wide
The color is rad, but the fit is not. I have gapping along center back that’s not great.

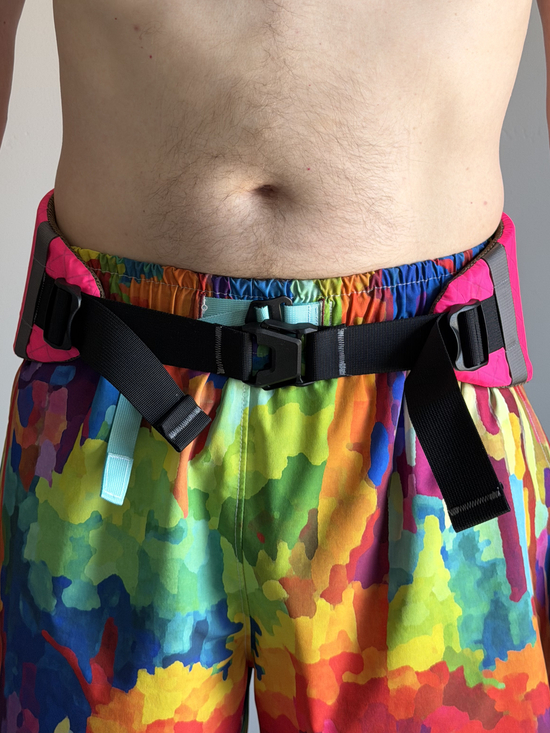
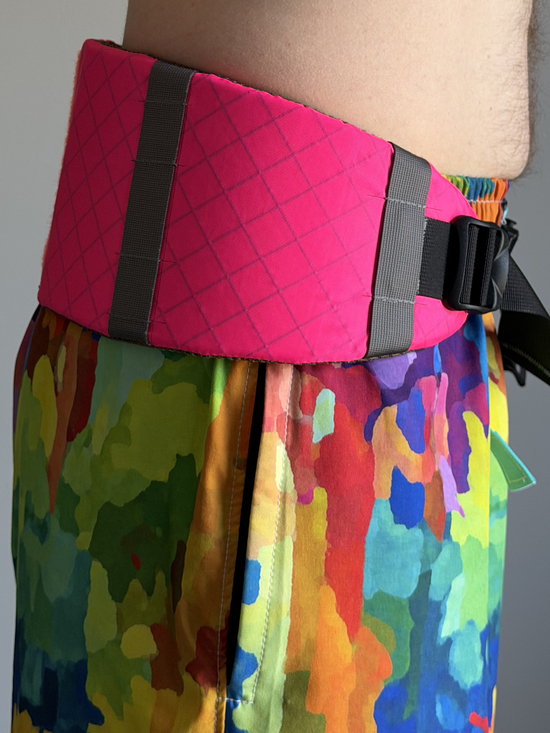
We will have to see how this wide shape performs for Ryan over extended use. For now, Ryan is completely obsessed with the bright pink!
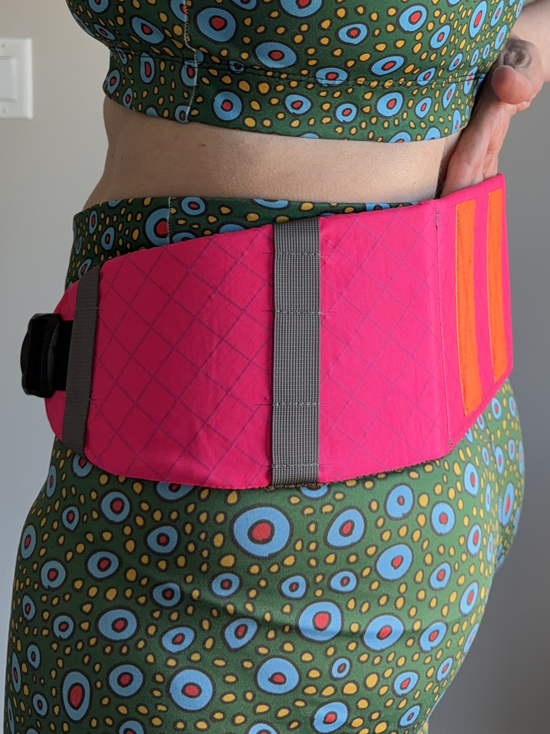
Narrow

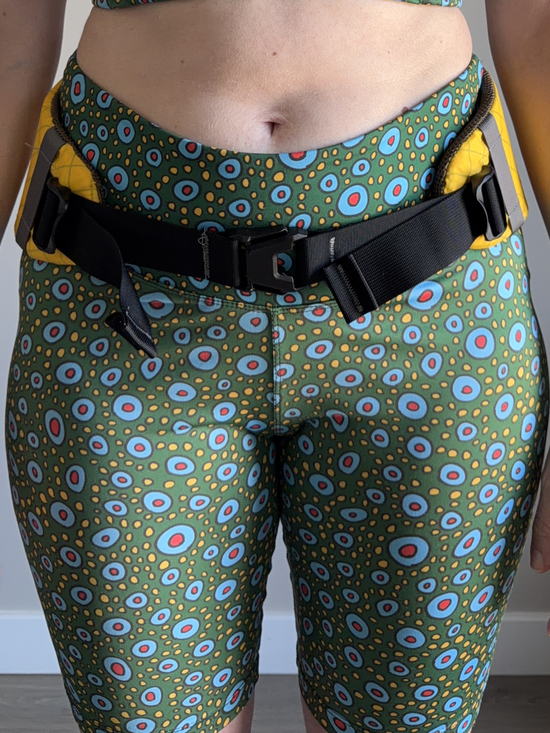
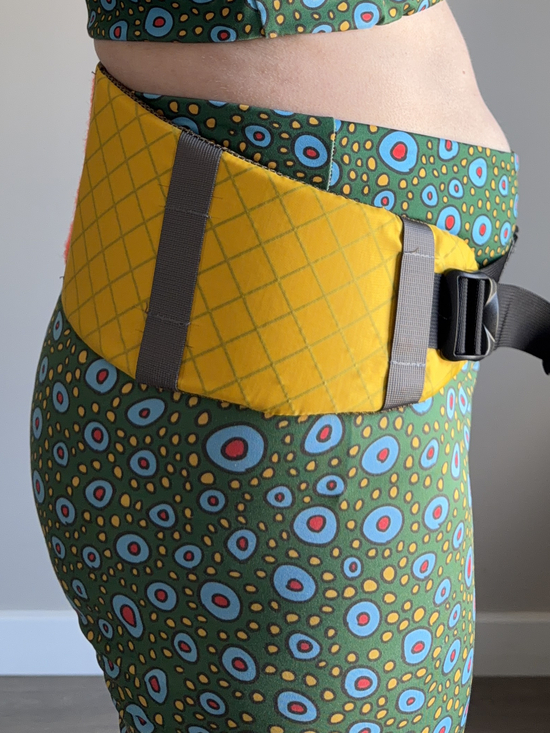
The narrow hipbelt fits me like a glove. There is continuous, flush contact between the padded belt and my torso with zero gaps or pressure points all the way around my circumference.
Honestly, I still think the narrow fits Ryan better too…
Personal Aside
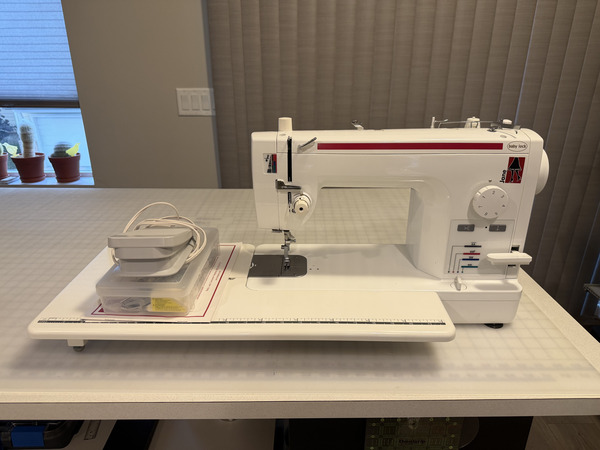
My new sewing machine arrived today. My Baby Lock Jane (circa 2017) has served me well for the past eight and a half years, but it’s starting to show its age. To be honest, ever since I made my first daypacks, it hasn’t sewn the same. I really pushed the edge of its capability with that project, and ever since, the machine goes into a “sensor lock” over almost nothing.
Whenever I try to slowly sew over a thick seam or backstitch over tight stitches, the machine freezes. Mechanically, the needle faces a massive spike in physical resistance, and the machine’s computer instantly detects that the motor is drawing too much electrical current. To prevent a bent needle bar, a stripped internal gear, or a burned-out motor, the sensor abruptly cuts power and sounds an alarm beep. My only workaround lately has been using the handwheel to walk over thick seams, but even then, it refuses to pick up the bobbin thread, leaving me with a trail of skipped stitches. I haven’t been able to sew belt loops on a pair of pants for a long while; for the two pairs of jeans I made for Ryan last fall, I actually had to break out the Sailrite just to finish the belt loops.
The Jane (now rebranded as the Accomplish) retails for $1,800 but can usually be found on sale for around $1,400. I wasn’t interested in buying another domestic machine at that price just to have it wear out in another 8 to 10 years. Averaging 65 to 70 projects a year, I realized it was time to consider an industrial setup.
I wanted a dedicated straight-stitch machine that could effortlessly handle light to medium-weight fabrics (using size 10 to 14 needles), so I went for the biggest, baddest industrial machine that fit the bill: the Juki DDL-9000C-FMS. I managed to score a used one for $1,700 from my local industrial dealer, whom I happen to know incredibly well. I used to buy all my Baby Lock machines from their home sewing store, Daine’s Cotton Shop, before they closed down. Now, they exclusively run their industrial shop, Daine’s Sewing. I absolutely loved the Cotton Shop and was so sad when it closed, but it’s comforting to know I’m in good hands now that I’m stepping up to industrial gear.
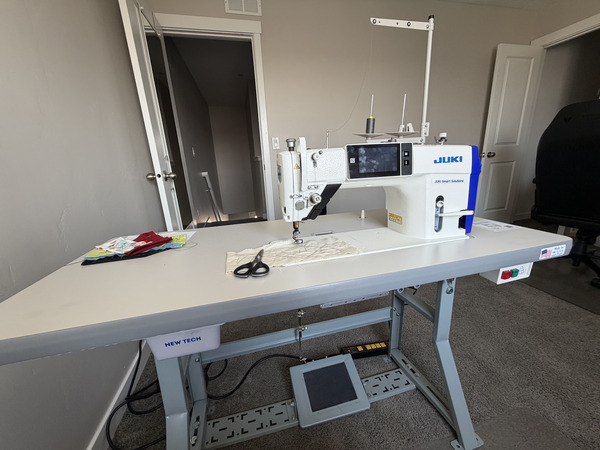
The hardest part of the transition so far is learning how to feather the new fixed pedal. It vividly reminds me of when I was 13 and my older brother took me to an empty stadium parking lot to teach me how to drive a stick shift in his 1989 Camaro. It takes some serious muscle memory, but I’m already getting used to the absolute awesomeness of it.
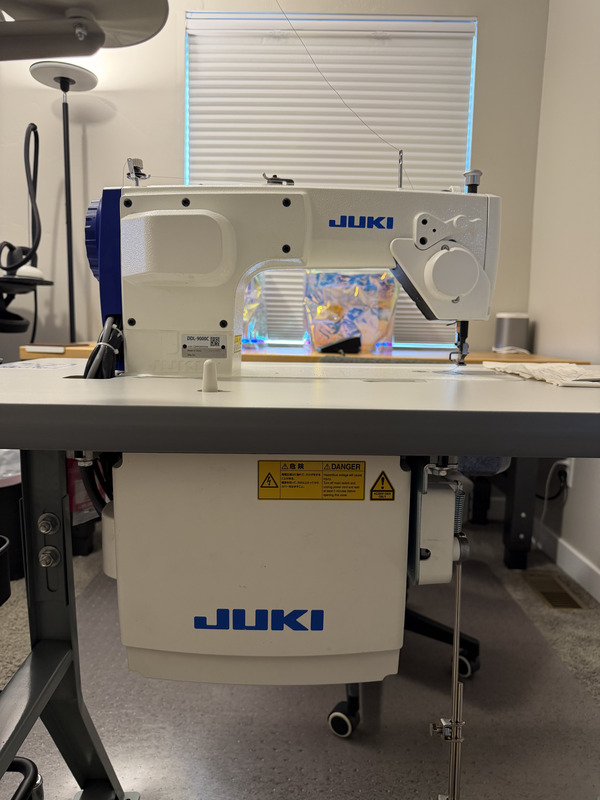
To be clear, this machine doesn’t replace my Sailrite, which I used to make these packs. I bought the Sailrite because it’s a portable heavy-duty machine that can handle massive needles up to a size 22 (whereas the Juki maxes out at a size 16) and can be tucked away when not in use to save space. Because I still predominantly sew garments, the Juki is going to be my daily workhorse. I have a lot of pants and dress shirts planned for Ryan this year, and I finally have a machine that can keep up with the workload!

IF YOU FOUND THIS POST HELPFUL, CONSIDER SUPPORTING MY WORK BY SIGNING UP FOR A PAID SUBSCRIPTION.
POSTS OLDER THAN 3 MONTHS ARE NOW FOR SUBSCRIBERS ONLY — YOUR SUPPORT KEEPS THIS SPACE GOING.
INTERESTED IN SUBSCRIBING TO RECEIVE NEW POSTS IN YOUR INBOX?


Leave a comment