Hiking Daypacks for the Whole Family

This was a massive project for me, but I was determined to complete it this year in time for the summer hiking season. The reason for making our daypacks was to get a better fit on our shoulders and reduce the pack’s weight overall. I was able to accomplish both. The packs are 63-77% lighter than our old packs and have been tailored to fit our shoulder widths and slope.

Weight

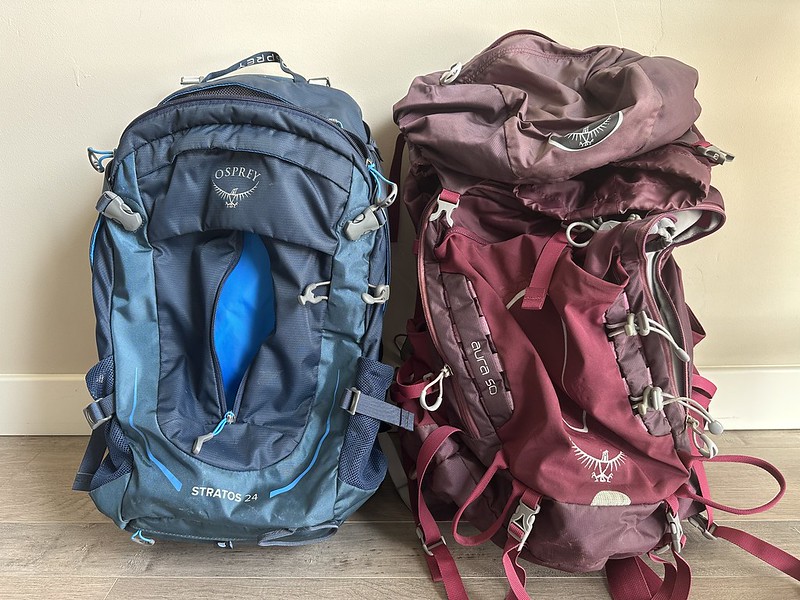
My old pack, the purple/red bag, is the Osprey Aura 50, and it weighs a whopping 4.29 lbs. Last year I tried to downsize my 50L pack to 24L because I didn’t need that much room. I had the 50L pack for the hip belt and adjustable frame. Osprey has started including adjustable frames and padded hip belts in their smaller packs. So I tried the Osprey Stratos 24 pack. The Stratos weighs 2.67 lbs. I wanted the hip belt and adjustable frame to keep the weight off my shoulders because I quickly get headaches from the shoulder strain.

trapezius
levator scapulae

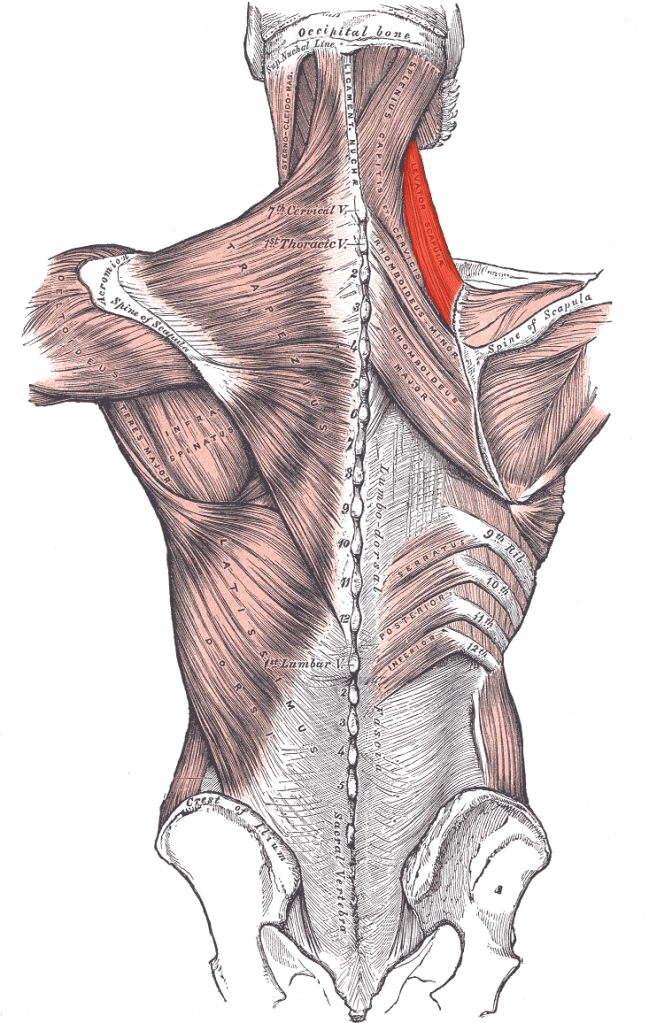
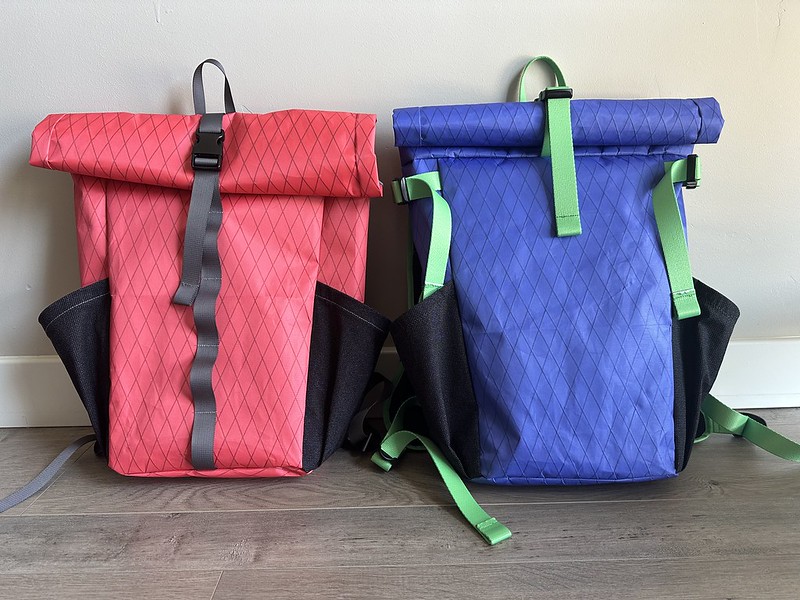
However, I struggled with the Osprey Stratos 24 because the straps were too narrow and dug into my upper trapezius and levator scapulae muscles. I had to give up on the Stratos 24 and wore a hip bag while researching how to make daypacks. I thought that if I could reduce the pack’s weight and get the shoulder width and slope correct, I could wear a bag without suffering headaches. Ultimately, my pack only weighs 1 lb, 63% less than the Stratos 24 and 77% less than the Aura 50!

Shoulder Width and Slope

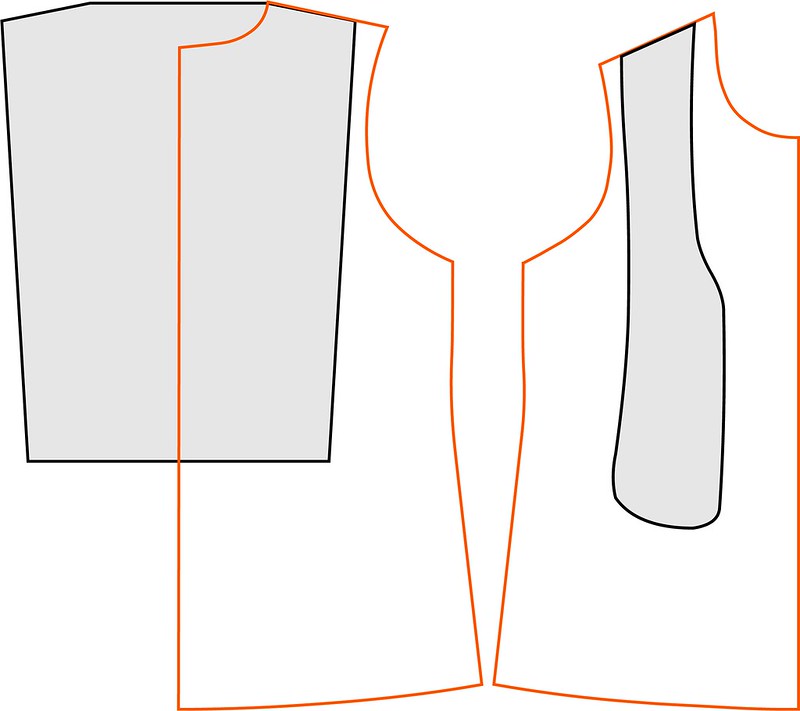
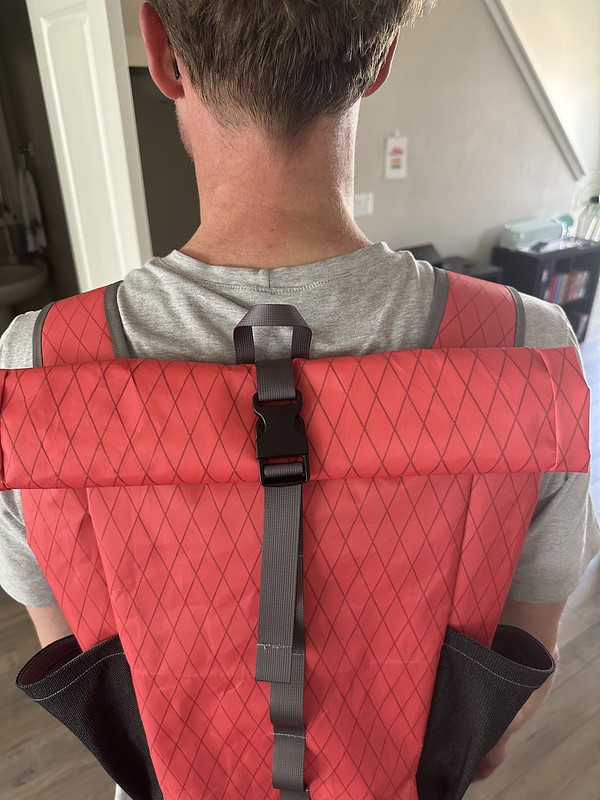
Notice where the slope of the back piece starts compared to the back of my tried-and-true t-shirt pattern? I ensured the backpack shoulder straps didn’t start too close to my neck. I wanted the outside of the strap to hit right at the AC joint, the bony protrusion at the top of the outer shoulder. The straps also are angled precisely to my shoulder angle. The back piece angle matches my back shirt pattern, and the front shoulder strap matches my front shirt pattern. I’ve spent a lot of time perfecting our t-shirt pattern over the years, so I know the shoulder slope is spot on for Ryan and me. Luckily my mom and I have very similar upper body shapes, and she can wear the same tops. So I didn’t have to calculate her shoulder slope.

My old packs would sit approximately here on my shoulders, red line. Notice how close the straps are to my neck. After wearing my bag all day, I would have rub burns on the side of my neck.

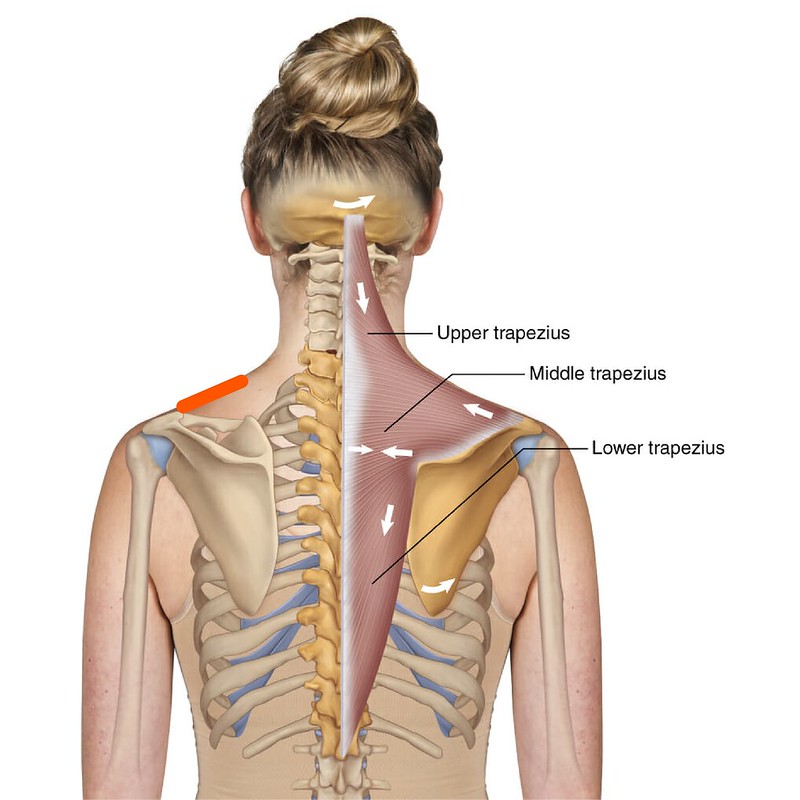
For this project, I moved the straps out and made sure the straps ended right at the end of my shoulders. This moved the straps away from my neck and off the upper trapezius and levator scapulae muscles.

Patterns

Body

The body of our pack is based on the Zipworks 30L pack. The sizing was adjusted subtly for each person. The YouTube video shows how I finished the seams with grosgrain ribbon and how I constructed the pack in general.

Straps

Our straps are based on Learn MYOG Fastpack. The pack features a vest-like strap that I thought would work well for our daypacks. I had to adjust the angle of the straps between each of us, but that was the only change I made.

My Pack

Body

My main fabric was Ripstop by the Roll X-Pac VX15. I used their omnicolor solid print service and printed a yard. The X-Pac VX15 is a laminate fabric that is waterproof and has good abrasion resistance and high tear strength. The fabric was easy to sew and the final pack is beautiful.

Stretch Pockets

I used Ripstop by the Roll Venom UL Stretch Mesh for anything that needed some stretch: side pockets, inside back pocket, and vest pockets.

Shoulder Straps

I used Ripstop by the Roll 3D spacer mesh with 1/4 inch mesh size for the straps. The fabric can also be purchased from Seattle Fabrics.

Zippered Pocket

Finally, any fabric would have worked here. I needed something softer than the X-PAC VX15 fabric for the inside zippered pouch. The X-PAC fabric is stiff, so it makes a nice bag that holds its shape, but it would be terrible for something like a pouch that needs to fold in half and move around objects.

Supply List

Here’s my complete supply list:

The shopping cost was what it cost to purchase items. I was not always able to purchase just the amount I needed, sometimes, I had to buy extra. The bag cost is just the price of supplies used to make the bag.

My Mom’s Pack

Supply List

My mom and I have the exact same pack. The only thing that differed was the supply list. I wasn’t happy with my straps. The webbing from Strapworks is too thick, and I have to use two hands to adjust the tension. I got new webbing from Ripstop By the Roll that is much more similar to straps you’d expect to find on a backpack. I saved money on Mom’s shopping list because I had leftover 210D HDPE gridstop fabric, 1″ Woojin plastic dragon tension locks, 3D spacer mesh, and microtex needles.

Ryan’s Pack

Body

Ryan has wider shoulders, so I widened the back by 1 inch. His back piece is now 14-1/2 inches. I kept the bottom of the back piece the same width, 11-1/2 inches. I also adjusted the angle of the shoulder straps on the back piece and the strap shells.

Stretch Pockets

Because I widened the back piece, I needed to widen the back pocket as well.

Shoulder Straps

Everything is the same for the vest straps except for the angle at the top. Ryan’s pattern matches the pattern from Learn MYOG. For my version, I removed 5/8 inches from the outside corner.

Zippered Pocket

After making my bag, I felt I could widen the inside pocket 1/2 inch.

Supply List

I saved on Ryan’s pack since I used many of the same items from my mom’s pack. On average, the pack costs about $100 in supplies, significantly less than the Stratos 24 price tag of $180 and Aura 50 price tag of $315.

Insides

Zippered Pocket
Key Holder
Back Pocket

I added ABS Plastic to the back pocket inside the bag. I was able to get 3 sheets from Amazon. Learn MYOG has information about how to cut and sand the ABS plastic in his Fastpack tutorial. Having the plastic gives the bag some rigidity and the plastic makes a great chair when you want to sit on the ground and enjoy a snack.

Conclusions

Only time will tell if the pack solves my headache problems. So far, the pack has worked out great and fits well. I’m excited about summer break and the time spent hiking in the mountains.

Leave a Reply

Fill in your details below or click an icon to log in:

WordPress.com Logo

You are commenting using your WordPress.com account. Log Out /  Change )

Facebook photo

You are commenting using your Facebook account. Log Out /  Change )

Connecting to %s

This site uses Akismet to reduce spam. Learn how your comment data is processed.

Website Powered by WordPress.com.

Up ↑

%d bloggers like this: