McCall’s Unisex Bomber Jacket M7637

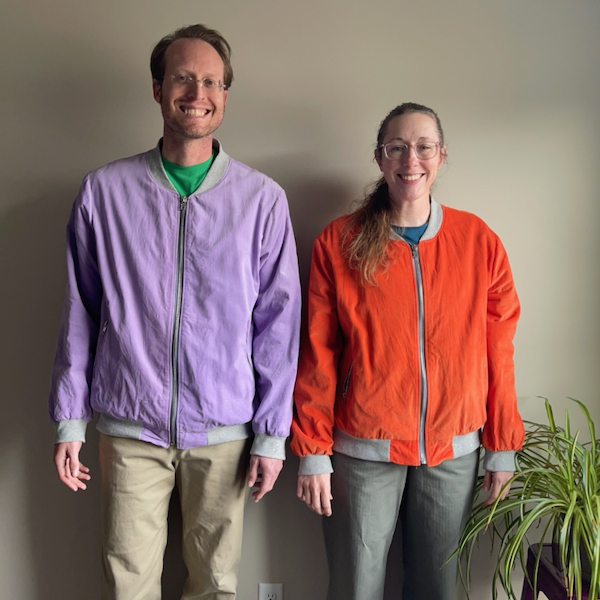
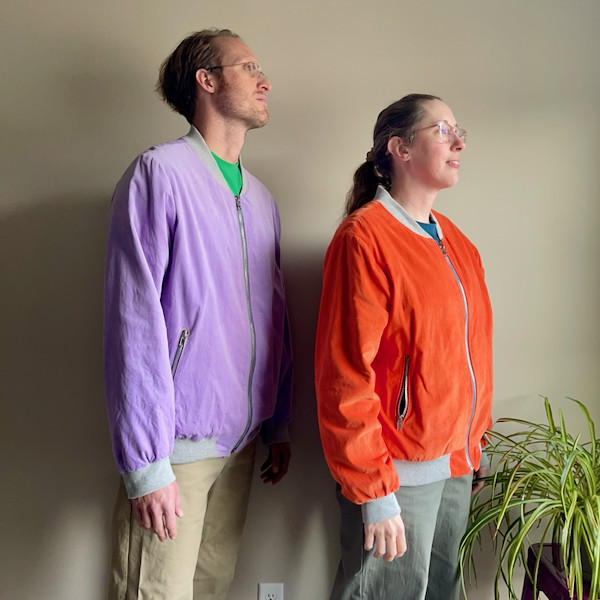
I have definitely been highly influenced by all the wonderful jackets made by Emma. I’ve had this pattern in my library for a while, and I finally got around to making the jacket for Ryan and myself. This will be a great post because I get to feature one pattern and show how it looks on two different bodies! So let’s get into it.

View

McCall’s 7637

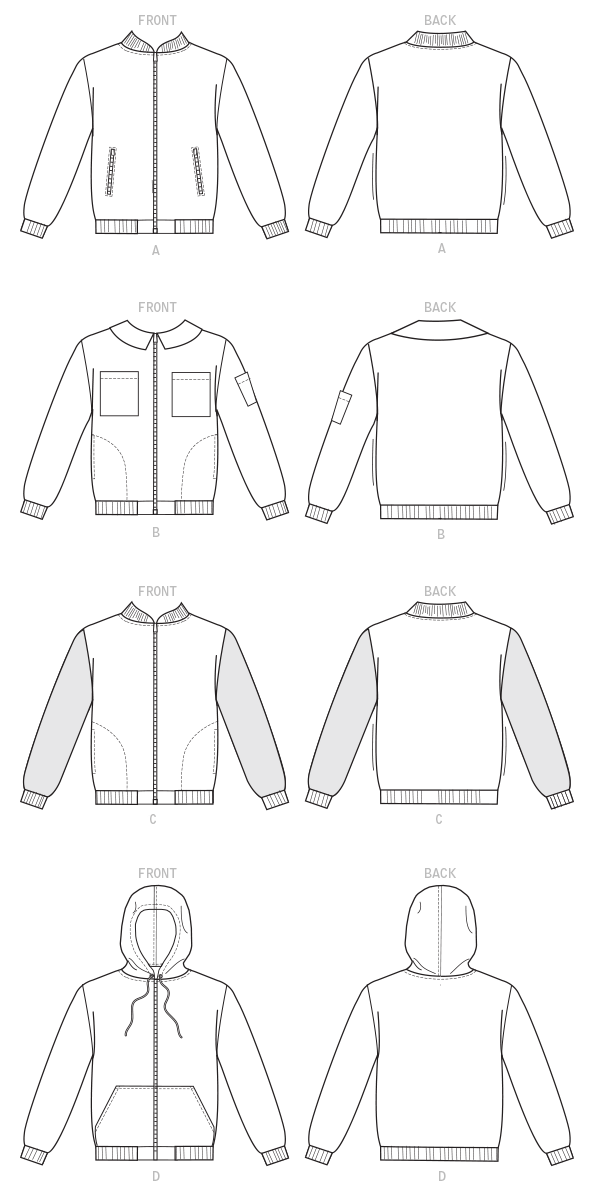
For this post, I ended up making View A for both Ryan and myself.

Sizing

SIZESSMLXLXXLXXXL
Chest34-3638-4042-4446-4850-5254-56
Waist28-3032-3436-3942-4446-4850-52
Hip35-3739-4143-4547-4951-5355-57
Pattern Size Chart in Inches

My measurements are currently: 39″ chest, 32″ waist, and 43.5″ hip. I am 5’11” tall. Ryan’s measurements are at present: 40″ chest, 35″ waist, and 42″ hip. Ryan is 6’5″ tall. I initially started by trying size M for myself and Ryan, but the jacket was too fitted for our purpose. I want to wear sweaters and hoodies under the jacket comfortably, so it needs to be slightly oversized. I wasn’t sure how oversized Ryan needed to go, and I tried size XL, but it was too much. In the end, we both ended up with size L.

Fabric and Notions

For the shell, I choose Featherwale Cotton Corduroy from Mood Designer Fabrics. For the lining, I choose Robert Kaufman Shetland Flannel Speckle. For the cuffs, I got 2×2 rib knit from Mood Designer Fabrics. The rib knit is 400 GSM. The hardest thing to pick out was zippers. I ended up getting custom zippers from Pacific Trimming:

  • 1 x 22 inch #5 metal teeth zipper open seperating (my jacket)
  • 1 x 25 inch #5 metal teeth zipper open seperating (Ryan’s jacket)
  • 4 x 6 inch #5 metal teeth zipper closed end

Construction

I ignored the instructions mostly and instead used the method described on Jalie’s website for sewing the lining and the shell together. With this method, there’s no need to hand-stitch anything.

Front

Ryan’s pattern is in purple. My pattern is in orange. The original pattern is outlined in black.

Alterations for Ryan involved lengthening the body by 3 inches. Did I mention Ryan’s 6’5″ tall?! I needed to adjust the slope of the shoulder. I added ¼-inches at the neckline and removed ¼-inches at the shoulder. I did not need to lengthen the body at all.

Back

Ryan’s pattern is in purple. My pattern is in orange. The original pattern is outlined in black.

Alterations for Ryan involved lengthening the body by 3 inches and moving the shoulder point forward ⅝-inches. I needed to move the shoulder point forward ¾-inches.

Usually, the back shoulder seam is lengthened forward when doing a forward shoulder alteration. Then, the front shoulder seam is shortened downward. However, the slope of the shoulder seam and the distance from the shoulder to the chest level need to be checked. With this pattern, only the back pattern piece needed to be adjusted.

Sleeve

Ryan’s pattern is in purple. My pattern is in orange. The original pattern is outlined in black.

Because I did a forward shoulder alteration, I needed to move the center of the sleeve cap forward. If you want a step-by-step tutorial, check out this blog post. Ryan’s back shoulder point was moved forward ⅝-inches so I needed to move the shoulder cap center forward ⅝-inches. I wasn’t sure what value to use for my adjustment, so I picked the value halfway between ¾-inches (my back piece adjustment) and ½-inches (my front piece adjustment).

And I realize ½-inches for the front piece doesn’t look right because my figure is labeled ¼-inches. Remember to take into account that I raised the neck point ¼-inches. Essentially this means I lengthened the whole shoulder seam ¼-inches and then had to drop the shoulder point, not just ¼-inches but ½-inches. This is all to say, ⅝-inch adjustment to the sleeve cap felt close enough, and so that’s what I used.

Ryan’s sleeve needed to be lengthened 3 inches, and the width of the sleeve bottom was reduced by 1 inch on both sides. There’s a lot of excess volume at the sleeve bottom, making it hard to attach to the ribbing, and removing the extra fabric made it easier to attach the ribbing and made the sleeve less poofy.

My sleeve needed to be lengthened 2 inches. I may be tall, but I have a short torso and long arms. I removed 2 inches on either side of the sleeve bottom.

Cuff

Ryan’s pattern is in purple. My pattern is in orange. The original pattern is outlined in black.

Ryan’s cuff was left at size L even though 1 inch was removed from either side of the sleeve bottom. My cuff went down to a size S since I removed 2 inches from either side of the sleeve bottom.

Other Pattern Pieces

Nothing was altered about the waist ribbing or pockets. However, I did have to lengthen my neck ribbing by ½-inches since I added ¼-inches to the neck point on the left and right shoulder seam.

Final Thoughts

Here’s just a couple of additional notes about things I did to make construction easier:

I’m glad I ended up getting custom-length zippers that perfectly fit the pattern. The recommended notions on the pattern are one 24″ separating zipper and two 7″ zippers for the pockets, but you’ll have to shorten/lengthen the zipper depending on the adjustments. I did not want to try and shorten a metal zipper. It’s a pain to do, and I didn’t want to bother with it.

The other thing to do when making this pattern is to interface/stabilize the fabric around the zippers. I ended up adhering a piece of interfacing along the center front of the shell and lining. I also stabilized the pocket opening on the shell and lining where the zipper was attached.

Finally, I added top-stitching along the zipper and neckline. I wanted to prevent the zipper from catching fabric at any point.

All in all, I really like this pattern. It is a pretty quick sew and not any more technical than sewing pants.

One thought on “McCall’s Unisex Bomber Jacket M7637

Add yours

Leave a Reply

Fill in your details below or click an icon to log in:

WordPress.com Logo

You are commenting using your WordPress.com account. Log Out /  Change )

Facebook photo

You are commenting using your Facebook account. Log Out /  Change )

Connecting to %s

This site uses Akismet to reduce spam. Learn how your comment data is processed.

Website Powered by WordPress.com.

Up ↑

%d bloggers like this: