Hey June Handmade Union St Tee v3.0

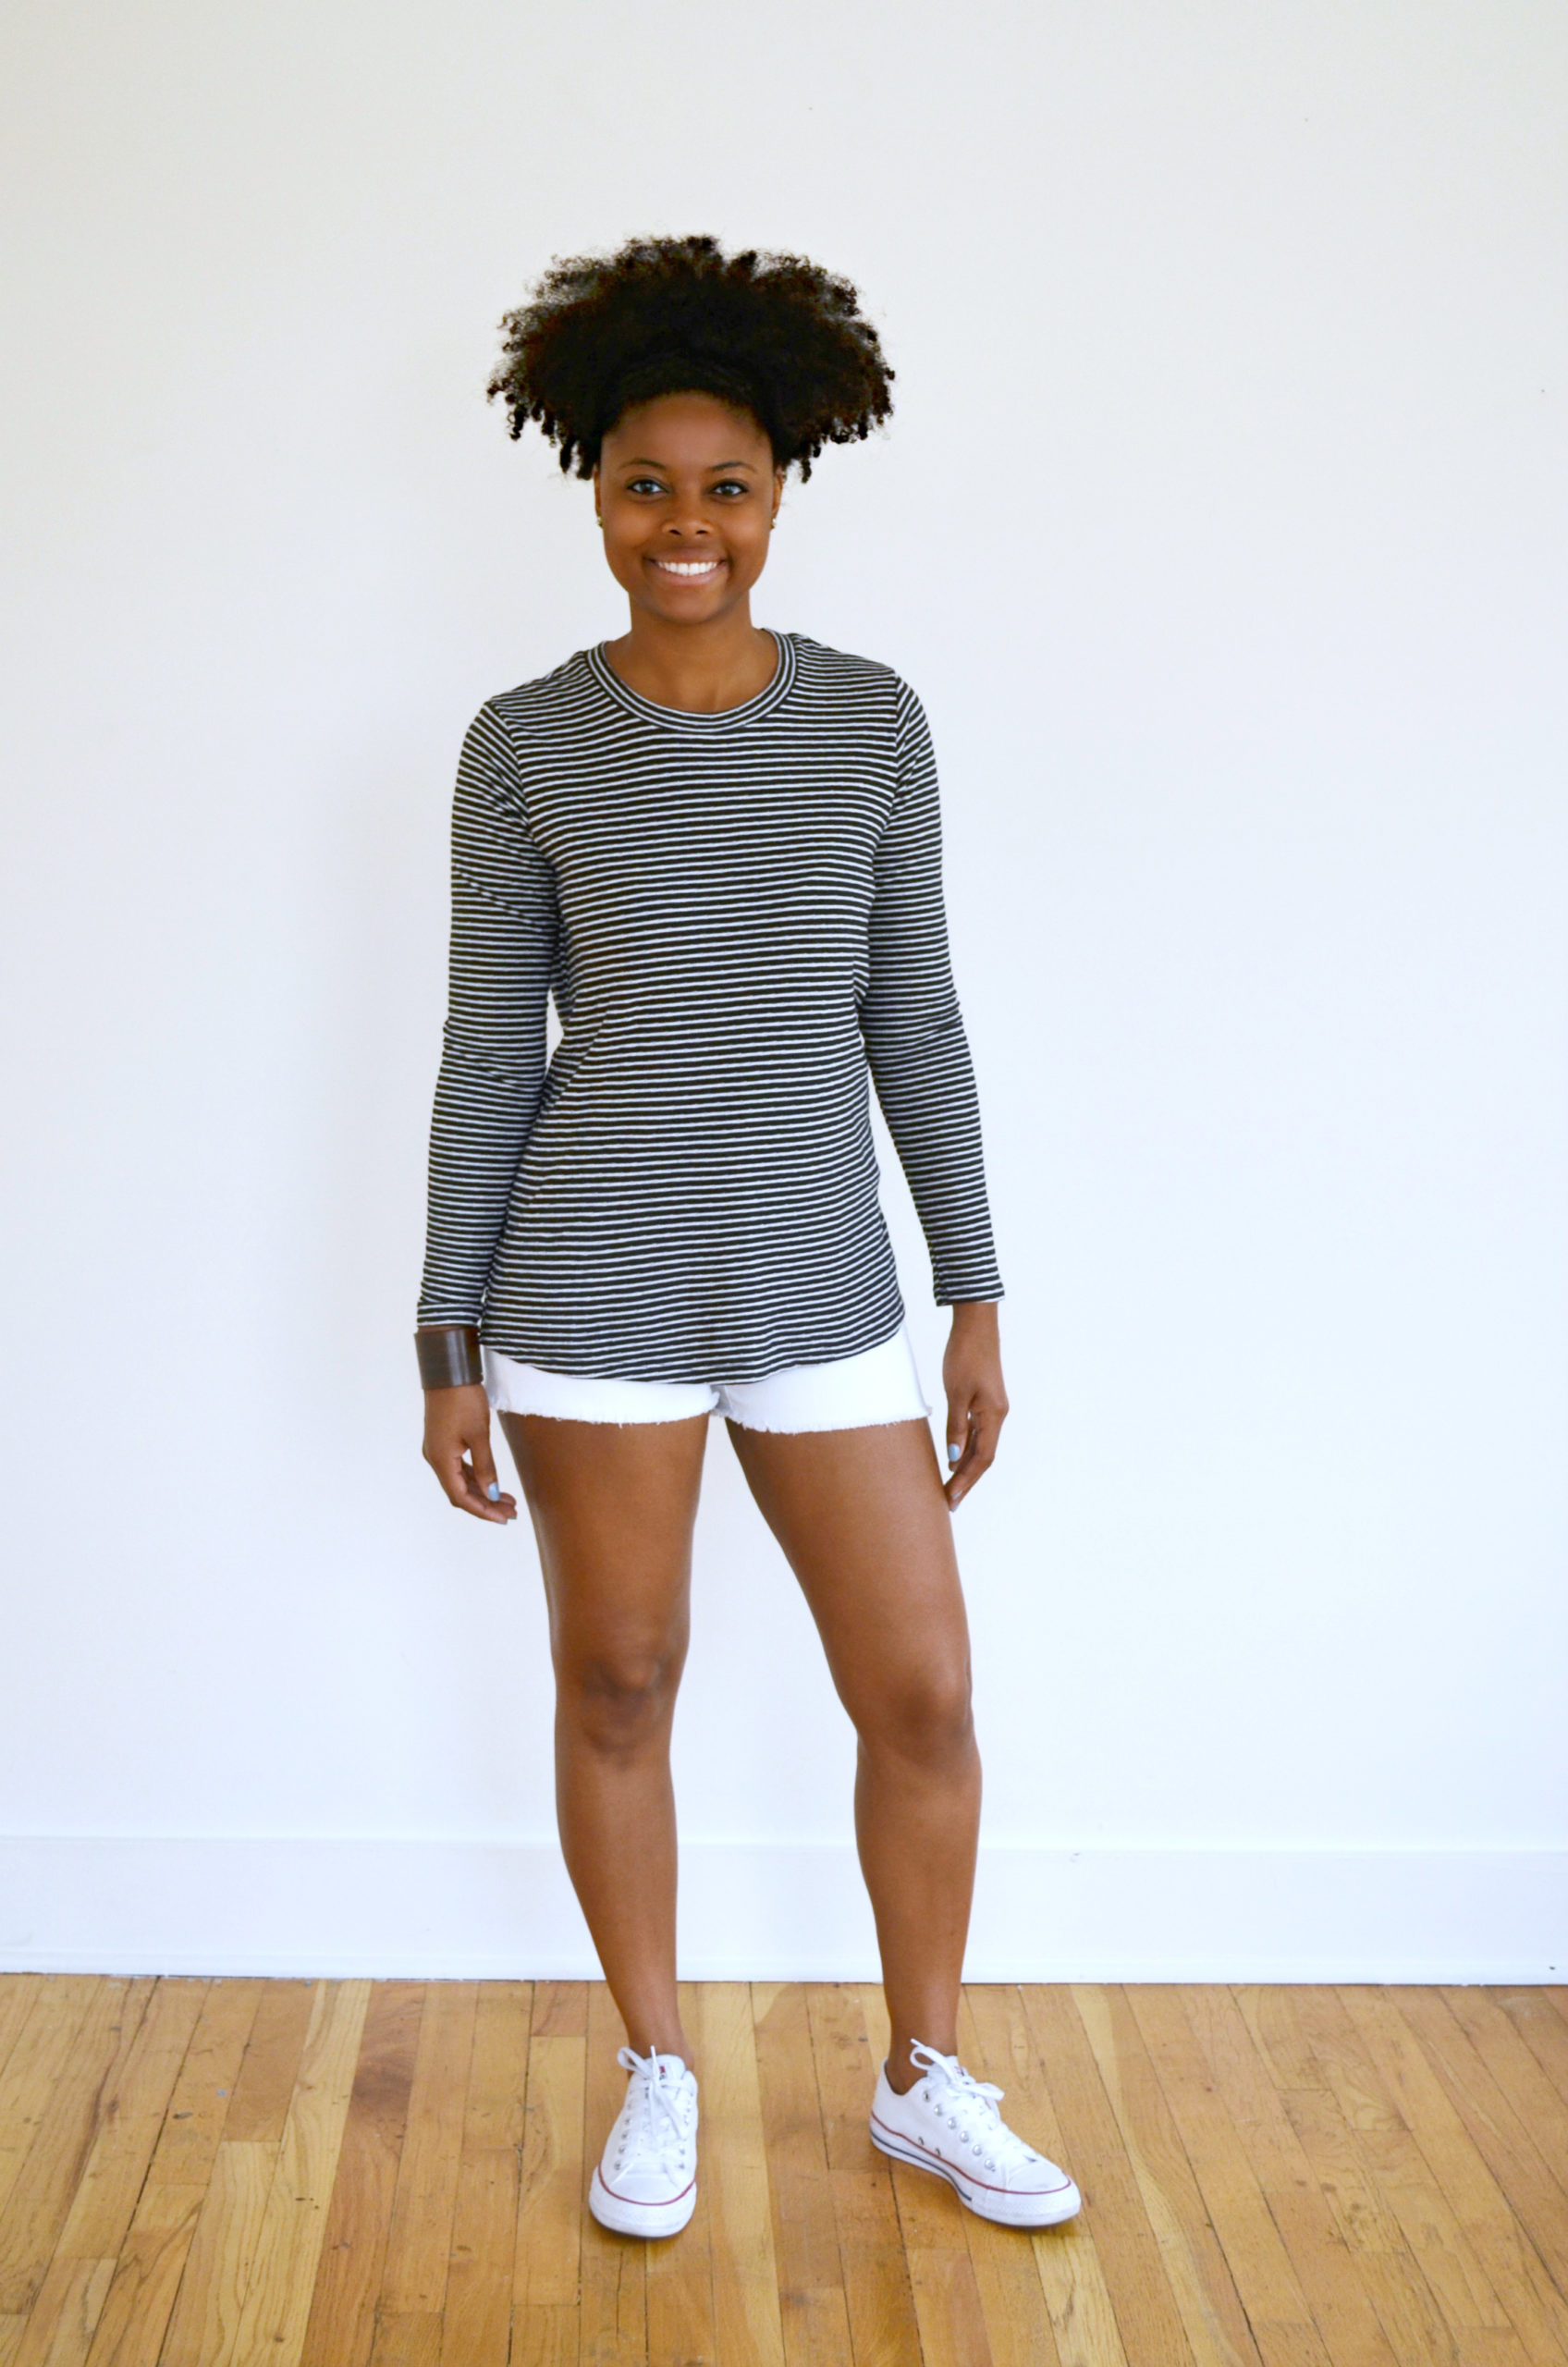
The Union St Tee has been my go-to pattern for a while now. My first post about the Union St Tee was in June 2019. I made a size XL, did my typical 1/2 inch forward shoulder alteration, lowered the front shoulder, and scooped out some of the armscye. One year later, in June 2020, I revisited the pattern. I used the same size XL. This time, I made my 1/2 inch forward shoulder alteration and scooped out the armscye, but I also lowered the armhole 1/2 inch. Because I dropped the armhole, I had to widen the sleeve curve 1/2 inch on either side. Check out my previous posts since these descriptions are super brief.

Because our bodies never stop changing, I’ve noticed that I’m wanting a little more ease in my shirts these days. Took until my 40s, but I’m finally experiencing breast tissue swelling and excessive bloating during my cycle. The last thing I want to wear when my body is swollen is anything fitted. The baggier, the better. I revisited the Union St Tee, knowing I wanted to make a size 1X.

Analyzing Style and Fit

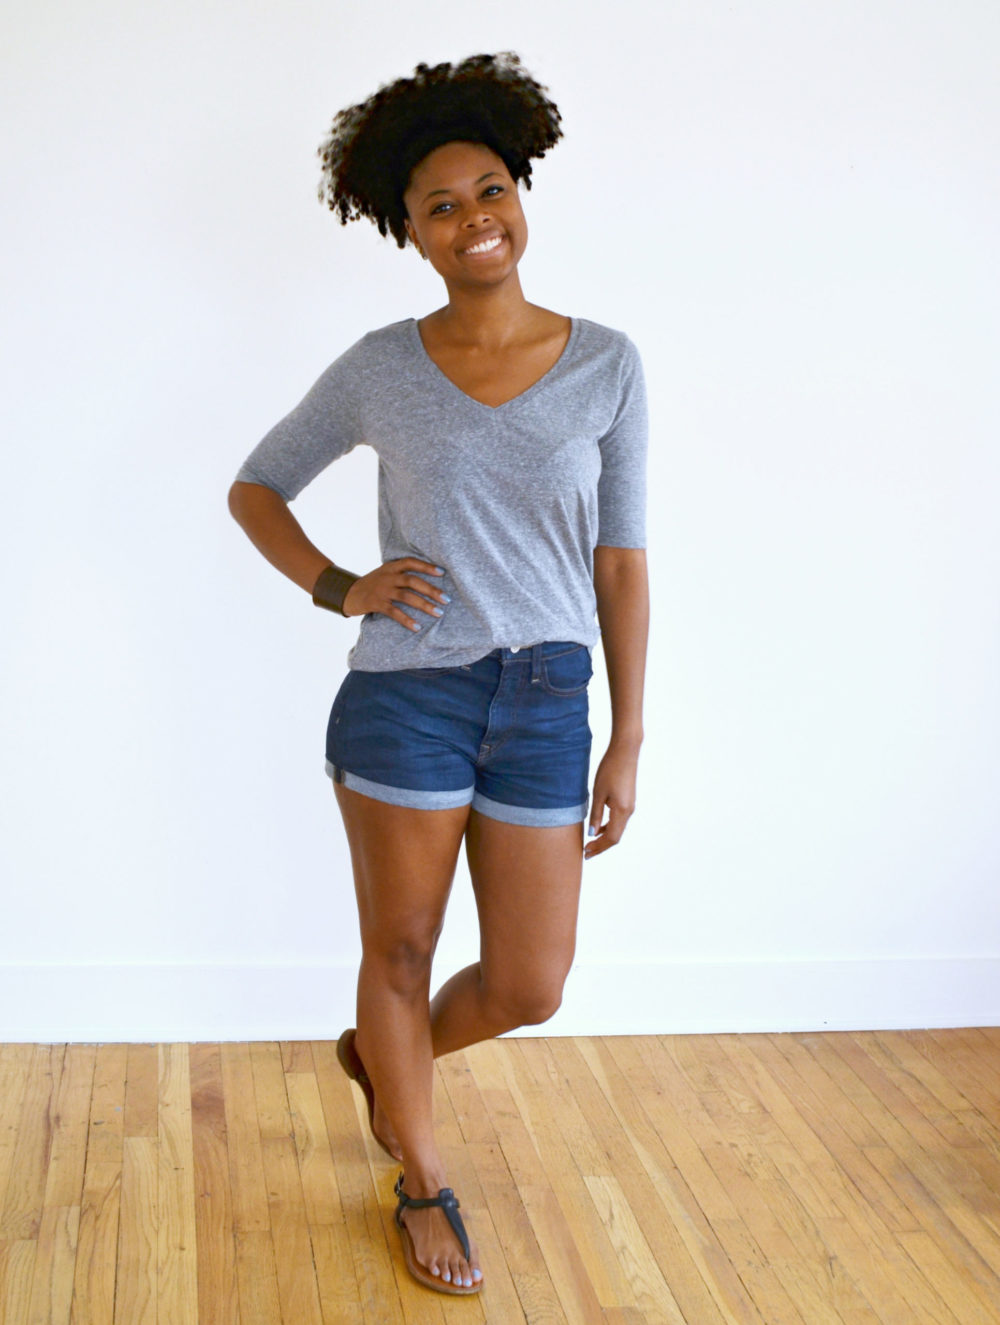
The Union St Tee has three necklines: scoop, crew, and V. The fit of the body is loose but not baggy. The arms are slightly more fitted. The shirt is subtly shaped, with the waist narrower and the hips wider. The bottom hem is curved. I have found the pattern to be a great wardrobe basic.

Crew Neckline

There are no wrinkles or excess fabric around the armhole above the chest level. The shirt skims across the body from the shoulder past the chest.

Scoop Neckline

I also love the scoop neckline.

V Neckline

For the V-neck, I’m not sure if it is the pattern or how the model is standing, but it looks like there’s some fabric pooling around the armhole. The V-neck is really deep and wide, and this may be changing the way that the shirt is balanced on the body and drapes? More on this later.

Materials

The fabric I make nearly all shirts from is the cotton spandex jersey from Pico Textiles. It’s inexpensive, high-quality, and super reliable.

Sizing

The Union St tee comes with two different bust versions. If your bust measurement is more than 3 inches bigger than your high bust measurement, you have the option to use the full bust adjustment piece.

XXSXSSMLXL1X2X3X
High Bust293133.535.53840.5434547
Bust323436384042444648

My current measurements are high bust 42 and bust 40. My body is the opposite of “normal,” where my high bust measurement is bigger than my full bust measurement. I know I don’t need the FBA alteration. Additionally, I already knew I wanted to make a size 1X, which makes sense based on my high bust measurement. I’m between sizes XL and 1X.

Pattern Alterations

When it comes to t-shirt fit, I prefer to have no bunching or wrinkles around the armhole. I found some examples on the internet to show what I mean:

Those wrinkles and fabric bunching are a combination of two factors: the front shoulder may be too long and/or the across chest width may be too wide.

Ways to fix excess fabric around armhole

For me, this is how the Union St Tee fits without any alterations. To remove the fabric pooling around the armhole, I need to scoop out a bit of the armhole to make the across-chest width less wide.

Front

Red = remove fabric; Green = add fabric
  • Lowered the front outer shoulder 1/2 inches
  • Lowered the front armhole 1 inch
  • Narrowed across the front chest 7/8 inches
  • Removed 3 inches from hem (not shown)

Back

Red = remove fabric; Green = add fabric
  • Raised the back shoulder point 1/2 inches
  • Lowered the back armhole 1 inch
  • Narrowed across the back chest 1/2 inches
  • Removed 3 inches from hem (not shown)

Sleeve

Red = remove fabric; Green = add fabric
  • Widen both sides of the sleeve 1 inch, because I lowered the front and back armhole 1 inch

Final Fit

Digital Avatar Fit

I also tried this pattern on VStitcher. The avatar measures a 46.5-inch bust and a 49.5-inch hip. The avatar is wearing a size 3X. The fabric is a medium-weight cotton jersey knit with a 30% 4-way stretch. I found it extremely interesting that the avatar has the same fit issues as my V-neck, where the center front of the shirt wants to swing outward.

Conclusions

Part of documenting my work online is having a place to look when I revisit patterns. I was so thankful to have my previous blog posts so I knew how I needed to alter the larger size. It made this process so much easier.

I don’t love the V neckline. The olive green shirt above. I think the neck is too deep and too wide and, therefore, lacks stability. The shirt wants to drape differently. From the side view above, the shirt wants to fall back, and the center front swings outward in an odd way. Notice how the shoulder seam is further back on the green versus brown shirt. If it did a V neckline again, I would want to base it off of the crew neckline so the V neckline was higher up and less wide.

I don’t mind the scoop neckline. The mustard yellow shirt above. It’s OK.

The crew neckline is by far my favorite fit. The brown shirt above. It sits nicely on my shoulders and is balanced from front to back, meaning the shirt doesn’t try to slide backward or forward on my shoulders. There’s plenty of ease but no ridiculous bunching of fabric around the armhole.

Finally, I did remove 3 inches from the hemline. I don’t mind the longer shirt. I wanted the shirt to hit past the waistband this time.

6 thoughts on “Hey June Handmade Union St Tee v3.0

  1. Thanks for the helpful sewing details – your Tees look great on you!

    Also appreciate the fabric suggestion. The website notes that these knits are medium weight, which is what I am usually looking for.
    Chris

    Liked by 1 person

  2. In my experience, another cause of armhole bunching can be because the width at the bust-line isn’t enough, therefore the shirt is unable to fall down and bunches up into wrinkles around the armhole. Similar situation to generous calves causing bunching at the knees in pants.

    Liked by 1 person

Comments are closed.

Website Powered by WordPress.com.

Up ↑