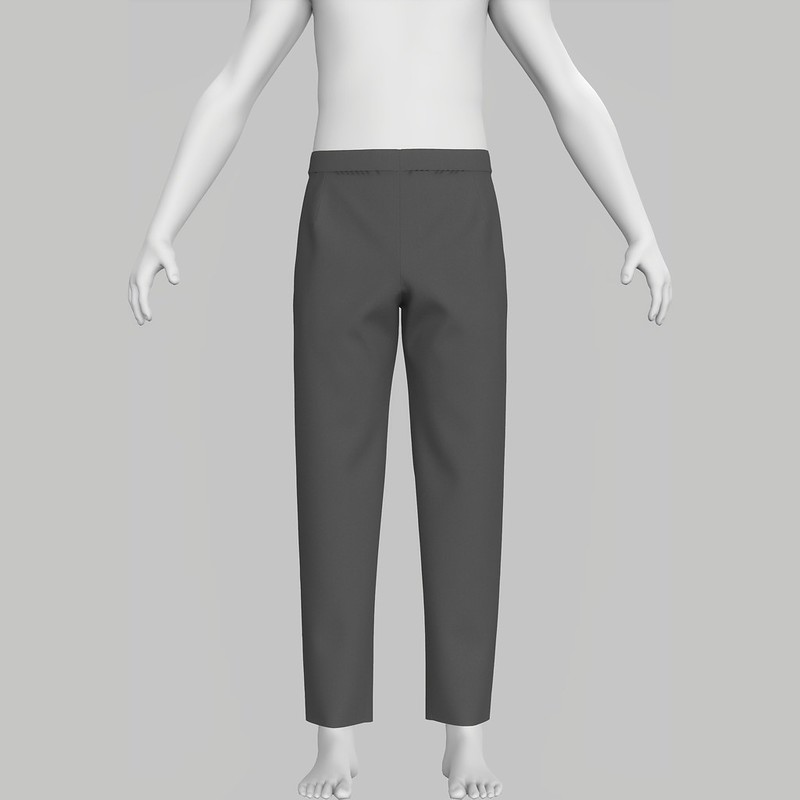
I have used a self-drafted trousers pattern for Ryan for some time because I’ve never found a pattern that does him justice. Ryan is 6 feet 5 inches. His inseam is 37 inches. He currently has a 32-inch natural waist and 42-inch hips. He’s like a piece of paper, broad from the front and back and barely visible from the side. I could never get pants to fit his hips and waist simultaneously. The answer came when I stumbled upon a website that shows all the trousers ever worn by anyone playing James Bond have front darts! Front darts are a miracle.

Accessing the Pattern
I’ve made Ryan’s trousers pattern available as a download.
Click the colorful button above, and a new tab should open with the Gumroad link. I’ve only included the basics: front, back, and waistband. The pattern does NOT include seam allowances.
Dart Components
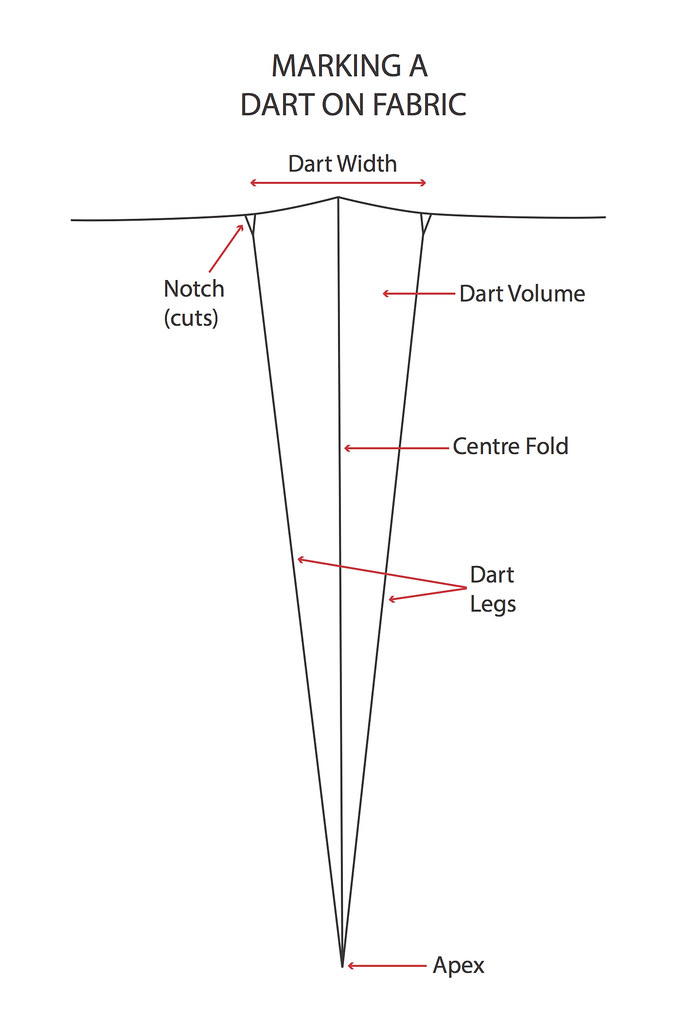
Darts have four (4) important components: two (2) dart legs, a dart fold line (center line), and a vanishing point, also known as the apex. Darts not only remove excess fabric but help shape the garment around curves. The dart added to the front of Ryan’s trousers is big. The dart legs are ~4 inches long, and the dart width is ~1.25 inches wide. That means with two darts (one on each side), I am removing 2.5 inches from the overall waist circumference.
I have tried to remove the 2.5 inches from either the side seam, the center front, or both. Removing the excess fabric from these areas doesn’t work, and instead of getting esoteric as to why I’ll just show you examples in the next section.
Before I found that I could use a dart in the front, I just left Ryan with a waistband that was too big. He hid the excess 2.5 inches under a belt. The belt was needed to hold the pants up. It wasn’t a great look, but it was better than wearing too-tight trousers.
Why a dart is needed!
In the following images, I will show what happens if I remove 1.25 inches from the side seam (left), insert a 1.25 wide dart (middle), or remove 1.25 inches from the center front (right).
Front View

The top row consists of the 3D-rendered trousers, and the bottom row consists of the pressure measurement of the trousers against the body. When the side seam is taken in, extreme draglines form from the side waist diagonal towards the center front. This is a very common look (see below). In the pressure map, you can see the increased pressure all along the side seam and the hip (purple oval). When waistbands are too big, you typically take in the side seam, not the center front or back. However, I wanted to see what would happen if I did take in the center front. Draglines form at the center front and fan outward. The other thing that happens is that the waistband at the center front drops. I made Ryan pants like this once, and his front waistband was CONSTANTLY falling below his belt. It was really annoying and didn’t look great. Again, pressure is increased along the side seam even though the excess circumference was removed from the center front.

Side View
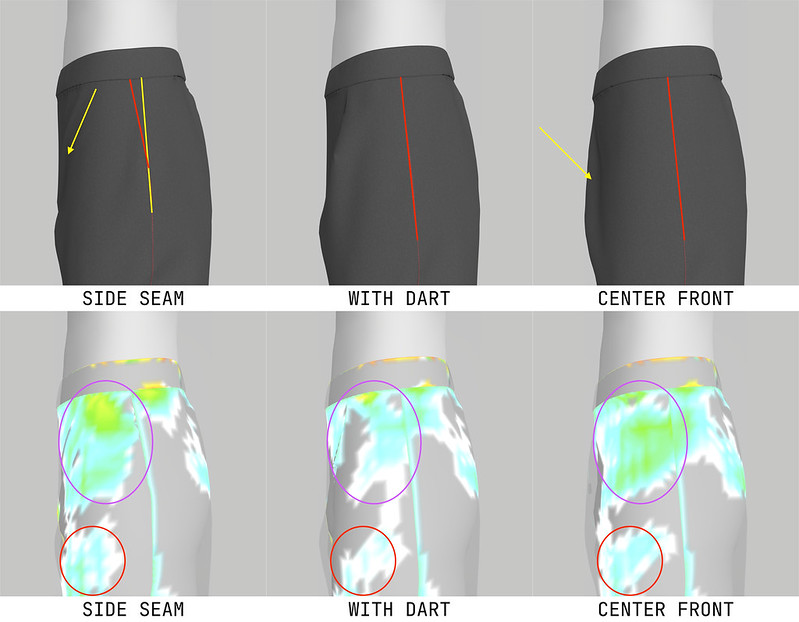
It becomes apparent that taking in the side seam doesn’t work because the seam line is dramatically pulled forward and no longer in line with the side body. When you remove the excess from the center front, it does some weird nonsense. I’m pointing to fabric puffing outward. The pressure maps show increased fabric pressure all along the side waist (purple oval) and side hip (red oval) for both alternatives compared to the trousers with a dart.
Back View
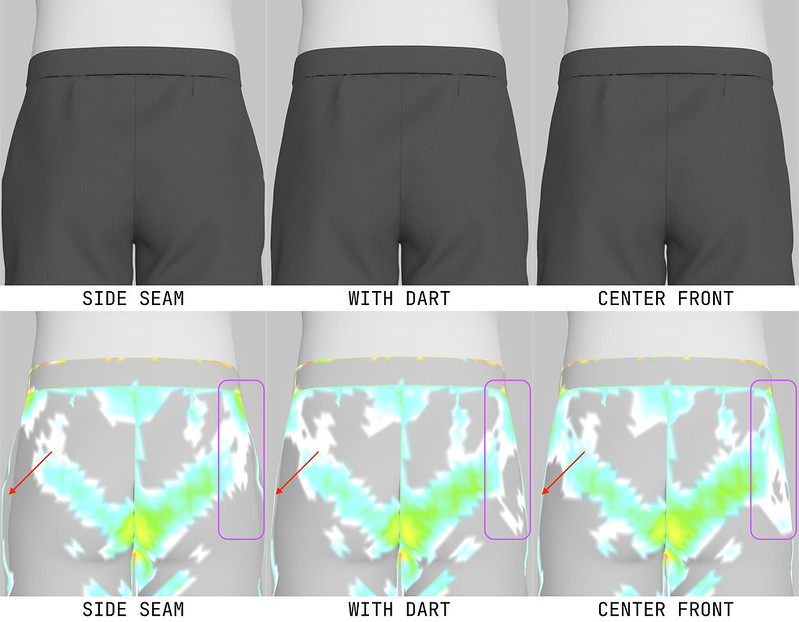
If you remove the excess fabric from the front side seam, counterintuitively, the back piece billows along the lower hips (red arrow). I’ve gone through this cycle of removing excess from the front side seam at the waistline and then removing excess from the back lower side seam, and it just makes the pants tighter and tighter until they are unwearable. It’s a vicious cycle. Removing excess fabric from the center front has the opposite effect. It makes the trousers tighter around the lower hips on the back (purple box). Again, I’ve gone through the cycle of taking in the center front at the waistline and then letting out the fabric at the back lower side seam.
Solutions
A front dart dawned on me because I spent some time fitting a waistband on Ryan at his preferred location and circumference. I then pinned the center front and the side seams to that waistband. I’ve confirmed enough times that the side seam and center front don’t need to be pulled in tighter. And then I sat there pondering how to get the waistline of his trousers to fit the tighter waistband he preferred. With just the center front and the side seam pinned, it was obvious the front waistline was too long for the front waistband section. The only way to make it happen that I knew about was a dart.

But I found out later that darts aren’t the only solution. Trousers have traditionally come with side tabs, and bespoke designers and tailors still offer side adjusters over belt loops. The dart is now “hidden” in the construction of the pocket and side adjuster. Brilliant!
Has anyone ever seen a trouser pattern with side adjusters?
Conclusions
If I distribute the 1.25 inches to the side seam and the center front (taking 0.625 inches from both), I get the same fit issues as before, just not as extreme. Darts or fancy side adjusters are the way to go if you are not using an elastic waistband. If you remember my description of the purpose of a dart, to remove excess fabric and to provide shaping around curves, the center front and side seam are also darts. They help shape the pants around our hips and crotch. You can’t distribute the excess fabric there because those darts are already functioning as they should. By trying to increase the dart width on the center front or side seam, the shape of the pants is grossly distorted. Side thought, I’m guessing this is why elastic waistband jogger trousers became so trendy for men.
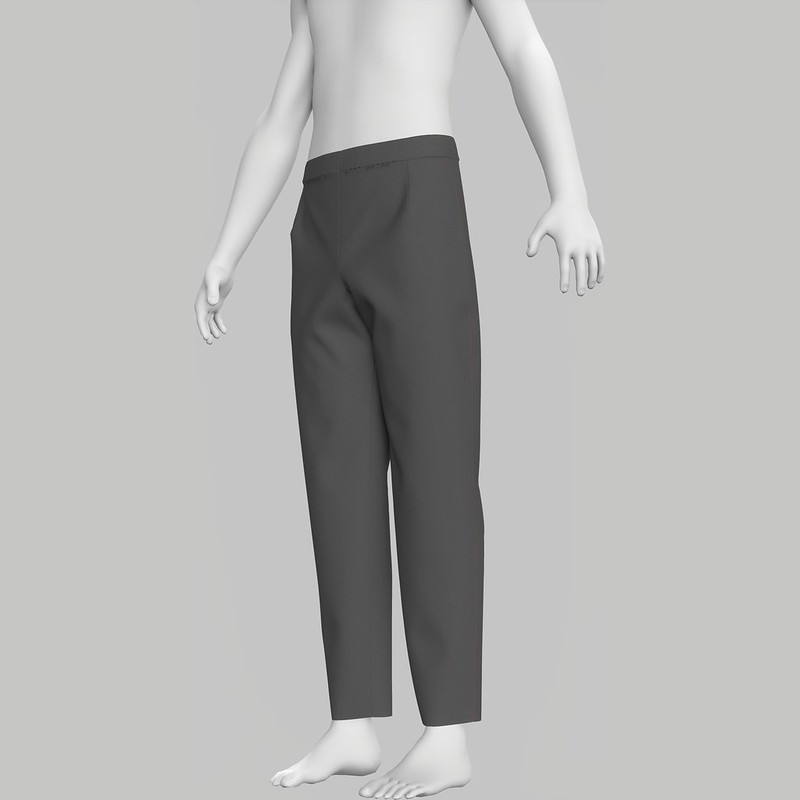
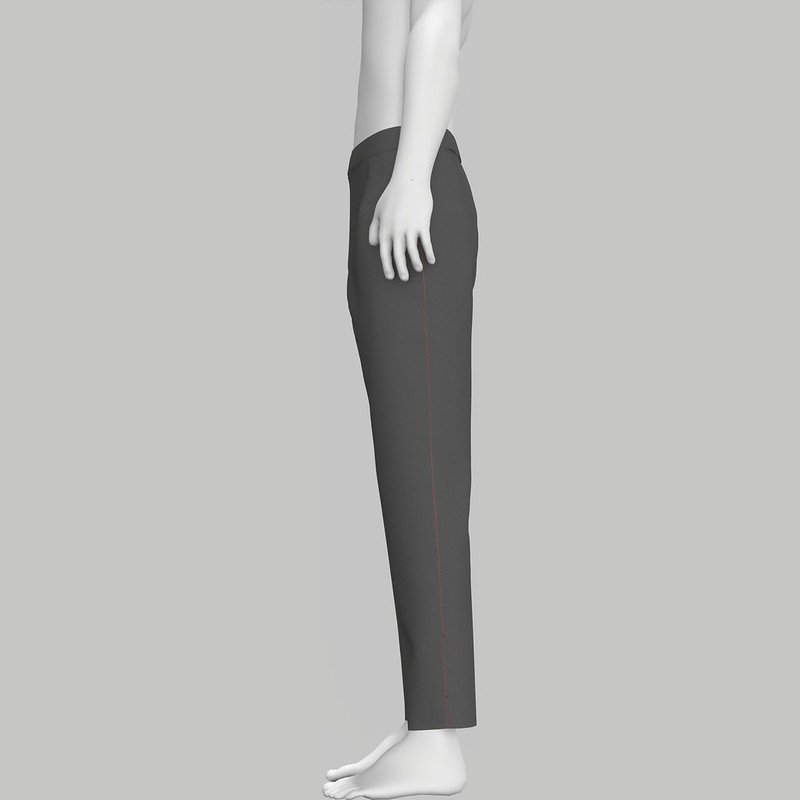
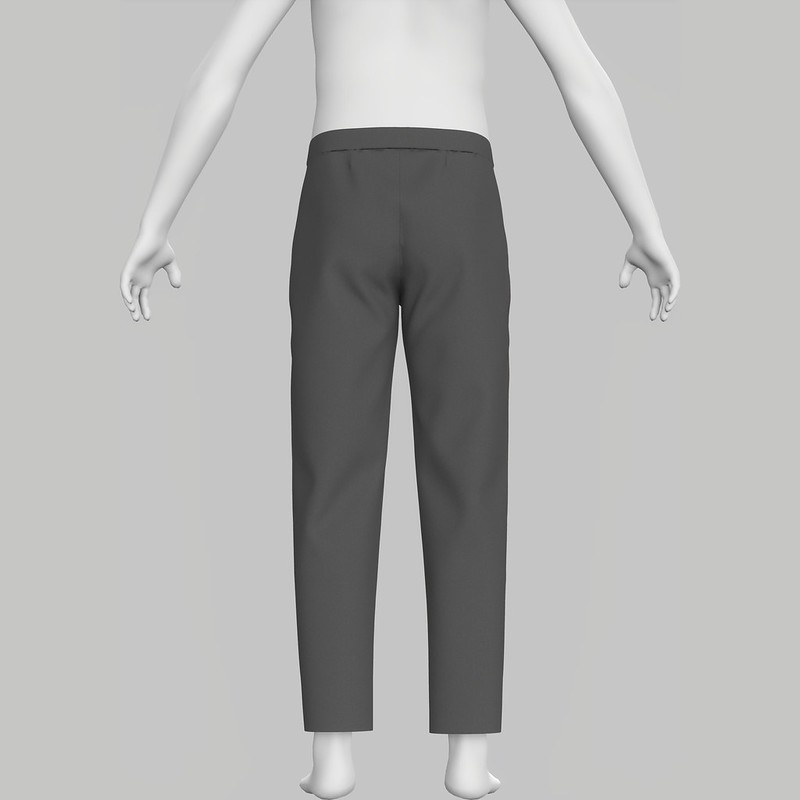
Here are the other rendered views of Ryan’s trousers. The avatar is not a perfect replica, but it shows the fit of the final self-drafted pattern pretty well.



Hi! I stumbled upon your blog last night as I falling down the rabbit hole of pants fitting research. I am very intrigued by your use of Browzwear—would you consider posting your review of it for your home sewing? I didn’t know it was available for individuals, and more I really want it!
LikeLiked by 1 person
I’m still waiting to hear back from the company to see if my license through the Indie Program is limited. I would love to continue to use Browzwear, but it may not be possible. An alternative is Clo3D, though a monthly license is expensive. I have found the 3D program helpful in studying patterns on various body types and whether my alterations are enough to get a good fit. Some patterns are drafted so poorly that they aren’t worth the effort. I wouldn’t say the program is home user-friendly because it requires a substantial computer (processor with 12 cores or more and 32GB RAM) and quite a bit of computer knowledge. I work as a neuroimaging researcher, and my job consists of generating and using computer code (MATLAB, python, bash, UNIX, R, etc.) I’m comfortable navigating complex programs and 3D software (MATLAB, Blender, VTK, etc.). I found the Browzwear University helpful, but I suspect it would be much more work for someone less comfortable. However, if you are obsessed with designing capsule wardrobes and testing out looks, these programs are absolutely worth learning. I think Browzwear or Clo3D could help visualize the garment, materials, and notions for a big project. Thanks for your interest in Browzwear, and let us hope I can continue to use the program and post blogs about my experiences.
LikeLike
Thank you for your response! I hope you can continue to use Browzwear as well. I found your blog because I’ve been having trouble with the hudson pants, and now I know why. Keep posting! I really enjoy your detailed analyses.
LikeLiked by 1 person
Yes, I agree, this trouser talk is absolutely fascinating to a sewing nerd. I really appreciate you taking the time to write up your findings for your readers. When I finish the projects already started, trousers are the next challenge. However, after your comprehensive blog posts, along with the ‘top down, centred out’ method, I have high hopes of success!! Thank you so much
LikeLiked by 1 person
Thank you so much. I’m glad I have people who love the nerdy sewing stuff as much as me. Best of luck on your trousers adventures too.
LikeLike
Hi Naomi! I find this discussion fascinating – especially the part about the center front & side seams already functioning well like darts, so additional excess fabric needs to be dealt with in an alternate fashion. While I’ve never seen a men’s pattern with side adjusters, I think the Mitchell Trouser from Closet Core and Miriam Trouser from Cashmerette both have adjustable waistbands/side seam adjustments, but they go about it differently. I love your content, thanks for the research oriented way you go about doing things.
LikeLiked by 1 person
Hiya! Thank you for the pattern ideas.
LikeLike