When you are on a path of discovery, the best advice is often the last to be found. My blog is intended to reflect my journey as I learn more about sewing, knitting, and baking, so things will feel out of order. If I were writing a book, this blog post would probably be one of my first chapters, but blogs go in the opposite direction. For several years now, I have fumbled around with the idea that pant fitting has more to do with shape and less to do with size and this post is the culmination of all my learning.
History

Two years ago, I wrote a blog post about doing an alteration referred to as a “knock knee” alteration. The point of the post was to argue that the alteration should be renamed “wide hip” alteration since the adjustment was made not at the knee but up at the crotch level. Admittedly even now, I wouldn’t know what to call this alteration.
The issue with this adjustment is that there’s more to it than just pivoting at the crotch level. You have to raise the side waistband since length was removed from the side seam. Next, I could never figure out what happens with the crease line? In the end, the whole balance of the pant goes wonky.
I was using this alteration because, with most pant patterns, my pant legs would swing towards my inseam, and I would have excess fabric bunched up along the side seam at my knees. Even after getting the leg to fall straight from the crotch level with this knock-knee/wide-hip alteration, the pants from the crotch up never fit right.
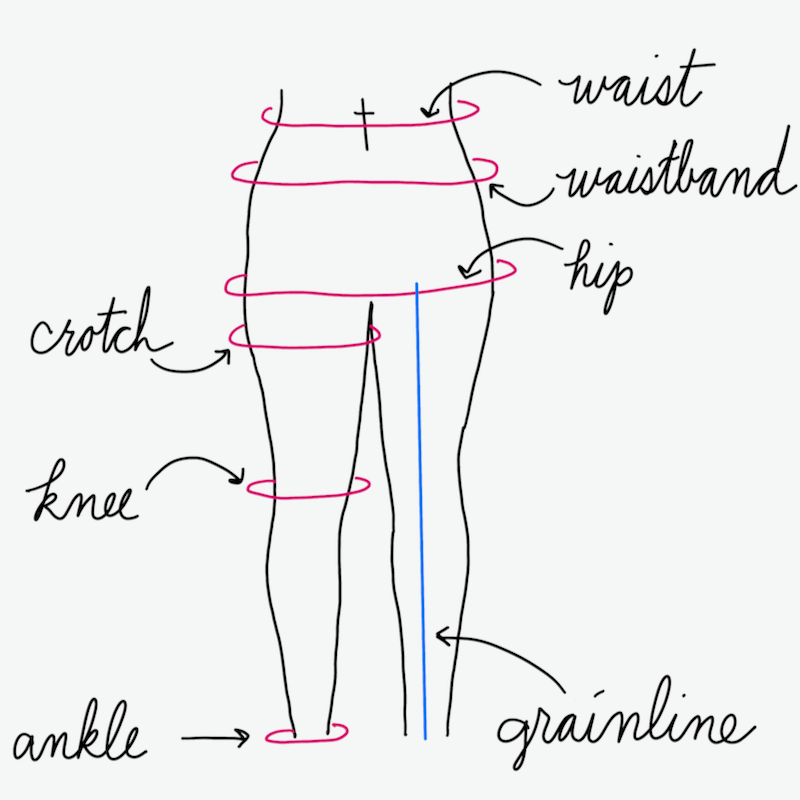
A year ago, Michele talked about crease line placement at various cross-grain line points (e.g., hip, crotch, knee, and ankle), which sparked an idea in my head. I’ve spent the last year drafting pant blocks for Ryan and myself, focusing solely on where the crease line needs to go and shifting the cross-grain line levels right and left to get a pant pattern.
My latest blog post was about crease line placement at the crotch. A quick summary of that post is the crease line does not have to be anywhere near the center at the crotch level for the front or back pieces. For Ryan and me, the crease line is at the center of the ankle and knee, but after that, it all depends on our body shapes. I’m still tweaking this placement for myself as I make more pants of different material and styles, so the process of learning is still on-going.
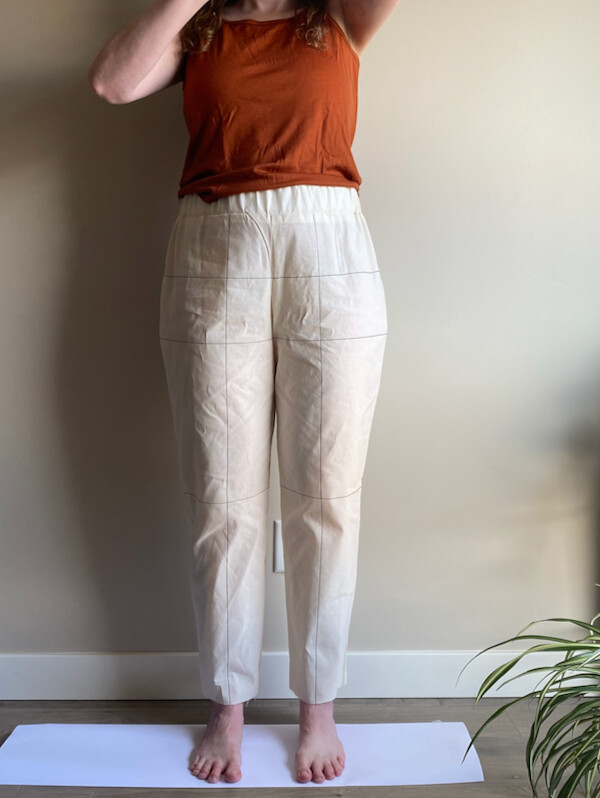
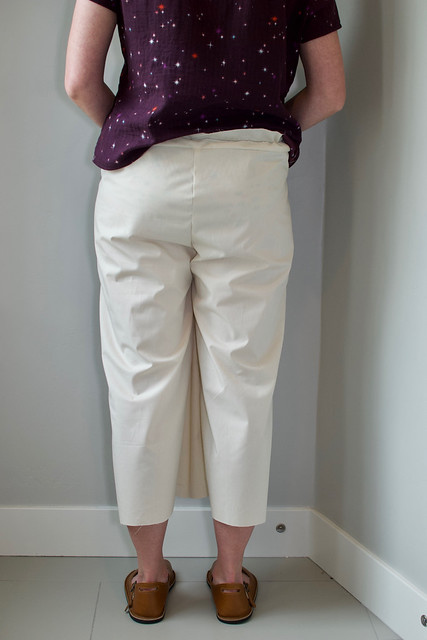
In the last year, I’ve learned that crease line placement at the hips (i.e., top of the crotch curve) is the first thing you should worry about. From the hip level, your pant legs should drape straight up and down or plumb. In all my photos, I’ve drawn the crease line and major cross-grain lines. Cross-grain lines stay level with the floor, and the crease line should be plumb.
Goldilocks Principle
For this post, I made 5 muslin pants that will be used to show you what happens when the crease line is off at the hip level:
- Front and back with correct crease line placement at the hip level
- Front with crease line placement ½ inch too wide
- Front with crease line placement ½ inch too narrow
- Back with crease line placement ½ inch too wide
- Back with crease line placement ½ inch too narrow

Subscribe to continue reading
Become a paid subscriber to get access to the rest of this post and other exclusive content.
