Grainline Studio Tamarack Jacket

Since 2020 is the year of stretchy pants and big sweatshirts, I figured I needed to join the trend and make myself a comfy quilted jacket too. This was a big and intimidating project for me. I don’t have a lot of experience sewing jackets, and to make things even more interesting, I planned on constructing my jacket slightly differently.

Measurements & Size

My full bust measures 39 inches, natural waist is 33 inches, and hip is 42 ½ inches. Based on the pattern size chart, I should cut out a size 14. I sewed a test version using blanket fleece and settled on a few modifications.

Modifications

Based on my blanket fleece test version, I felt like the front pieces were too baggy. Therefore, I sized down to a 12 for the front pieces and kept a size 14 for everything else. I also lengthened the arms by 1 ½ inches.

Other than my ½-inch forward shoulder alteration, I made no other changes. If you still don’t know about forward shoulder alterations, check out this video:

Materials

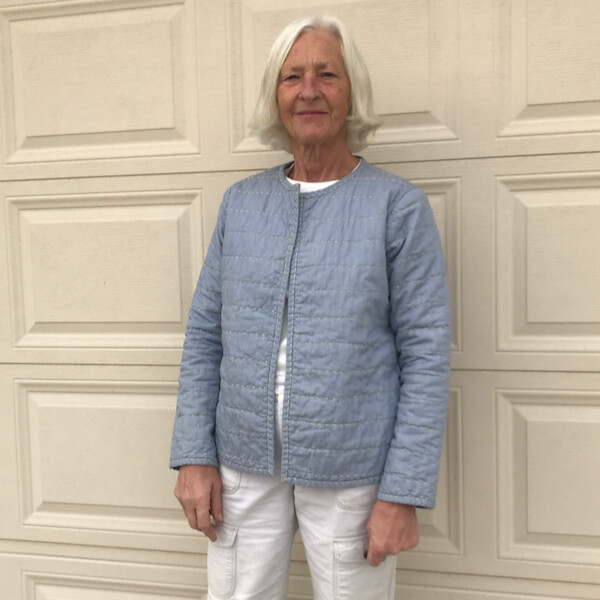
I’ve been desperately trying to get as close as I can to having no stash, so I wasn’t going to buy new fabric for this project. I used fabric I’ve had in my stash since 2017. The jacket was created entirely out of Art Gallery smooth denim solid infused hydrangea fabric. I knew that I wanted to hand-stitch the quilt so it would not be so boring. I used lemon Hidamari Sashiko thread for my stitching. Finally, I knew I wanted a good drape on the jacket, so I used Orient Dream quilt batting. The batting is a blend of bamboo, silk, Tencel, and cotton. The batting and thread were the only things not already in my stash.

Construction

Hand Quilting

After cutting out my fabric and batting, I basted the pieces together before I started quilting. To quilt my pieces, I started my horizontal lines at the underarm and quilted the rest of the horizontal lines 2 inches apart. I decided to not do any vertical lines. If you want to learn more about how to hand quilt, I would highly recommend Suzy Quilts guide.

Sewing

Following the Tamarack instructions, I sewed the front and back pieces together. That was just about the only step I followed. After that, I ignored the instructions and did it my own way. Instead of using a zigzag stitch or my serger, I chose to finish my raw edges using the Hong Kong seam finishing method. This method is the preferred method for seams pressed open (e.g., side, sleeves, shoulder, etc.). I used the Hong Kong seam finish for most of my seams. I used bias binding to finish the armhole since that seam was bound together / pressed to one side and not pressed open. I had to alter the order of construction because of these finishing methods.

After my shoulder seams were sewn together, I used 1-inch fabric cut on the bias to finish the raw edges using the Hong Kong seam finish.

I didn’t include the welt pocket because I thought having a pocket dangling on the inside looks dumb.

Going back to the pattern instructions, I followed the method for bias binding the back bottom hem and front hem and neckline. The one thing I wish I would have done is to fold the fabric so no raw edge was exposed. I decided to hand stitch the bias binding on the outside with my yellow thread to add a little more detail to the jacket.

Next, I sewed the front and back pieces together along the side seam. The instructions have the sleeves sewn on before the side seams, but that wasn’t going to work since I am using a Hong Kong finish for my side seam and sleeves.

I overlapped my bias binding edge and Hong Kong seam finish at that tricky overlap at the hem. It wouldn’t have been a big deal to fold over my bias binding, and I wish I would have. That would have created a really clean finish.

Before sewing the sleeves to the jacket, I sewed the sleeve and used the Hong Kong seam finish. With both the sleeve and side seams pressed open, I did my best to line them up when I attached the sleeve.

With sleeves attached, I pressed the seam towards the sleeve and used a bias binding method to bind the seam together. I used 2-inch fabric cut on the bias, but I probably should have used 1 ½ inches or less.

Finally, I used 2-inch bias binding to finish the sleeve hems and hand-stitched the binding for added flare.

Final Fit

There really is no substitute for making a jacket with quilted material. The fleece definitely did not do justice to the overall fit of my final jacket. My hope was to make a jacket that was “a-blanket-that-fits-well.” I wanted it to be slightly oversized for comfort, and it needed to fit over my sweaters. Neither was achieved. The jacket fits fine if I plan on wearing only a t-shirt. Luckily, my mom is nearly the same size as me for shirts, so I gave her the jacket. She doesn’t wear sweaters, and I think it looks better on her anyway.

I also didn’t love the subtle drop shoulder. The quilted sleeves are so heavy that the shoulder seam really pulls down on the jacket and causes gapping at the neckline. You’ll see many people in the jacket with a raised / gapping neckline, and it’s because the shoulder/armhole isn’t quite right. Luckily again, my mom has slightly broader shoulders than me, so she doesn’t have that dropped shoulder effect.

I’m not sure going up a size or two would solve my fit discomforts with this pattern. I think if I tackle another quilted jacket, I’ll go with a pattern more like the Sapporo Coat by Papercut Patterns that has a full drop shoulder and a much baggier fit. There’s no question that a quilted version of the Sapporo would be a much better “blanket-that-happens-to-be-wearable”.

Conclusions

I had much higher hopes for this project, and I wish it would have come out perfect. I’m thankful I learned a lot through the process though. I had never done Hong Kong seam finishes, and I was happy I could figure out the order of construction for the jacket using a combination of Hong Kong seam finishes and bias binding. I was also thrilled that my sewing machine had absolutely no problems with construction. Although some of the seams got bulky, I was able to distribute the bulk enough that nothing was too extreme compared to the rest of the jacket. The jacket does look like a crinkly warm quilted jacket after being washed and that is always delightful too.

I have several big scary projects to work on this winter, so my next quilted jacket will just have to wait. Stay safe, stay healthy!

One thought on “Grainline Studio Tamarack Jacket

Add yours

Leave a Reply

Fill in your details below or click an icon to log in:

WordPress.com Logo

You are commenting using your WordPress.com account. Log Out /  Change )

Facebook photo

You are commenting using your Facebook account. Log Out /  Change )

Connecting to %s

This site uses Akismet to reduce spam. Learn how your comment data is processed.

Website Powered by WordPress.com.

Up ↑

%d bloggers like this: