Digital Pattern Organization

I’m not the type of sewer that collects patterns. I buy only when I need something, and chances are I will purchase digitally. I don’t love taping together patterns, and waiting for a copy shop version isn’t always ideal, but I really don’t like tissue patterns. Tissue paper is just an extra level of annoyance. I worry about tearing it. It’s slippery and doesn’t ever want to hold in place. Most of the time, it was poorly folded, and I have to iron out the creases, literally. So this post is about how I organize all my digital patterns since that’s my primary source for patterns.
Now, this is where I really shine! My life involves organizing, tracking, processing, and dealing with millions and millions of files associated with brain imaging. The exact number right now is 5,962,175 files and grows every day! It is imperative that I keep files, folders, and entire datasets consistently named and organized. Any small deviation: an underscore instead of a hyphen, an accidental space, or a 0 (zero) instead of the letter O will completely ruin and destroy my work. Nothing can be out of place. My computer organization is my life, and yes, I’m the person with zero messages in my inbox, nothing on my desktop, an empty download folder, no unread text messages, and all my files neatly named and organized. Therefore, my digital pattern pieces are going to be equivalently organized.
Cloud Drives
If you’re not saving your patterns on a cloud service, what are you even doing? Using a cloud service (e.g., Google Drive, Dropbox, Box, OneDrive, etc.) is the easiest way to ensure you don’t lose a pattern. Cloud services are useful because if your computer ever dies or HD stops working, your documents are still available through the cloud. Saving locally and depending on a backup system is another option, but probably not the easiest unless you know computers and have a RAID system for backups. I digress.
The other benefit is that if you ever forget how much fabric you need, you can often look at your patterns on the go. Not sure what notions are required. Look it up! I definitely like to buy only just enough fabric for a project, and it is nice to be able to look up that information on my phone if I don’t remember.
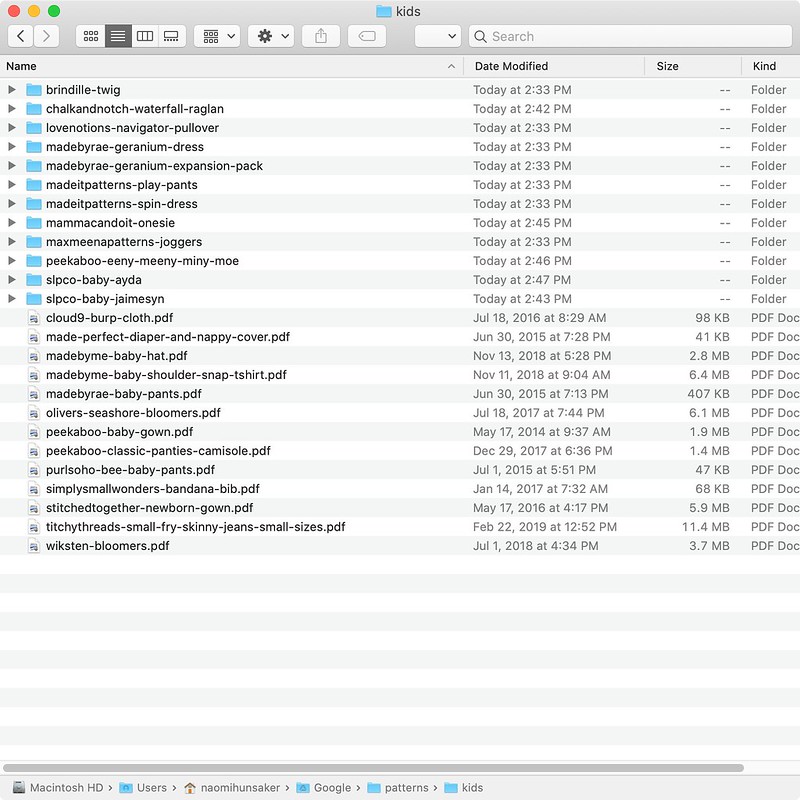
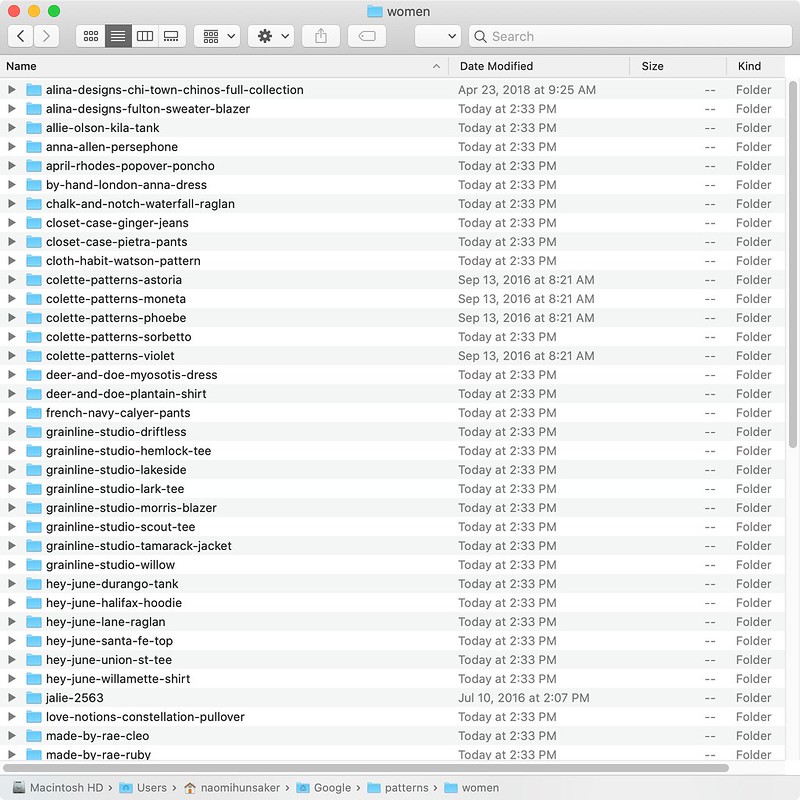
Main Directory
I like to categorize my patterns a little bit, but obviously, you could skip this main directory organization altogether and just organize your patterns in the main directory.

These categories don’t map precisely with the paper pieces I have organized on my bookshelf, but that’s because some categories don’t need to be printed: crochet, cross-stitch, embroidery, and quilt.
On this level, I have two key files. The first file is the InDesign file I use to create my envelope labels. The second file contains information about how much fabric I need for my patterns. I want to buy only just enough fabric for my projects and not ⅛ yard more than I need.
Fabric

Michelle (AKA SewJourners) has a great resource if you are trying to shrink your stash. However, shrinking my stash isn’t the issue. I only need to keep track of how much fabric I need for a project, so next time I purchase fabric I don’t buy too much. My Excel file lists the pattern(s), person sewed for, fabric purchased, how much purchased, and how much used. What’s helpful is knowing how much fabric I need if I combine patterns. For example, if I sew Ryan Trigg Shorts (row 26), I need 1.5 yards. If I sew Ryan, Fremantle Pants (row 27), I need 2.5 yards. Then, I decided I would sew Ryan Trigg Shorts and Fremantle Pants using the same fabric. Instead of needing 4 yards (1.5 for shorts and 2.5 for pants), I found out that I only needed 3 yards (row 29). Luckily, I was able to sew a skeleton version of shorts (no pockets) for Ryan using the leftover 1 yard. I’ll do anything to reduce waste and keep my stash small.
Sub-Directories
For work as a code monkey, there are certain rules that I have to follow when naming folders and files:
- NO SPACES EVER, NEVER EVER
- Be consistent with the use of ‘-‘ vs ‘_’. I tend to prefer the hyphen over the underscore. It has to do with computer programing languages I use.
- Be consistent with using lower or uppercase letters. Best to choose one or the other and not mix.
- Avoid special characters like: .?&@#
Those are the major offenders, usually. Whether I’m naming a file or a folder, I will begin with the pattern company, then the pattern name.
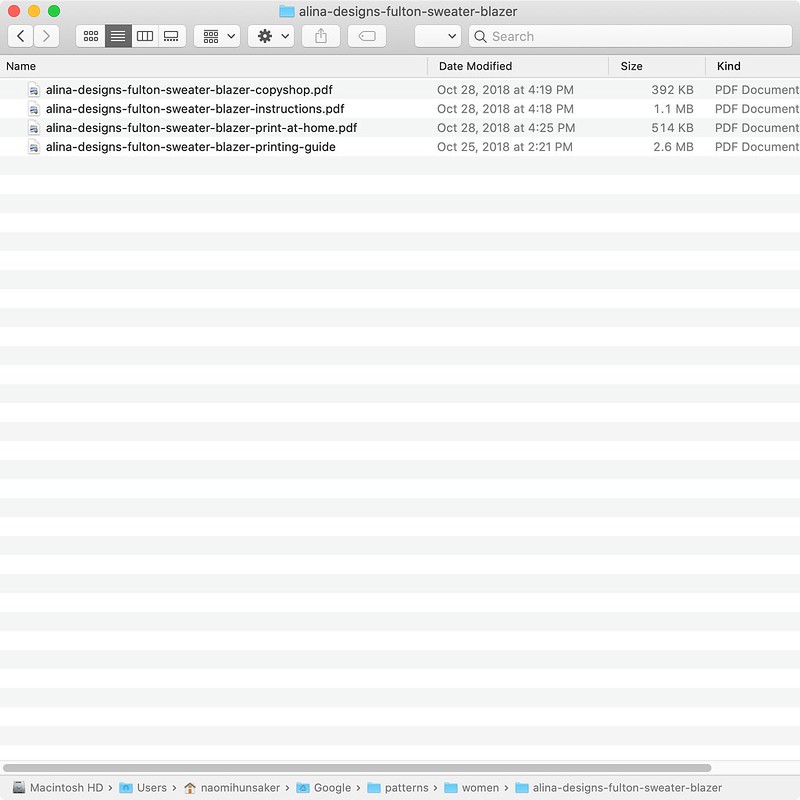
Folder vs Files
If a pattern comes with more than a single file, I will make sure those files are organized in a folder that I have named explicitly according to my convention. If the pattern has only one file, I won’t bother with a folder and will just rename the file.
Files in folders also get renamed starting first with the parent folder name and then adding on whatever description is necessary (e.g., instructions, print-at-home, copyshop).
Search
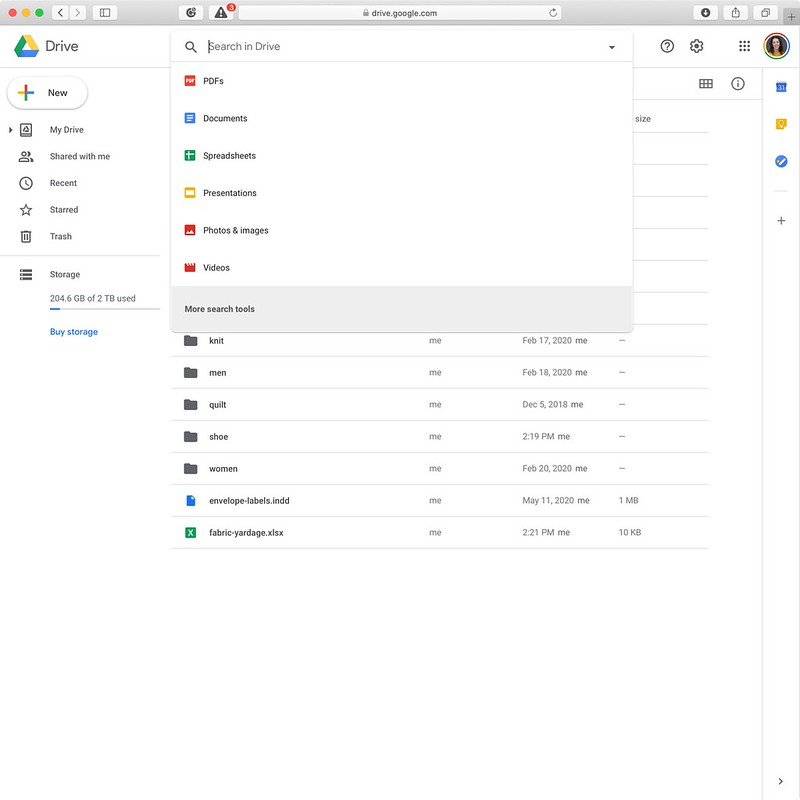
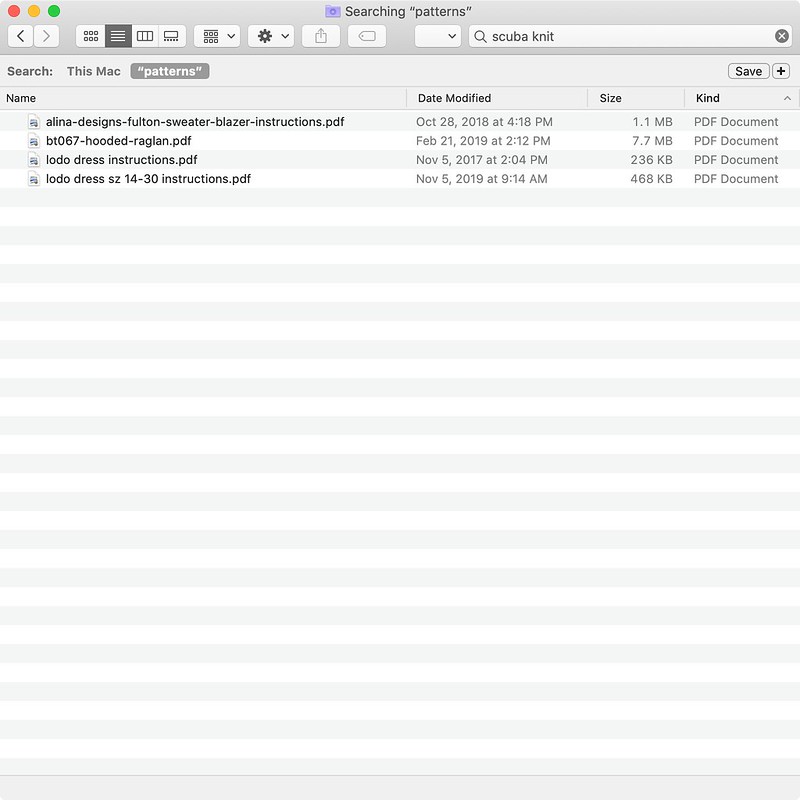
One of the features of using a Cloud service like Google Drive, is often you’ll be able to search within a file. For example, let’s say I want to find all my patterns that recommend using “scuba knit”? I can simply do that on my Google Drive webpage using Advanced search options. I narrowed my location to my ‘PATTERNS’ directory and looked for documents containing the phrase ‘SCUBA KNIT’.

After hitting ‘SEARCH’, four files were found!

The same thing can be done if you are running the latest version of macOS. I can’t say with any confidence about Windows OS, but this would probably be available with the latest releases as well.

I hear a lot of people saying, “patterns/links are sent to my email, and that’s my backup.” That works too, but remember that download links can disappear or stop working. It’s important to have a copy downloaded. I wouldn’t depend on download links as your backup plan, especially when online companies close and no longer allow downloads. However, I do definitely keep my emails saved as proof of purchase in case there’s ever a dispute.
Conclusion
Organizing your computer files/folders is just as important as organizing patterns or your fabric stash. You need to be able to find something when you want it, and being consistent with labeling will help. It’s also helpful to keep files organized on a Cloud system as added protection if a file is accidentally deleted or your computer stops working. Use email only as a backup of proof of purchase. Next up, my not-so-big fabric stash reveal!
Bonus

Here’s a quick tutorial on how to format windows and take screenshots on your computer if you are on a Mac. Ever wondered how to resize a window to be an exact size? Only me? Huh, OK? Well, I was able to size my windows precisely for this tutorial, and here’s how you can do that. You can use the native Script Editor app instead of downloading something from the App Store.
- Press ‘Command+Spacebar’ to launch ‘Spotlight’.
- Type ‘Script Editor’ to find the app.
- You can also launch ‘Spotlight’ by clicking the magnify glass in the upper right-hand corner of your desktop.
- Start a new document if prompted.
The script is about as straight-forward as you can get:
tell application "Finder"
    set bounds of front window to {100, 100, 900, 900}
end tell
You want Script Editor to tell the application, in this case, your Finder window, to resize and go to a specific location. The bounds are broken down as follows: place the top left corner at location 100, 100 pixels on your screen, and then resize the bottom right corner to location 900, 900 pixels. This results in a window that’s 800 by 800 pixels. If you want your window to be 900 pixels square then you’d change the bounds to ‘{100, 100, 1000, 1000}’. If you want your window to be 600 pixels wide by 800 pixels tall (portrait) you’d change the bounds to ‘{100, 100, 700, 900}’. If you want your window to be 800 pixels wide by 600 pixels tall (landscape) you’d change the bounds to ‘{100, 100, 900, 700}’.
To run the program press the triangle button or press ‘Command+R’.
You can change whatever application you want to send the command: Finder, Safari, Preview, Excel, etc.
How to capture a portion of your screen like a window?
- Open the window or menu that you want to capture.
- Press and hold these keys together: ‘Shift, Command, 4, and Space bar’. The pointer changes to a camera icon. To cancel taking the screenshot, press the ‘Esc’ (Escape) key.
- Click the window or menu to capture it. To exclude the window’s shadow from the screenshot, press and hold the ‘Option’ key while you click.
- If you see a thumbnail in the corner of your screen, click it to edit the screenshot. Or wait for the screenshot to save to your desktop.

IF YOU FOUND THIS POST HELPFUL, CONSIDER SUPPORTING MY WORK BY SIGNING UP FOR A PAID SUBSCRIPTION.
POSTS OLDER THAN 3 MONTHS ARE NOW FOR SUBSCRIBERS ONLY — YOUR SUPPORT KEEPS THIS SPACE GOING.
INTERESTED IN SUBSCRIBING TO RECEIVE NEW POSTS IN YOUR INBOX?


Leave a comment