
I promised to write this post a long time ago, but only now is it getting published. Sorry. In August, I worked on creating flat 2D patterns from 3D duct tape body forms that I would cut to make sloper pieces. I posted a lot on how to do that for pants etc. and I started writing posts for upper body, but got stalled in my process.
There’s a couple of reasons why it has taken me forever to get this post written. First, work got in the way. Second, I still don’t have an excellent method for translating the duct tape sloper into a wearable shirt. I still had to go through a lot of testing and sewing to finally edit my sloper pattern to how I wanted it.
It has been an extremely educational process and has given me a ton of insight on how to fit clothes to my upper body. But at the end of the day, I still think having a 3D printed body form is preferred. The next big sewing purchase for me will be a Beatrice Form (https://beatriceforms.com). That being said, I thought it would still be insightful to see what my pattern looks like compared to a whole bunch of others.
Sewaholic Renfrew Top
One of the first t-shirt patterns I bought when I started sewing was the Renfrew Top by Sewaholic. Sewing a basic t-shirt was my first garment and main focus when I started sewing, and I didn’t realize how elusive the perfect shirt was going to be.
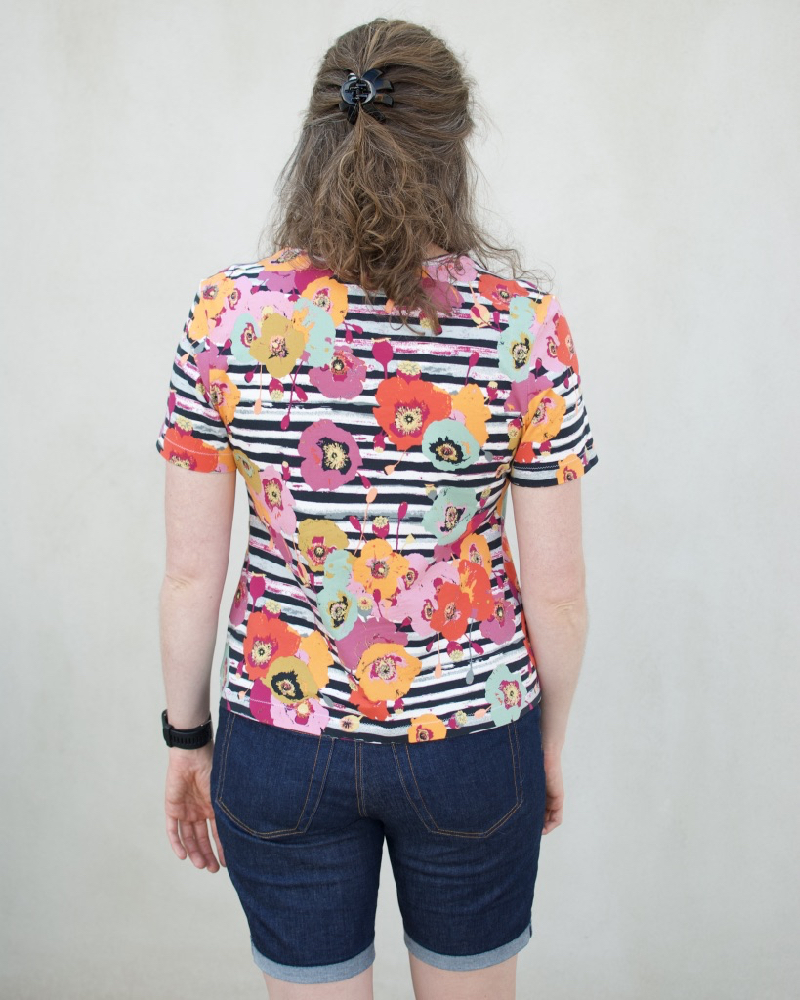
Full disclosure, I have NEVER been able to wear RTW shirts for women. The only basic tee I ever owned growing up was the free unisex shirts I got for all those swim meets and camps. I was a competitive swimmer from the age of 5 through high school, and I still jump in the pool for laps today. Given my athletic background, I have manly shoulders and upper back. When I start measuring upper bust, bust, chest, etc. my measurements are all over the place, and I still don’t know how to account for it all.
When I made my first shirt, it was no surprise that the Renfrew Top didn’t fit. This led me to see if I could self-draft a basic tee and with the help from Sunni of a Fashionable Stitch, I was able to come up with a passable pattern that served me well for a year or so, but the more I sewed, the more I saw the flaws in the pattern. Fast forward a few years, the way I solved the shirt problem was to explore fit with the duct tape sloper.
For all of these shirts, you’ll notice that I need to take up the shoulder seam in the front and let out or lengthen the back and not always an equal amount. I also need to do a forward shoulder alteration of at least 1/2-inch. That means the front seam at the shoulder needs to be dropped 1/2-inch and the back seam at the shoulder needs to be raised 1/2-inch. Even when you take those alterations into account, the width of the shoulder is still far too narrow for me. I also need a full-bust adjustment (FBA) or as is in my pattern a bust dart. Yes, you can have a bust dart in a basic tee!

The length discrepancy between my pattern pieces are due to the front having a bust dart. When the dart is added in, the side seam is shortened and matches the side seam length of the back piece and the center front stays longer to accommodate for the bust.

Subscribe to continue reading
Become a paid subscriber to get access to the rest of this post and other exclusive content.
