April is the time of year that we get strawberries in the grocery store for $1.25 – $1.50 a pound. I wish I had access to local Utah strawberries, but people just don’t grow them here. I won’t complain, because Utah is more known for our raspberries!! And we have tasty raspberries.
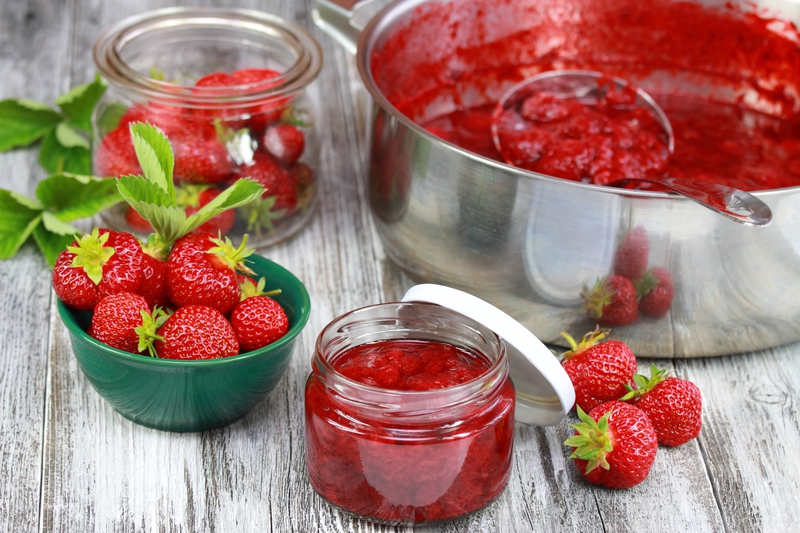
Here’s my recipe for making strawberry jam. Remember, I do things a little different. I use a 2:1 fruit to sugar ratio by weight. Normally it is the other way around, 2:1 ratio of sugar to fruit. I find that my ratio works perfectly for the berry family (i.e., raspberries, blackberries, strawberries, etc.). The key is to macerate the fruit and sugar for a couple of hours or overnight in your refrigerator and then pass the soupy mixture through a food mill before cooking. I’ve had such great results with this method.
The canning season has begun and I’m looking forward to another great year of produce. Let’s keep our fingers crossed that our fruit trees don’t freeze this year! I’m really looking forward to apricots and peaches.
Strawberry Jam
Ingredients
- 6 pounds ripe strawberries, cleaned and halved (about 12 cups)
- granulated sugar, 1/2 of the weight of the cleaned and halved strawberries (about 1,200 grams or 6 cups)
Directions
- Place the strawberries and the sugar in a non-reactive pan or bowl, stir, cover and let macerate for at least 2 hours or until the sugar is completely dissolved.
- Prepare water bath canner, jars, and lids. Don’t forgot to add 1/2 cup vinegar to canner water to keep your bottles looking nice.
- When the strawberries are fully macerated and softened, put them through the coarsest setting of a food mill.
- Transfer to a large shallow sauté pan (or electric skillet) and bring to a simmer.
- Simmer until the jam reaches desired gelling stage. Because I used a shallow non-stick electric skillet, it takes me only about 15-20 minutes to reach the desired gelling stage.
- Once you have obtained desired gelling point, remove from heat and skim foam off if necessary.
- Ladle the hot jam into sterilized canning jars, leaving 1/4-inch headroom.
- Wipe rim. Center hot lid on jar. Apply band and adjust until fit is fingertip tight.
- Turn off heat, remove canner lid and let jars sit in the hot water for another 10 minutes. This will prevent too much of the jam from pushing itself out the lids as it is cooling.
- Transfer jars to a towel-lined surface and let stand until completely cool, about 24 hours.
- Check lids and refrigerate any jars that are not sealed.
Notes
- This jam doesn’t cook much, so it can look very “loose,” or liquid-y if you are use to making jam with pectin. If you cook it longer to thicken it up, you’ll lose some of the very fresh flavor. Accept the looseness and enjoy the flavor!
- Do not double this recipe. Making jams can be finicky and doubling the recipe could be disastrous!
- Use the widest and most shallow pan you have, the deeper the pan the longer you will have to cook your jam. You will lose the fresh flavor the longer the jam has to cook.
- I’m always a little pressed for time, so I make my jam and store it in the refrigerator overnight. The benefit of doing this is I can cook two batches of jam to have a full canner amount and I can also make certain I have the proper gelling stage. To preserve my refrigerated jam, I just slowly warm up the jam until it is hot and then go through the canning steps. You never want to try to can cold jam.
Leave a Reply