
I’ve refined my workflow for fitting pants over the years, but I lack experience and confidence when it comes to tops. As the weather warms up, I want to revise my t-shirt pattern again. The long-sleeve shirts I made a few months ago were OK, but the fit never felt great. This four-part series will cover my fitting workflow with a new t-shirt pattern. I started with the Sage Tee from Elbe Textiles. I chose this pattern because it is more size-inclusive than the Union St. Tee and is drafted for a cis male body. I have always had better luck fitting into men’s clothes because the shoulder width is drafted wide enough for my body.
Style and Fit
There’s not a lot to say about the Sage Tee. It is a basic, relaxed-fit t-shirt with a crew neck. It comes with a short and long sleeve and a chest pocket. The shoulders hit slightly past the edge of the shoulder to give it that relaxed fit. The neckline is moderately high but not too high. In general, the shirt looks like a standard t-shirt.
Sizing
The pattern comes in 13 sizes and fits chests from 34 to 58 inches, waists from 28 to 52 inches, and hips from 32.5 to 56.5 inches.

My current body measurements are 41.5-inch high bust, 40-inch bust, and 36-inch waist. Because my high bust is actually bigger than my bust measurement, I used that as my starting point. Based on my high bust, I should start with size E, which also works for my waist measurement. I’m ignoring the hip measurement because I know I will have to widen the t-shirt for my hips regardless of size.
Preparing the Pattern
I’m loosely following J Stern’s bodice workflow, but I am ultimately trying to find a process that works for me. I will say it repeatedly in this fit series, this is by no means a complete tutorial on how to fit a top. Neither is this a tutorial on how to get a “perfect” fit. This series is purely about the workflow I used to make this pattern fit my body. I really like the idea of creating a personalized step-by-step method for fitting. It improves the efficiency of the whole muslin fitting process. It breaks the process down into bite-size, manageable pieces. It reduces the stress and frustration of fitting. And ultimately, it sets you up for better success with your garment. All great reasons to develop your own workflow for making sample garments!
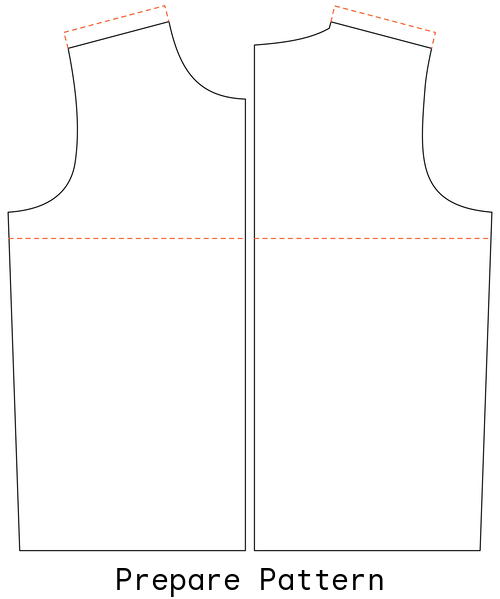
The first place I started was at the shoulder. I added a few inches to the shoulder seam. Next, I drew a line 1 inch below the armhole and removed everything below that. Because this isn’t a fitted knit top, I just used woven muslin fabric for my initial fitting. Later in the process, I used knit fabric to make sure my adjustments worked.

Subscribe to continue reading
Become a paid subscriber to get access to the rest of this post and other exclusive content.
