
Next year will be my third year using direct-to-film clothing labels. I have loved keeping track of my makes each year, and this is a great way to remember when items were made. The DTF I use is from Transfer Superstars. Their DTF is amazing. It’s easy to apply. Stretches with the material. Doesn’t crack or harden over time. And I know for a fact that it can be washed more than 50+ times and still look perfect.
Font Requirements
Each year, I try to design new labels, and here are my labels for 2024. To edit the labels, you will need to purchase and install the following font: National Forest Font Duo.
Download
This year’s labels are 2-1/4″ wide by 1/2″ tall. I have 8 different versions and 12 copies each for 96 labels for the year. More than I need, but that’s OK. I plan to share the extra with friends. Click the button below, which will open a tab to Gumroad where you can download the Adobe Illustrator file:
Designs


Helpful Tips
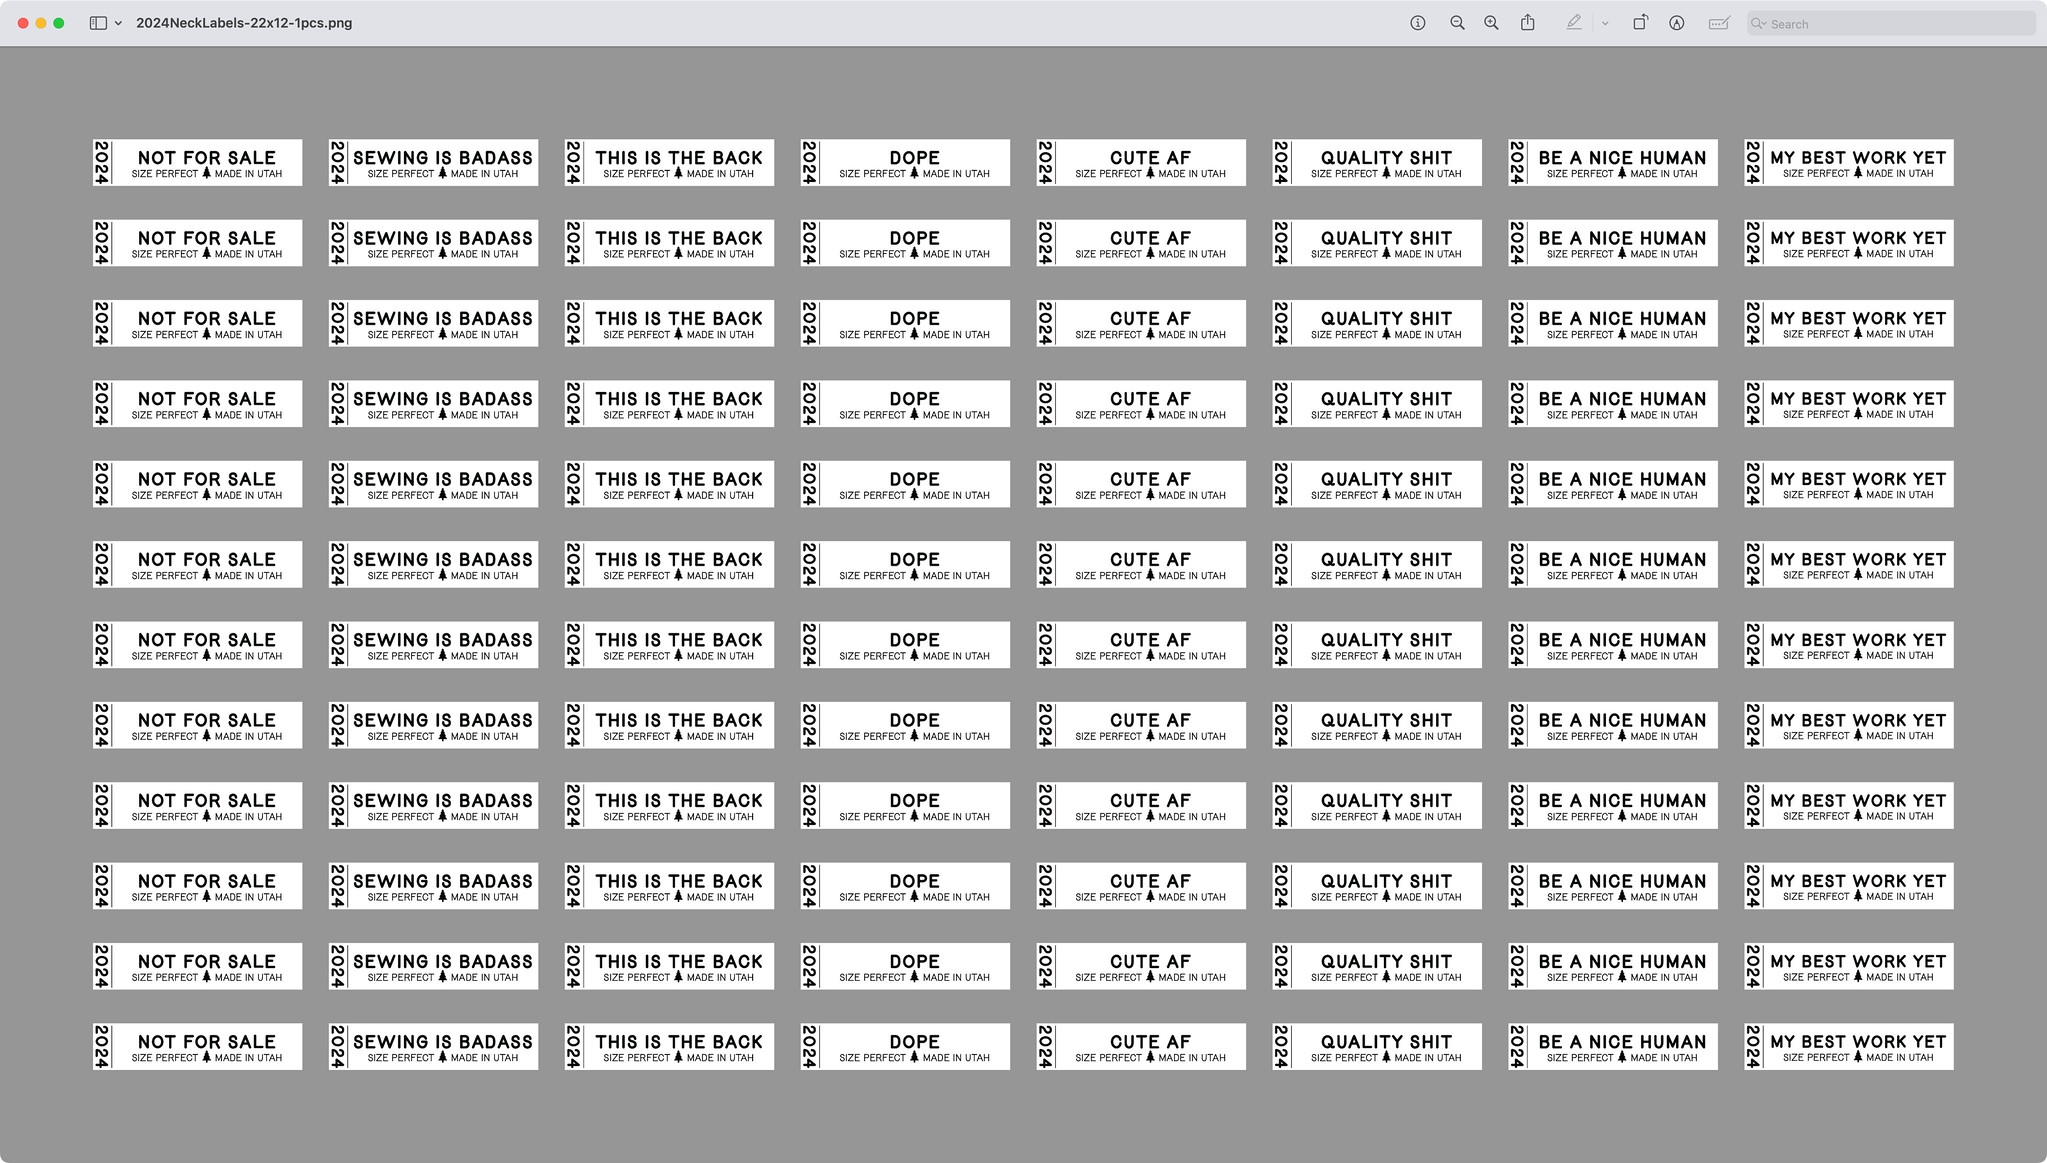
- The AI file is the smallest file printed by Transfer Superstars (22 inches x 12 inches).
- You need around 1/2 inch distance between each label, so don’t try to crowd more on the page.
- The font is too small to apply on its own. Therefore, the clothing label needs to include a background. Feel free to change the color of the white background, but don’t remove the background altogether.
How to Export File
- Choose File > Export > Export As.
- Select a location for the file, and enter a filename (e.g., Description-LengthxWidth-Copies.png [2024Labels-22×12-1pcs.png]).
- Select the PNG file format Save As Type (Windows) or Format (macOS).
- Select Use Artboards in the Export dialog box.
- Select All.
- Select Export.
PNG Export Options
- Set the Resolution to High (300 ppi).
- Set Anti-aliasing to Type Optimized (Hinted).
- Unselect Interlaced.
- Set the Background Color to Transparent.
- Verify the PNG file is 22 inches by 12 inches, has a transparent background, and generally looks like the screenshot just above.
How to Apply Label
- With your iron at 300ºF, pre-press your garment for approximately 7 seconds to remove excess moisture. I have a small Cricut EasyPress Mini set to Medium.
- Next, place your clothing label on your garment and press again for 7-10 seconds with heavy pressure.
- Let the clothing label cool for 10-15 seconds, and at the same time, wipe it down with a microfiber cloth around the edges of the label.
- While the label is warm but not hot, grab a corner of the film and peel.
- Flip the film around, lay on top of the clothing label, and press again for 7 seconds.
For more helpful tips, check ou this YouTube video:
IF YOU FOUND THIS POST HELPFUL, CONSIDER SUPPORTING MY WORK BY SIGNING UP FOR A PAID SUBSCRIPTION.
POSTS OLDER THAN 3 MONTHS ARE NOW FOR SUBSCRIBERS ONLY — YOUR SUPPORT KEEPS THIS SPACE GOING.
INTERESTED IN SUBSCRIBING TO RECEIVE NEW POSTS IN YOUR INBOX?

Ok, the this is the back one is my favorite. My kids totally need that!
I didn’t even know that this option exists. Thanks for sharing!
This is interesting. I’ve used printable fabric. I’ve also had a professional heat press that I sold but I currently have an iron that would get hot enough to use these.
So you’re uploading artwork to the DTF site and they send you sheets, correct? Thanks for the info and inspiration!
That is correct. I upload the PNG file to Transfer Superstars, and they print it and send it back to me. Their DTF is the best I’ve ever tried. The labels are small enough that a regular iron would probably work, too. I haven’t tried it since I have a Cricut EasyPress Mini.