
After the success of my first summer knit top, I decided to make another top. I made the Montpellier Top by NovemberKnits. This pattern did not go as smoothly as the first pattern. I had to make some significant alterations to get the top to fit comfortably for me.

Pattern Information
Size Range | 1-8 |
Bust | 85-140 cm |
Design Ease | 7-8 cm |
Knitting Method | Top-down |
My bust measures 99 cm, so I knit a size 4. That gives me 8 cm of ease.
Pattern | Montpellier Top by NovemberKnits |
Made for | Naomi |
Size | 4 (107 cm finished bust circumference) |
Needle | 5,5 mm and 5,0 mm |
Gauge | 14 STS x 20 RNDS = 10 x 10 cm in stockinette stitch after blocking |
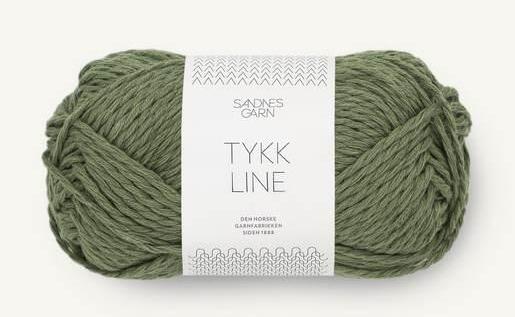
Yarn | Tykk Line by Sandnes Garn |
How much? | 8 skeins (400 g) |
Colorway | Olive Green 9062 |

Review
Throughout the pattern, the word “knit” has multiple meanings: (1) to produce a knit stitch and (2) to work the stitches as is. This makes the pattern confusing because you aren’t always sure if you should knit or purl when working stitches. It’s a simple enough pattern to figure out, but it makes the pattern unnecessarily confusing for a new knitter. An update has been published for the English version, but there are still instances of knit being used to mean work, not a knit stitch.

I was leery about the lowered armhole look, since depending on the fabric drape, bra cup size, and bottom of the armhole placement, you could have this happen:

The armhole at the bust will flip outwards. Based on some Instagram posts, this is exactly what can happen and for me, I’m not comfortable in tops that do this.
To fix this issue, I had two choices, go up a size, but I wasn’t sure if I would have enough yarn, or raise the armhole. Besides possibly not having enough yarn, going up a size didn’t make a lot of sense because the difference between the sizes before the armhole shaping isn’t that dramatic (54 (56) 58 (61) 62 (63) 64 (65) sts). The number of stitches for my size is 61 (or 43.57 cm). All the sizes above still wouldn’t give me much room at the bust point. The largest size only being 46.42 cm. Remember my front bust is approximately 49.5 cm (99 cm / 2). For this pattern to fit me and not have the ribbing flip out, the bottom of the armhole had to be raised high enough that there was room for my chest. Here are examples of how I wanted my top to fit:
Alterations
I needed to significantly alter the pattern to get the top to fit well on me. I have a very short shoulder-to-bust measurement, and I knew when I started this pattern that I might have to make changes. When sewing, I often have to remove length from the shoulder height. Before any alterations, the armhole was so long that it ended below my bra band, and the side ribbing was flipped away from my body. I wasn’t comfortable with the fit. I started over and raised the armhole by 4 cm (or 8 rows).
Back
BACK ROWS 1 & 2: I ignored the instructions and used a provisional cast-on for the 61 sts. I like that the provisional cast-on gives a neater and easier edge to pick up later. After changing the cast-on method, the design of the pattern is set up: 9 edge stitches on each side with stockinette in between.
BACK ROWS 3-16: The instructions say to work “back and forth as the sts appear until the back measures 13 cm (or 26 rows)”, I worked the back until it measured 8 cm (or 16 rows).
BACK ROWS 17-32: I didn’t change anything with the increases for the armhole shaping.
BACK ROWS 33 & 34: The final step for the back says, “work back and forth as the sts appear until the back measures 22 cm (or 44 rows).” I worked the back until it measured 17 cm (or 34 rows), which ended up only two rows.
Left and Right Shoulder
I made no changes to the left and right shoulder instructions.
BACK ROWS 35-46: The instructions include 12 additional rows for the back neck shaping, which bring the total to 23 cm (or 46 rows).
The instructions are clear where the shoulder point is, “Place a marker in the work. This marks the top between the back and front sections and is used to measure the length of the front later in the pattern.”
FRONT ROWS 1-22: The front shoulder starts with 22 rows and I didn’t change anything about these instructions.
Front
FRONT ROWS 23-24: Once the shoulder and neck shaping is finished, they are joined together.
FRONT ROWS 25-28: Instead of working 10 rows after the left and right shoulder is joined, I only worked 4 rows. If you are counting rows, the front should now have 28 rows.
FRONT ROWS 29-44: I didn’t change anything with the increases for the armhole shaping.
FRONT ROWS 45-46: The final step for the front says, “work back and forth until the front measures 27 cm (or 54 rows).” I worked the front until it measured 23 cm (or 46 rows), which ended up only two rows.
Body
I made no changes to the body instructions, except for ignoring the recommended length. I never follow length instructions. I always work until I’m ~6 inches from my final desired length, wash and block the sweater because it always grows, and work the last bit afterward.

Conclusion
Hopefully, my alterations make sense and are easy to coordinate with the actual pattern. Now to decide what I want to knit next!

Leave a Reply