
After sewing winter hiking pants, I had just enough Schoeller Schussmeister fabric leftover to make matching vests. I decided to try Green Pepper’s adult polar vest pattern (109).
Fabric
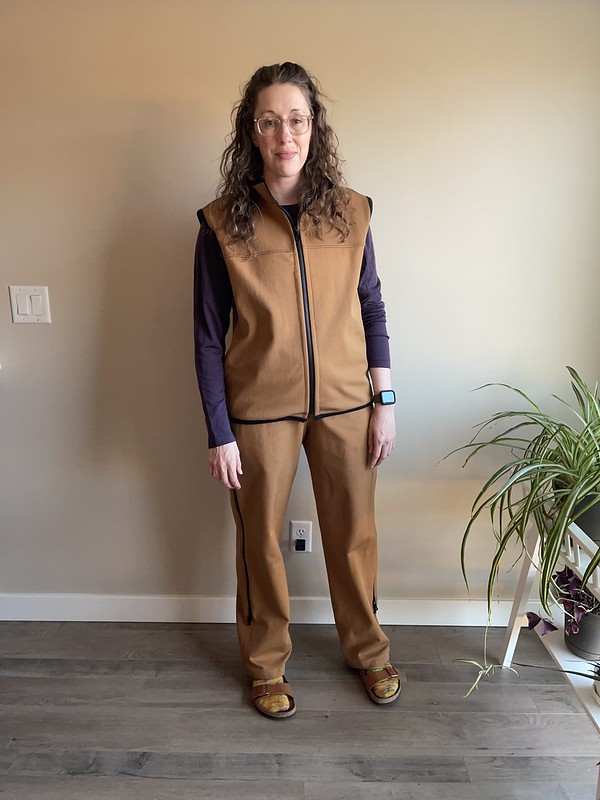
The fabric I used for the vest was Schoeller Schussmeister stretch woven fabric from Rockywoods (70% nylon, 25% wool, 5% elastane). The outside is smooth with DWR finish and the inside is textured, soft, and fluffy.
I used Art Gallery knit for the binding. Flannel for the pocket lining. Regular quilting cotton for the zipper binding. And finally, my zippers were purchased from Pacific Trimming and cut to length.
Size

Ryan and I have the same chest measurement, 39″. However, I cut out a size L to accommodate Ryan’s wider shoulders and a size M for myself. If I ever make this pattern again, I will grade the hips down to a size M for Ryan and grade up to a size L for myself.
The pattern is drafted very straight and will likely be too wide at the hips for straighter figures and not wide enough for people with curvier figures.

Front Alterations

Alterations for this pattern consisted of getting the slope of the shoulder correct (i.e., doing a forward shoulder alteration as needed) and getting the height of the shoulder seam right (i.e., lower or raise the whole seam). Stacey over at The Crooked Hem has a great tutorial on generating a shoulder template.
I lowered the outer shoulder point 1-1/8 inches on my pattern piece. I removed ⅜ inches from the shoulder seam on Ryan’s pattern piece and then dropped the outer shoulder an additional ⅝ inches. Ryan’s pattern was also lengthened 3-½ inches. Ryan is also very tall, 6’5″, and he always needs extra length on his shirts.
Back Alterations

Luckily I was able to mirror my adjustments on the back pattern piece. I added 1-⅛ inches to the outer shoulder point. This isn’t always the case for patterns. For Ryan’s pattern, I lengthened the shoulder seam by ⅝ inches. Just because I made a forward shoulder adjustment for Ryan on the front pattern piece doesn’t mean I will have to do the same for the back pattern piece.
I lengthened the back pattern piece by the same amount, 3-½ inches, for Ryan’s pattern.
Collar Alterations

The height of the collar stand was way too much. I removed a whole 2 inches. The collar hits just below our chin when the vest is completely zipped. I believe the collar is intended to always be folded in half because the instructions say to sew the wrong side facing outward. That wasn’t the look I was going for, so I removed 2 inches and stitched the collar with the wrong side facing the inside.
Because I removed ⅜ inches to the front and added ⅝ inches to the back pattern pieces for Ryan, I added ½ inch to the length of Ryan’s collar stand. Ryan’s neckband was increased by ¼ for each shoulder seam, so I added ½ inch in total to the length of the collar stand.
Front Pocket Alterations

The pattern has the front pocket opening along the side seam. I hated that placement on my vest, so for Ryan’s vest, I moved the pocket toward the front and angled them slightly. The construction of the pocket is still the same in the new location. Moving the pocket made sewing the side seam easier too.
The pocket is huge since you cut lining using the same lower portion of the front pattern piece. Therefore, you can place the front zippers anywhere you want!

Conclusions
This is a lovely basic pattern. The instructions were well written and easy to follow. If I ever use this pattern again, which I like will, I will adjust the hip size for Ryan and myself. I will also place the pockets better so they aren’t in the way of our backpack hip straps.
I’m also super happy I could use up the little bit of leftover fabric I had from making hiking pants. This project was well worth the effort.
If you want to make the bindings easier to attach, start by sewing them to the inside of the garment first. Then when they are folded to the outside of the garment, you can easily top-stitch them in place and not have to worry if you are catching the binding on the inside. The pattern has you attach the bindings to the outside first and flip them towards the inside and topstitch. The problem with this method is that you have to be very careful when you topstitch to catch the edge of the binding on the inside. I didn’t want to fuss with that nonsense, so I reversed the method.
Leave a Reply