
Just because leggings aren’t considered pants doesn’t mean they have to fit poorly. When I first started sewing, I did what every sewer does, I made leggings using a basic pattern. The standard design often does not have a side seam to “make it easier” for the beginner sewer. I prefer having side seams because that gives me more degrees of freedom to make alterations. Later, when I developed my basic pattern block, I drafted my own leggings. That pattern still works great for me, but I wanted to compare my self-drafted pattern that I made up on the fly with a pattern that I thought would be drafted well. Unfortunately, I had difficulty finding a pattern to compare to because most patterns don’t include a side seam. In the end, the pattern I selected was Grasser sports leggings, pattern no 468.
Sizing
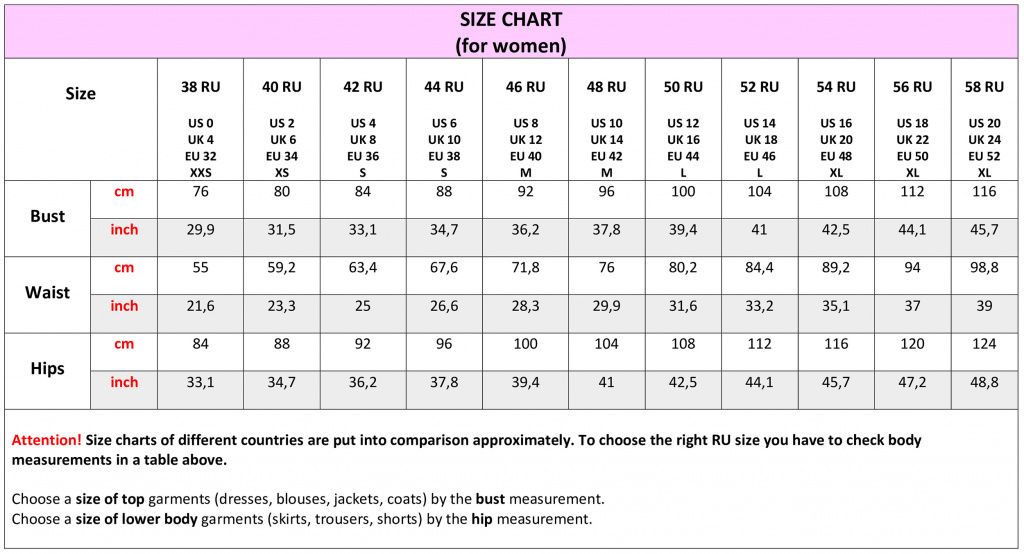
I am a size 52 RU based upon the Grasser size chart. Unfortunately, the pattern only goes up to 52 RU, so if I need a size larger (spoiler alert), I’ll have to draft my own.
Grasser also offers patterns drafted based on different heights:
- 158-164 (centimeters)
- 164-170 (centimeters)
- 170-176 (centimeters)
- 176-182 (centimeters)
Unfortunately, the leggings are only drafted up to 170-176 cm, and I’m 180-181 cm tall.
First Toile
Front Pattern Pieces
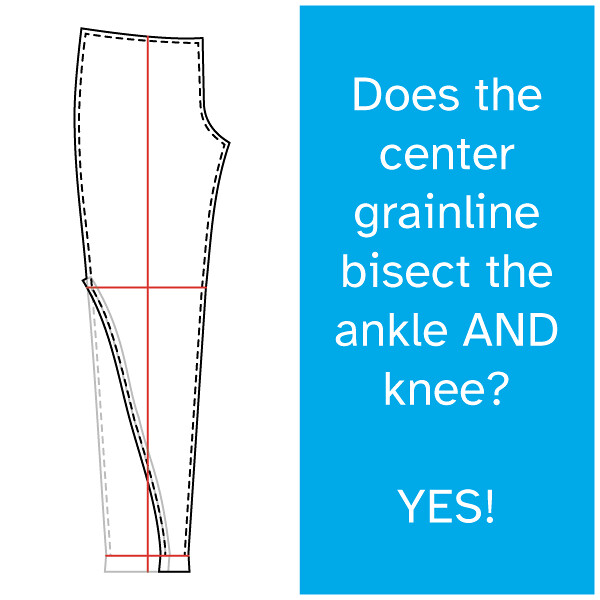
I promise I tried to do as little as possible with this pattern. My first question: Did the center grainline bisect the ankle and knee? It was a bit hard to know this, given that the front pattern piece has a color block option on the lower half. When I place the pattern pieces together, you can see that the center of the ankle matches up with the center of the knee.

My second question: At hip level, does the center front (excluding the seam allowance) to the center grainline measure 3.5 inches? For the front pattern piece, the measurement was perfect! Remember that I draw the hip level at the top of the crotch curve.

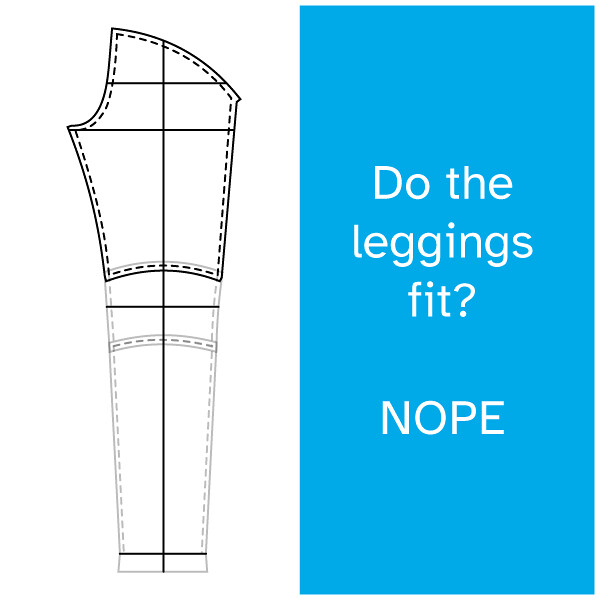
With that, I made my first toile. The final question: Do the leggings fit? Unfortunately, they did not.

Let’s take a look at the clues. The first clue was that the leggings were so tight that they were trying to fall off. They weren’t too hard to get on around the calves, but I really had to hoist them up around my upper thighs and torso. Any movement and I looked like a plumber. The second clue was the look of the fabric: the crotch area was overstretched, and the matte fabric was shiny. The excessive tightness was most apparent around the upper thighs and torso. I felt like a sausage.
Back Pattern Pieces

I asked the same questions for the back pattern pieces. The back pattern is split into three separate parts, plus there’s a yoke piece for the top. The first question is, does the center of the ankle match up with the center of the knee? Yes, yaaaaayyyyy!
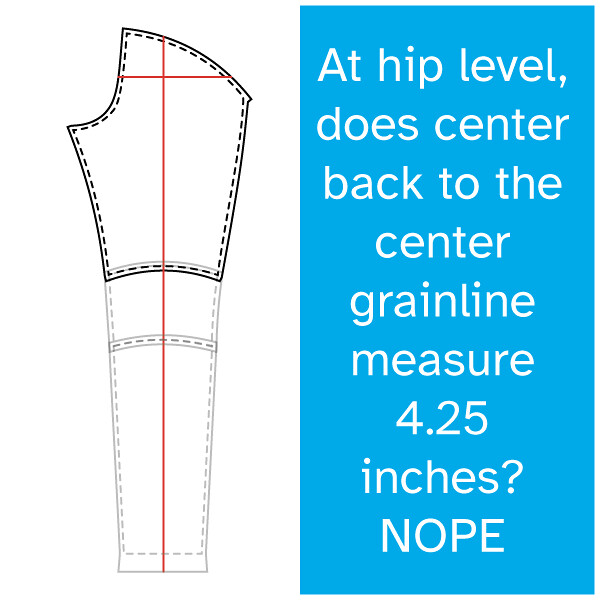
My second question, at the hip level, does the center back (excluding seam allowance) to the center grainline measure 4.25 inches? Unfortunately, my lucky streak was over. The pattern measures 2.625 inches, so I will need to make a significant adjustment to the pattern.
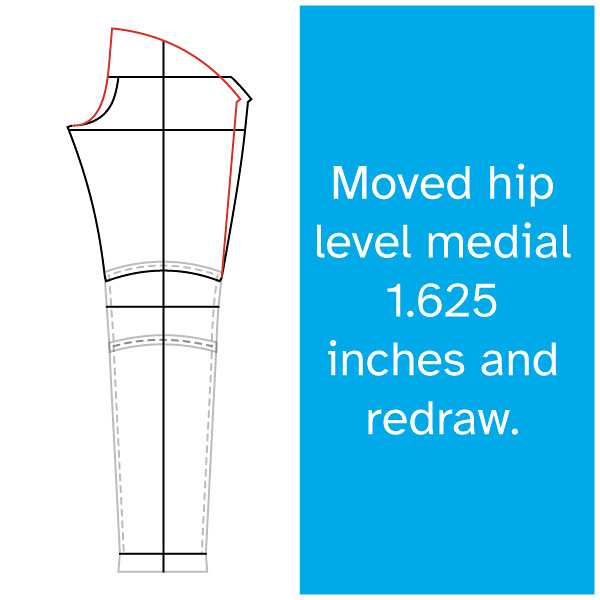
I cut along my hip level and moved the piece medially 1.625 inches to make this alteration. I then redrew the crotch curve and the side seam as best as possible.
I had made all the alterations I wanted for this first toile. But, unfortunately, the back pattern pieces didn’t fit either.

The back piece was also way too tight around my butt. Where does my butt end and legs begin? In real life, these leggings show everything! The other thing to notice is that the yellow knee piece is not centered at the knee crease. It needs to be lowered 2 inches.

Subscribe to continue reading
Become a paid subscriber to get access to the rest of this post and other exclusive content.
