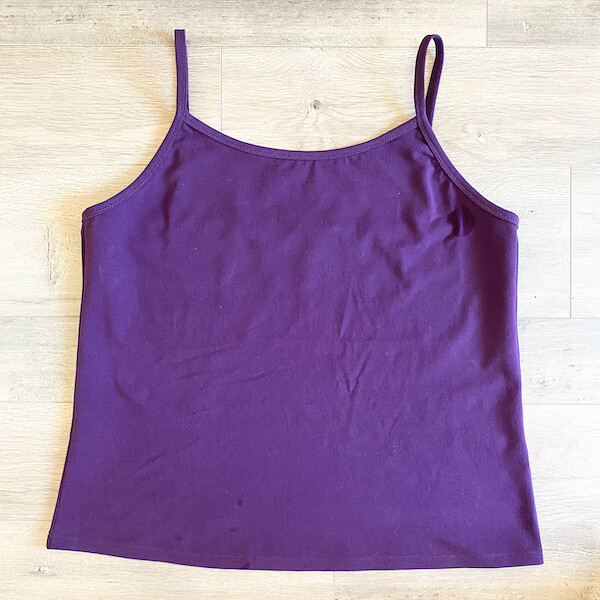
Welcome back! I’ve been talking about camisoles. My first post was about how I drafted my own camisole once I tried a recently released pattern that just didn’t work for me. This post is all about constructing the camisole. I didn’t love the instructions on the pattern I purchased, so here are my improved methods.
Making a camisole is pretty straight forward; the difficulty is with the binding and straps, so let’s start with the binding construction. I don’t have a fancy cover stitch machine, so I had to find a way to make my edges neat without being too bulky. This method would work for both an overlocker or a regular sewing machine with a zig-zag stitch.
Bias Binding
I added ⅜ inch lightweight swimsuit elastic to help stabilize the binding and straps. I do not have to worry about anything stretching out over time, and the elastic makes the binding a breeze!

For all the binding, this is how I layered everything. With the camisole facing up, I laid out my binding facing down. In other words, the right sides are facing together. Finally, on top of the binding fabric, I placed my elastic aligning all three raw edges.
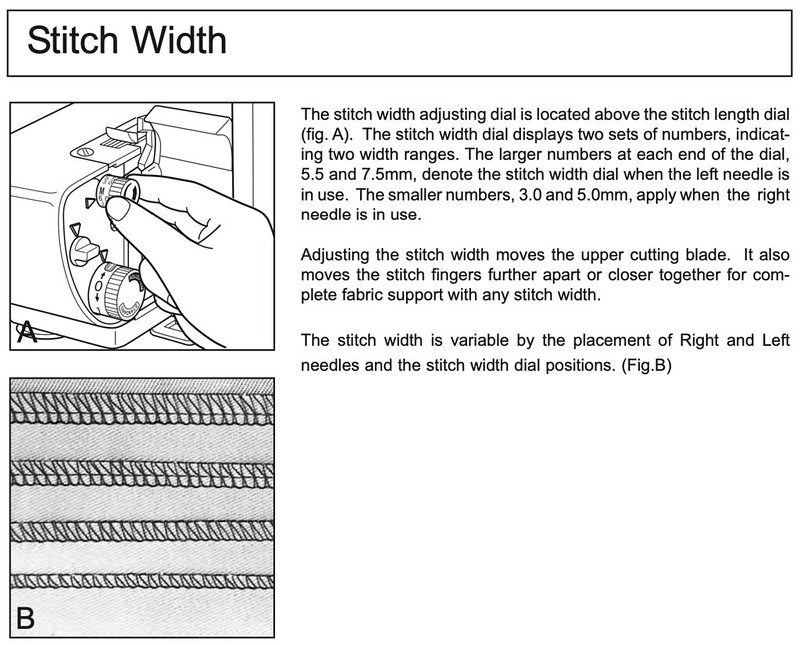
The moment of brilliance for me came when I realized I could adjust the width between my needles and the knife on my serger. The standard distance from the knife to the left needle is 5.5mm. Sorry to be jumping between inches and millimeters. At 5.5 mm (0.22 inches), that’s just shy of ¼ inches (0.25 inches). I need my stitch width to be ⅜ inches to match my swimsuit elastic. When I use the serger, I DO NOT want to cut off any fabric or elastic, and I want my final stitch width to be ⅜ inches.

Luckily, I can adjust the distance between the left needle and knife up to 7.5 mm (0.3 inches), which is very close to ⅜ inches (0.375 inches). If you can’t adjust your serger stitch width, you should do a zig-zag stitch along the inside edge of the swimsuit elastic. It is important to keep the ⅜ inch seam allowance.

I went through a lot of silly mistakes before I realized how to do it right. My first mistake (bottom example on the image above), I used my serger like I normally would set at 5.5mm, and I cut off ⅛ inch and had ¼ inch seam allowance left over. This isn’t totally wrong, but now the width of my binding is off. My binding was cut at 1 ¼ inch (⅜ × 3 = 1 ⅛ with ⅛ added for the turn of cloth bulk). If you want to cut off that ⅛ inch and use a ¼ inch binding, then your binding should be 1 inch (⅜ + ¼ + ¼ = ⅞ plus ⅛ added for the turn of cloth bulk). The first ⅜ accommodates the initial width of the elastic and is trimmed to ¼ by your serger if the stitch width is set to 5.5mm. The binding is folded over to cover the raw edge, ¼ inches. And finally, the binding is folded to the inside to cover the stitches, ¼ inches. Finally, I add ⅛ inches to accommodate the bulk of folding the binding around to the back. If you forget to adjust your serger or you can’t adjust the stitch width, then hopefully, these measurements will help. I found it super annoying trying to trim my binding elastic by ¼ inches after the fact once it was already attached to my camisole.
My second mistake (middle example on the above image), I moved my fabric so that I would trim nothing off, but then I had a flap of elastic along the inside edge because my stitch width was only ¼ inches. This really didn’t work because now I had to fold the elastic along with the binding. The elastic does not like to be folded width-wise.
Once I realized I could keep the seam allowance to ⅜ inches without cutting elastic or fabric, I was good to go. I adjusted my serger to 7.5mm, covering the entire width of the elastic, and I do NOT CUT OFF fabric along the raw edge!
After the binding and elastic are attached, I simply fold over my binding to the wrong side and topstitch using a zig-zag stitch, catching the fabric in the back. Because that edge contains the swimsuit elastic, it is super sturdy, and it is easy to fold the fabric around it. You don’t need to press the seam out. Just flip it over, hold it together with clips or pins, and start topstitching. You’ll see later on that I use a lot of pins. The extra time it takes to place pins is balanced by the fact that no pressing is needed.
I set my zig-zag stitch a little bigger than I normally would, the stitch width was set to 3.5mm, and the stitch length was set to 2mm. Just for comparison, when I topstitch neckbands on t-shirts, my stitch width is 2.5mm, and stitch length is 1.6mm.

The MADEIT pattern has you using either fold over elastic or a double folded with your own knit fabric. If you used fold-over elastic, your edge is only 3 layers thick (elastic, camisole, elastic). The second option was doing a double fold of your own binding, but that’s going to be super bulky, and frankly, it’s unnecessary. Now your edge is 6 ridiculous layers thick (double folded binding (2 layers), camisole, elastic, double folded binding (2 layers). Twice as thick as the fold-over elastic. Nope. That’s crazy.
The raw edges on knits don’t fray, so having the raw edge on the inside is no big deal. Besides, if you are really careful, the zig-zag topstitch will catch the raw edge on the inside perfectly to hold it in place. I didn’t want to waste my time trying to do a double fold to conceal the inside raw edge.
If this sort of thing bothers you, then, by all means, ignore me. I’m just not that fussy about a raw knit edge on the inside of my garment if it is sewn neatly. You hardly notice it. I prefer flatter binding with a raw edge than bulky binding that may look “cleaner.” By not doing a double fold for my inside binding, my edge is 5 layers thick. Reducing by one layer makes all the difference in the world to me.

Subscribe to continue reading
Become a paid subscriber to get access to the rest of this post and other exclusive content.
