As much as I love wearing the same things over and over again, I really need to provide more style to my wardrobe. Last month I challenged myself with sewing a pair of Ginger skinny jeans, so this month I am tackling the super popular True Bias Lander pant!
Size

Based on my measurements (waist 33″, hips 43″), I cut out a size 14. Remember, always go with your biggest measurement as it is easier to take garments in, rather than letting things out.
I sewed my test version in actual muslin fabric because the pattern calls for non-stretch woven fabric. I didn’t want to waste money on trying to do my initial fit with actual twill fabric. I can always do a baste fit with my actual pant fabric before sewing to verify my alterations.
Test Pair #1
Take In Side Seam
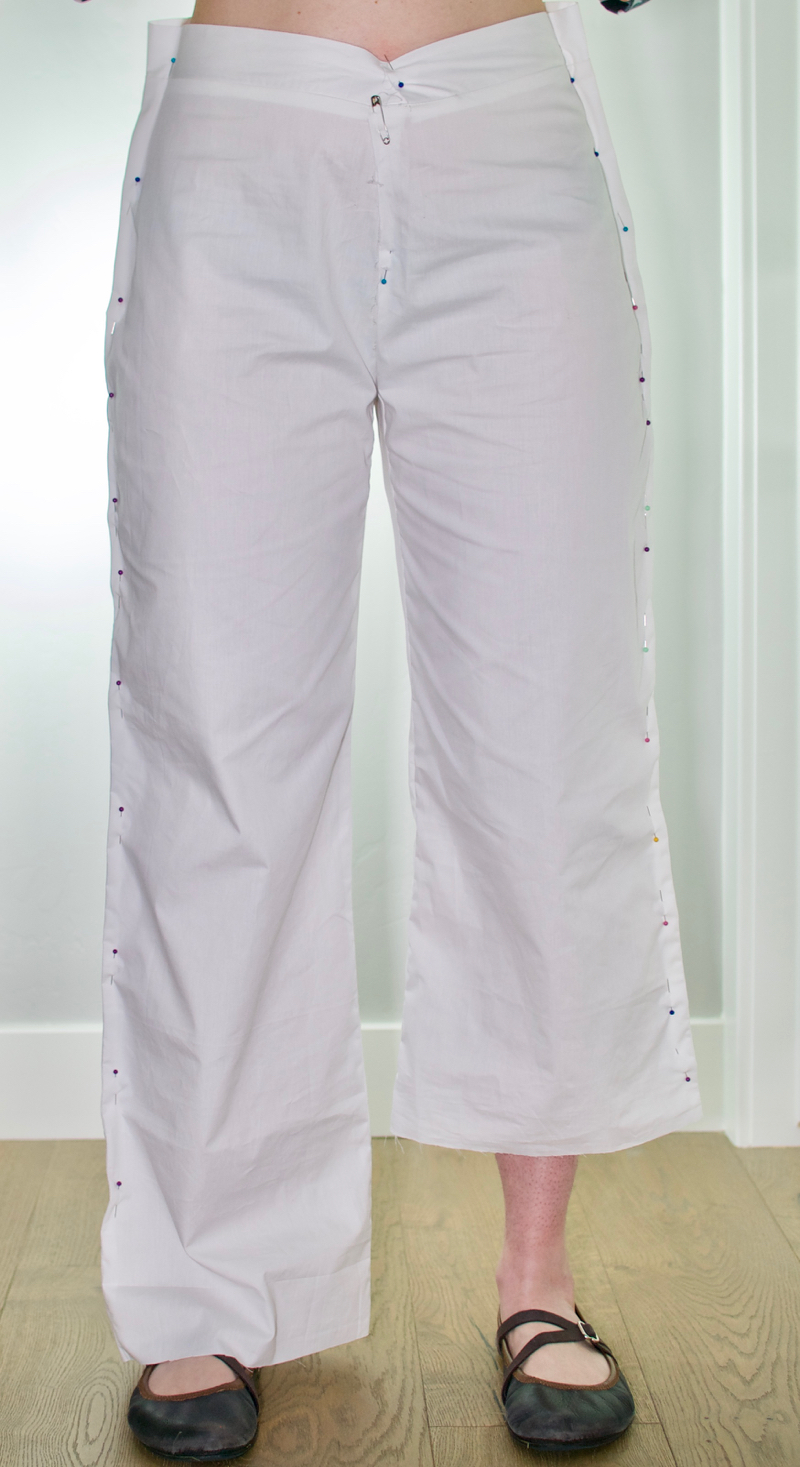
I didn’t have that many adjustments I needed to make. However, the few adjustments needed were BIG. Full disclosure, I did not read the instructions well enough to notice that the pattern included a 1-inch seam allowance for the side seams, I sewed my pants together with a ½” seam allowance. Hilariously this worked out well for me because, by dumb luck, I came to the right conclusion that I needed to take in the side seam by the extra amount. If you look at my photo, you can see where I had to pin the pants to make them fit. The pins in the center are just holding the center front seam together. I did not need to make any adjustments to the center front. If I had used the 1-inch seam allowance as the pattern suggested, the pants would have fit nearly perfectly. I only would have had to take in the side waist and graded it to the original pattern.
In other words, the ½” that I removed from the side seams is the ½” that NEEDS to be removed anyways to make the seam allowance ½” instead of the original 1″.
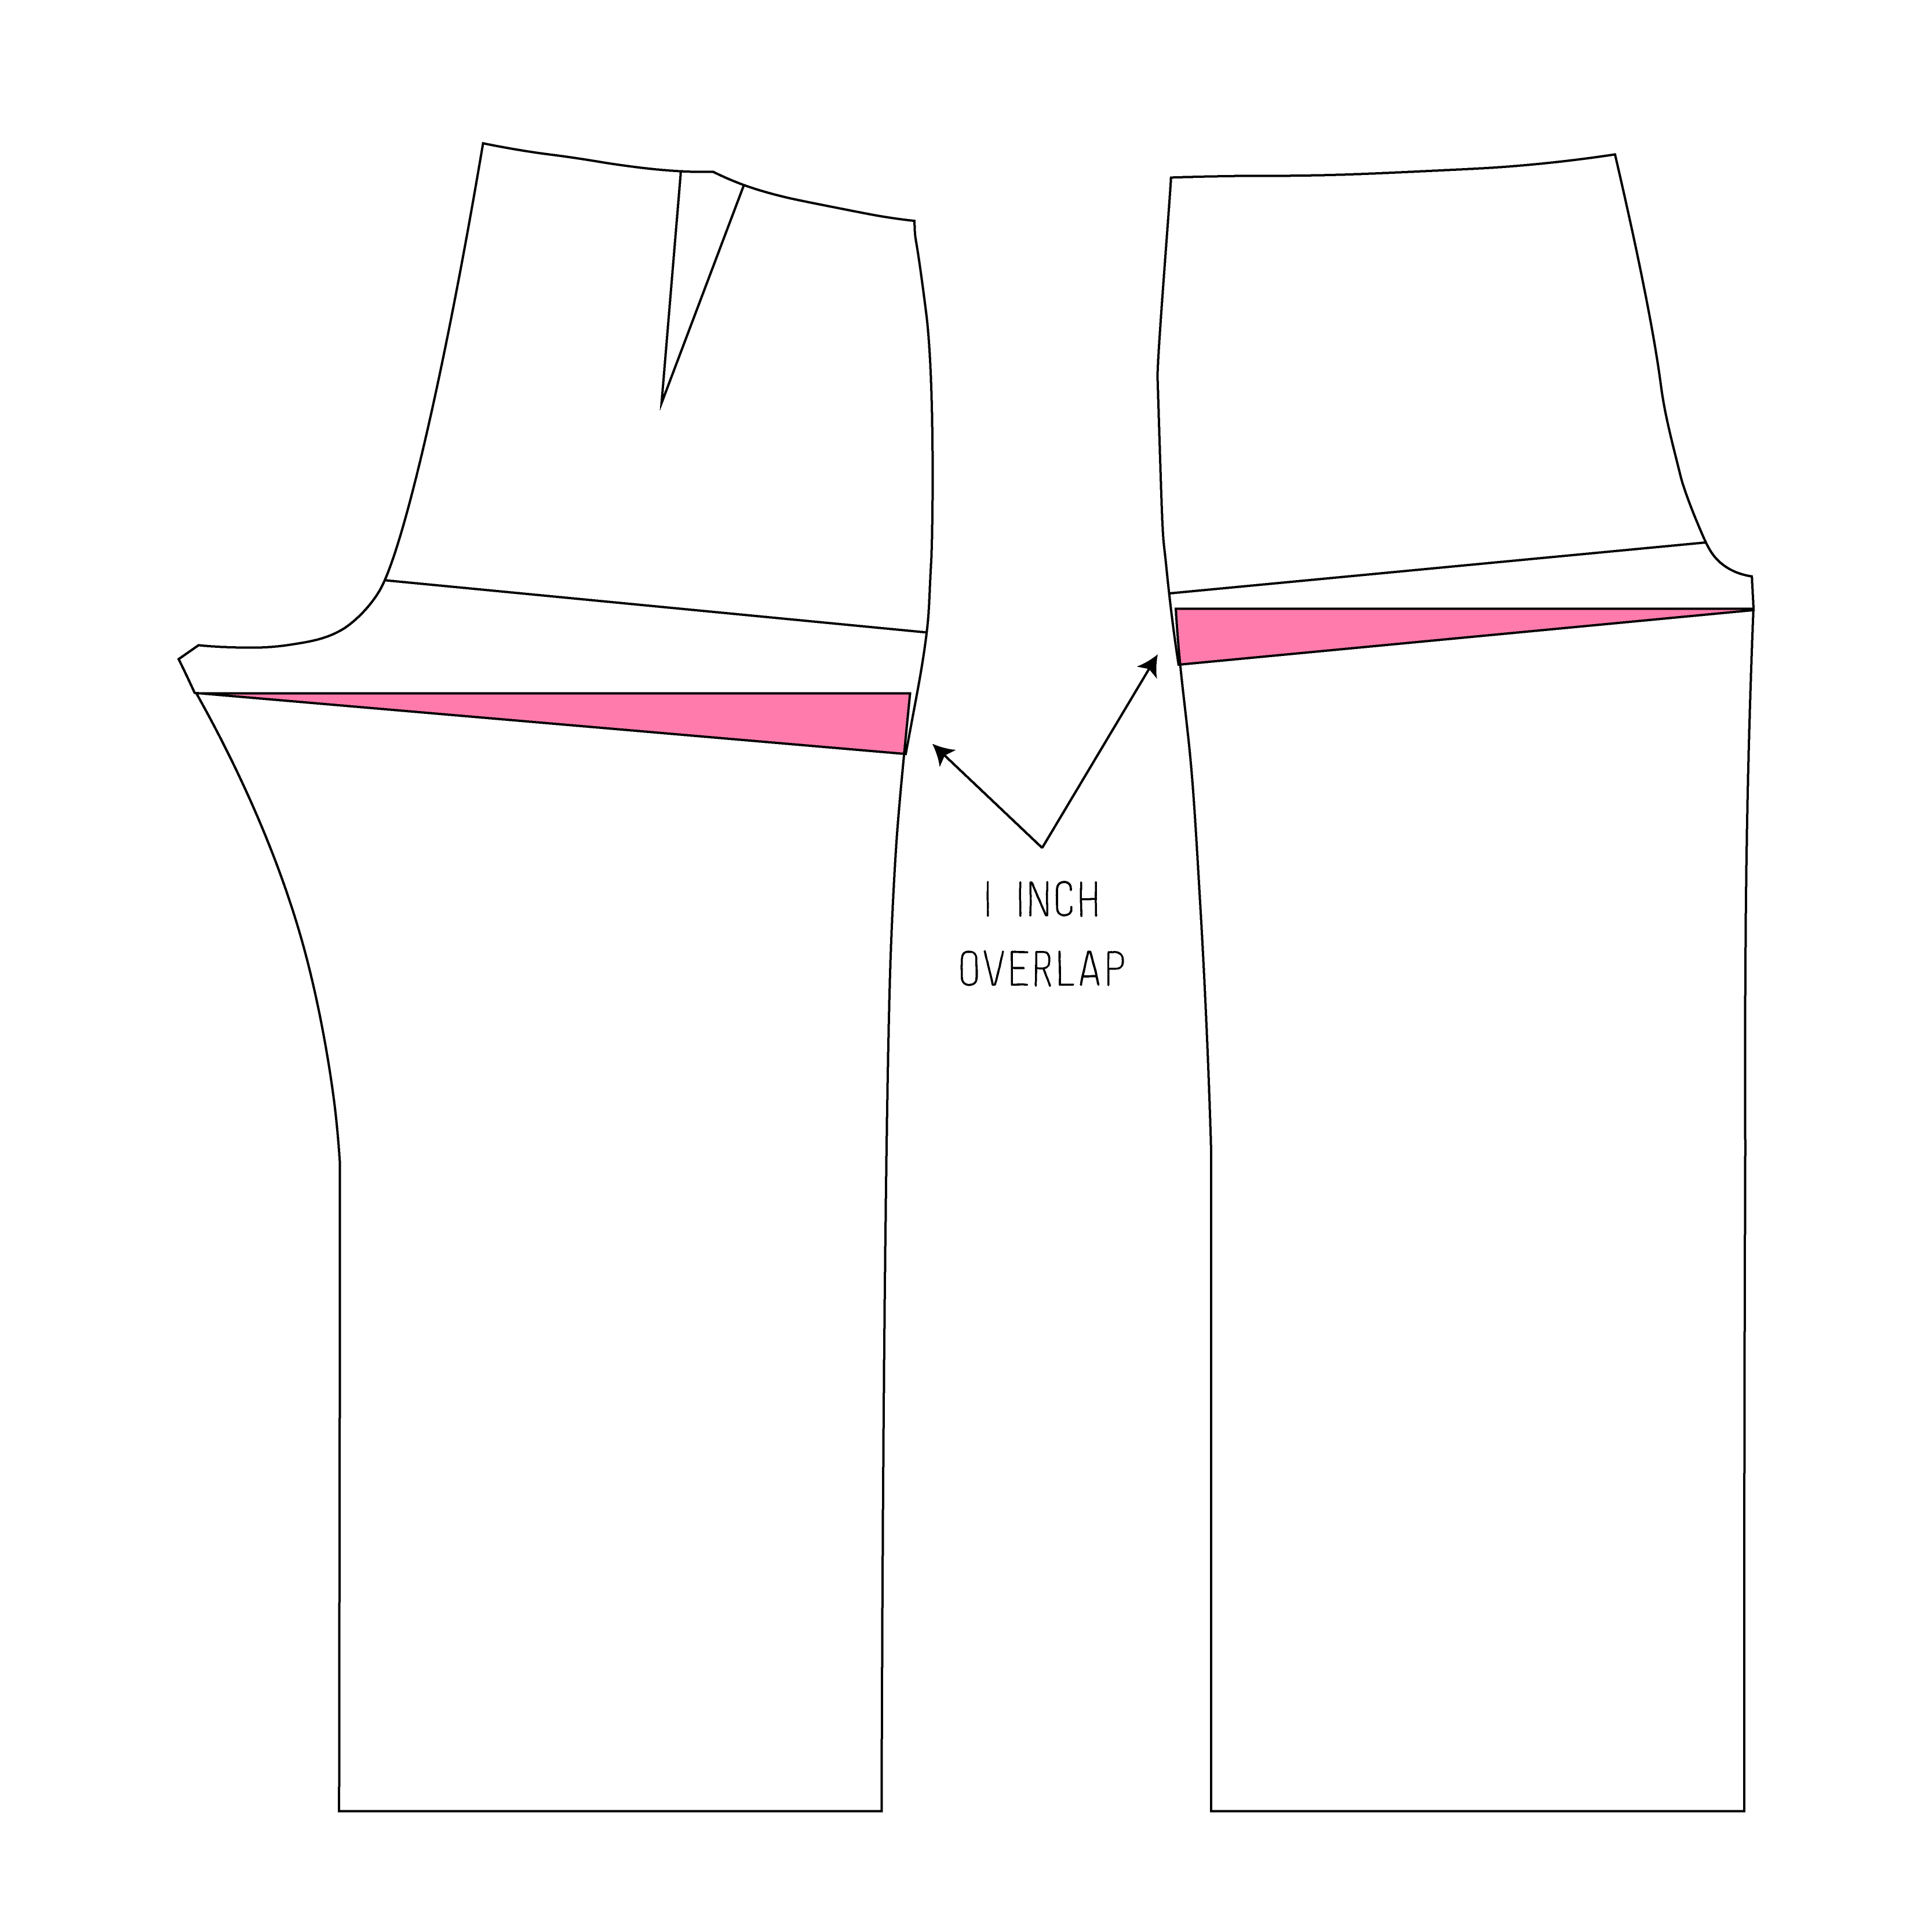
Knock Knee Leg Adjustment
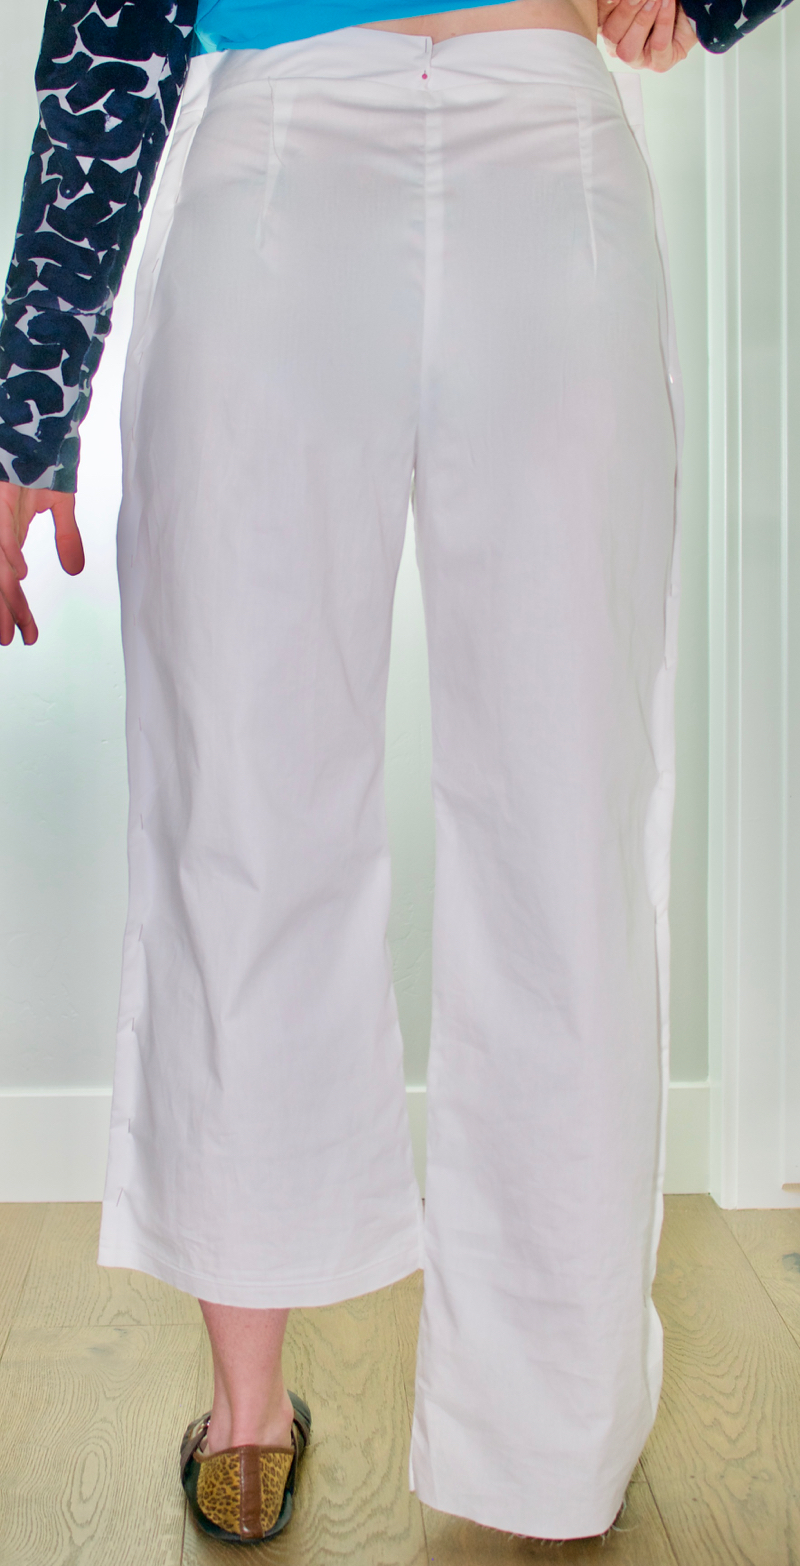
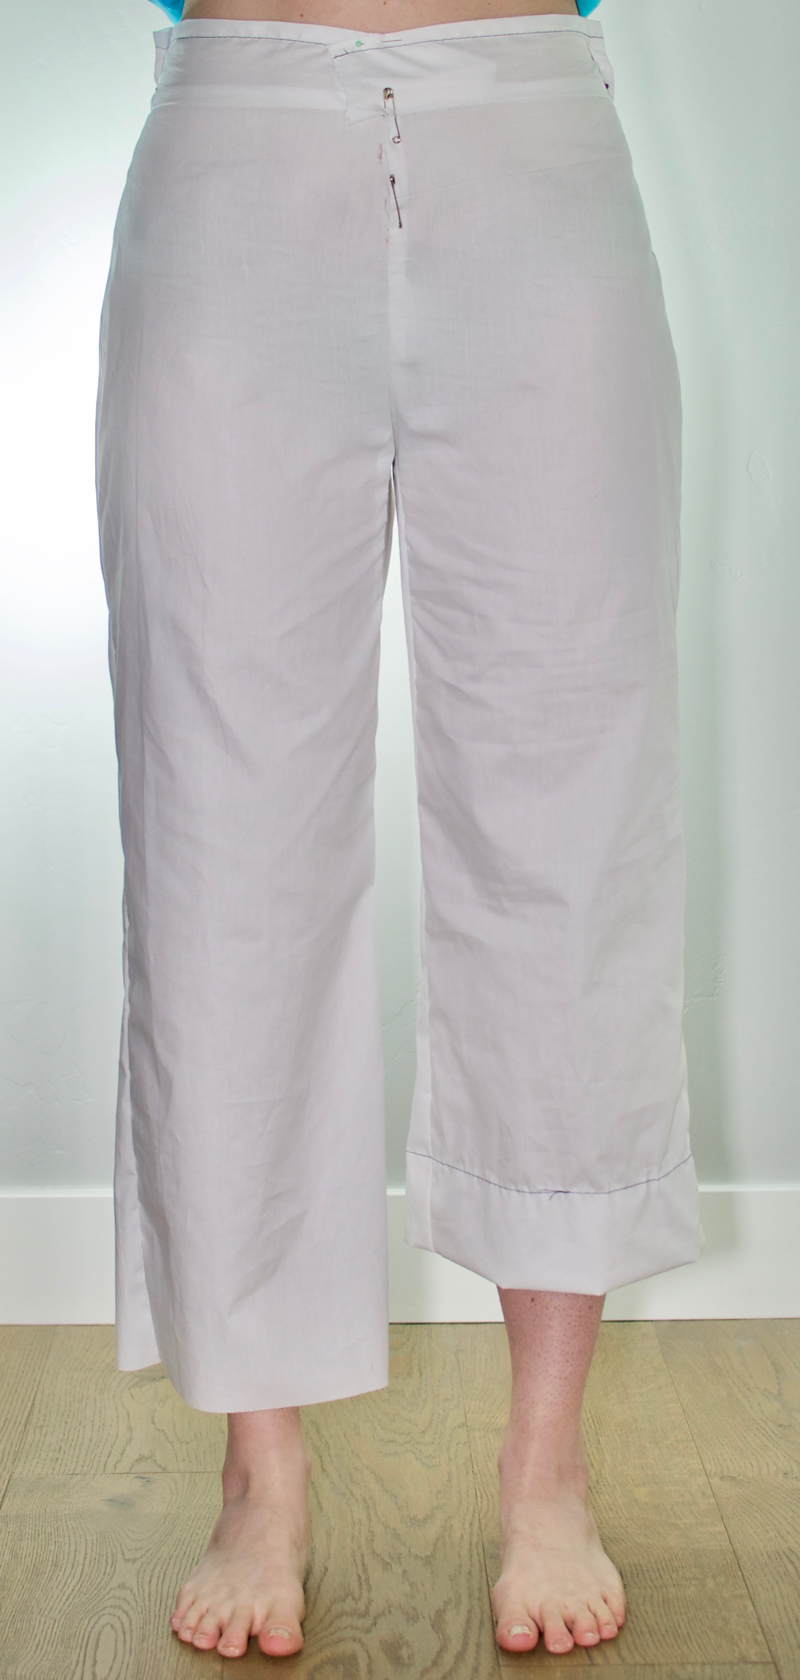
After realizing my dumb mistake of only using a ½” seam allowance, I feel better about my second alteration. I was worried that by taking out all that extra fabric along the side seam, I had inadvertently unbalanced the drape of the leg. Nope. So after my Ginger jeans adventures, I’m beginning to realize I may need to make more knock knee adjustments with my pants to get the legs to look right. Can you see in the pictures how my leg is not centered in the pant? If I pinch up on the outer leg to mimic a knock-knee leg adjustment, can you now see how my leg becomes centered in the pant?
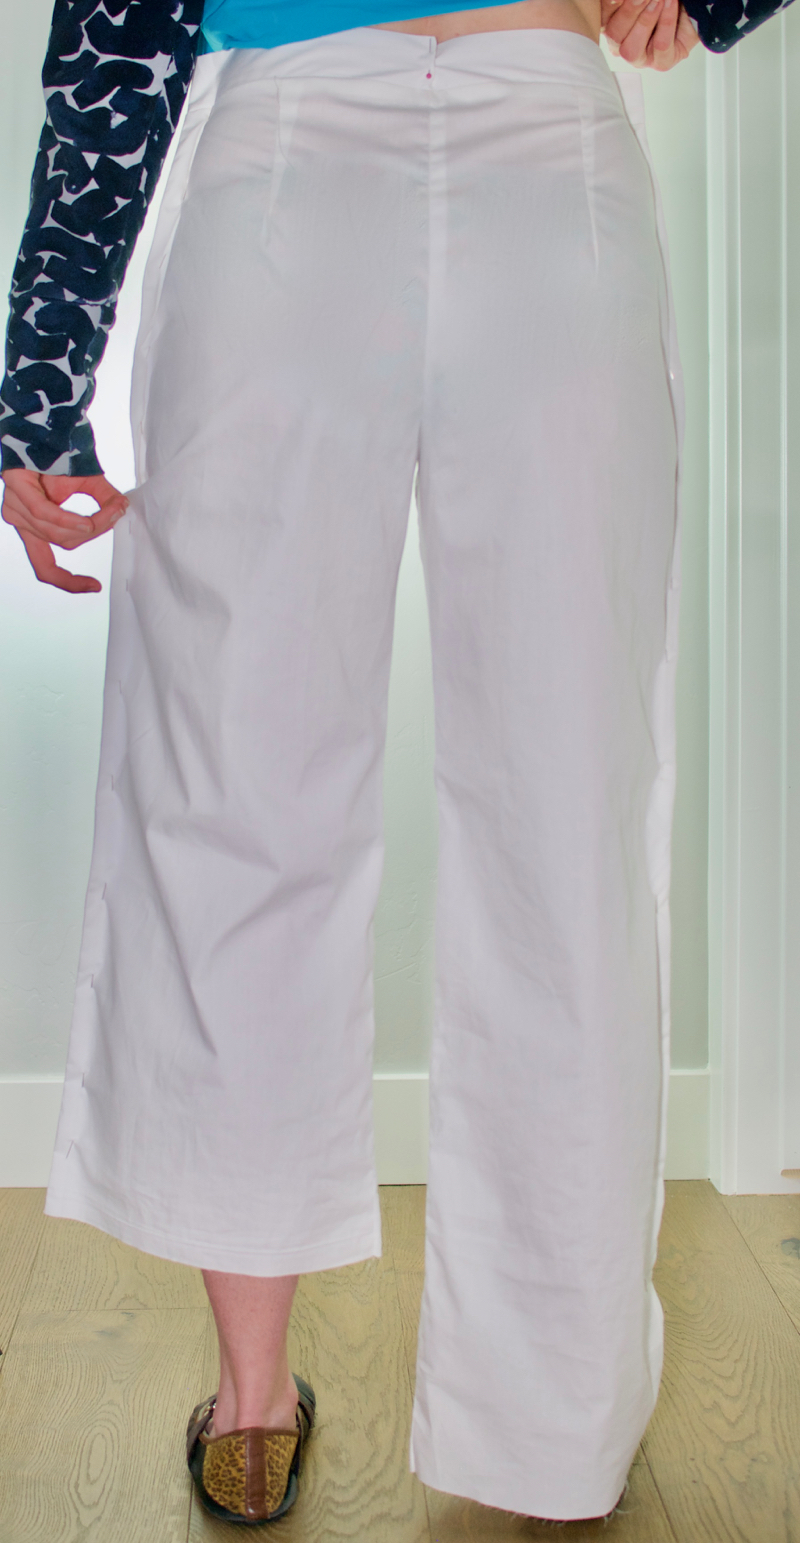
Much like my jeans, I had to be pretty extreme and overlap the fabric by a whole inch!
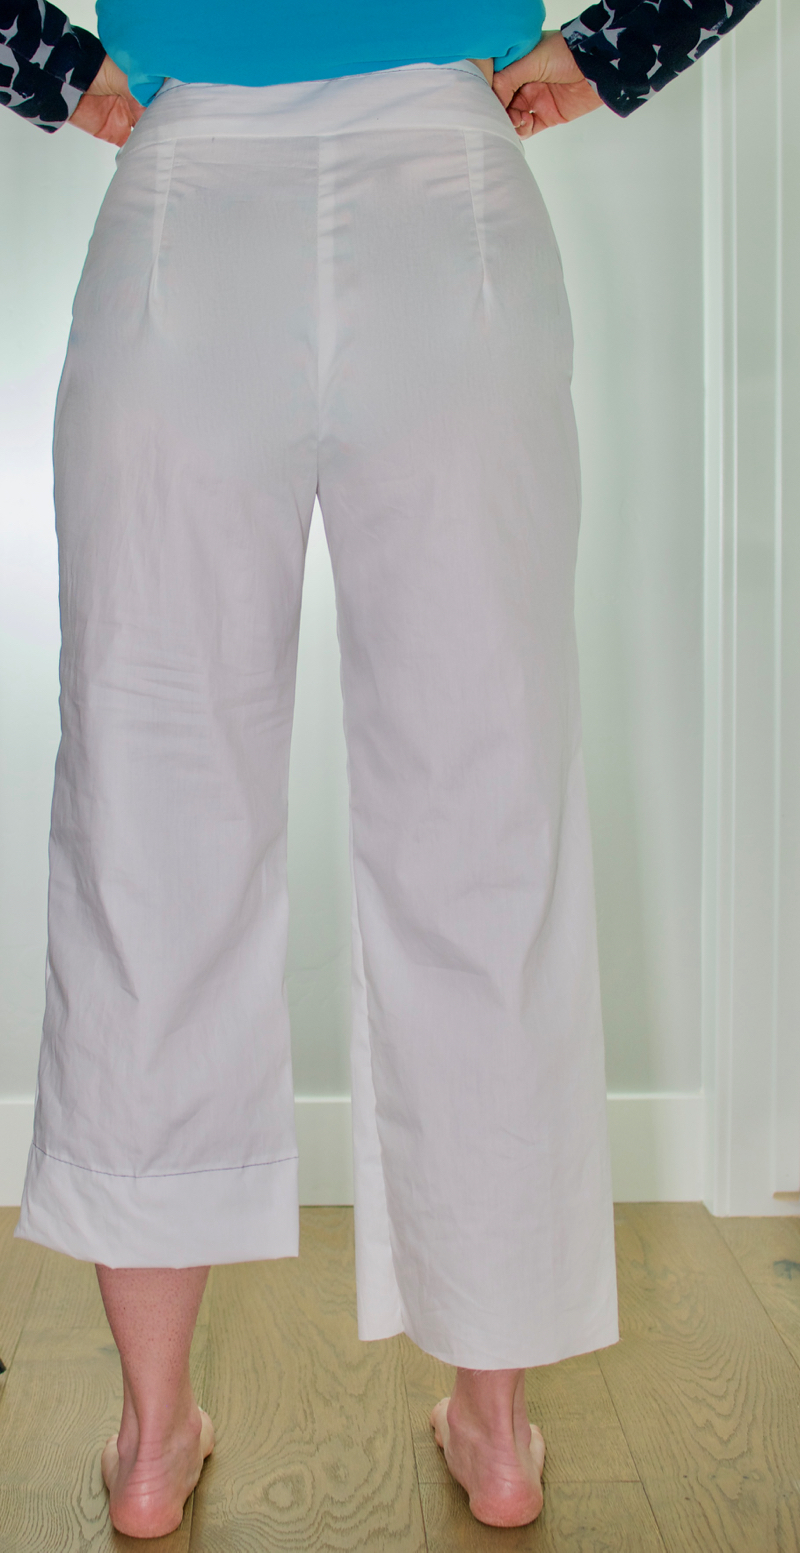
Test Pair #2
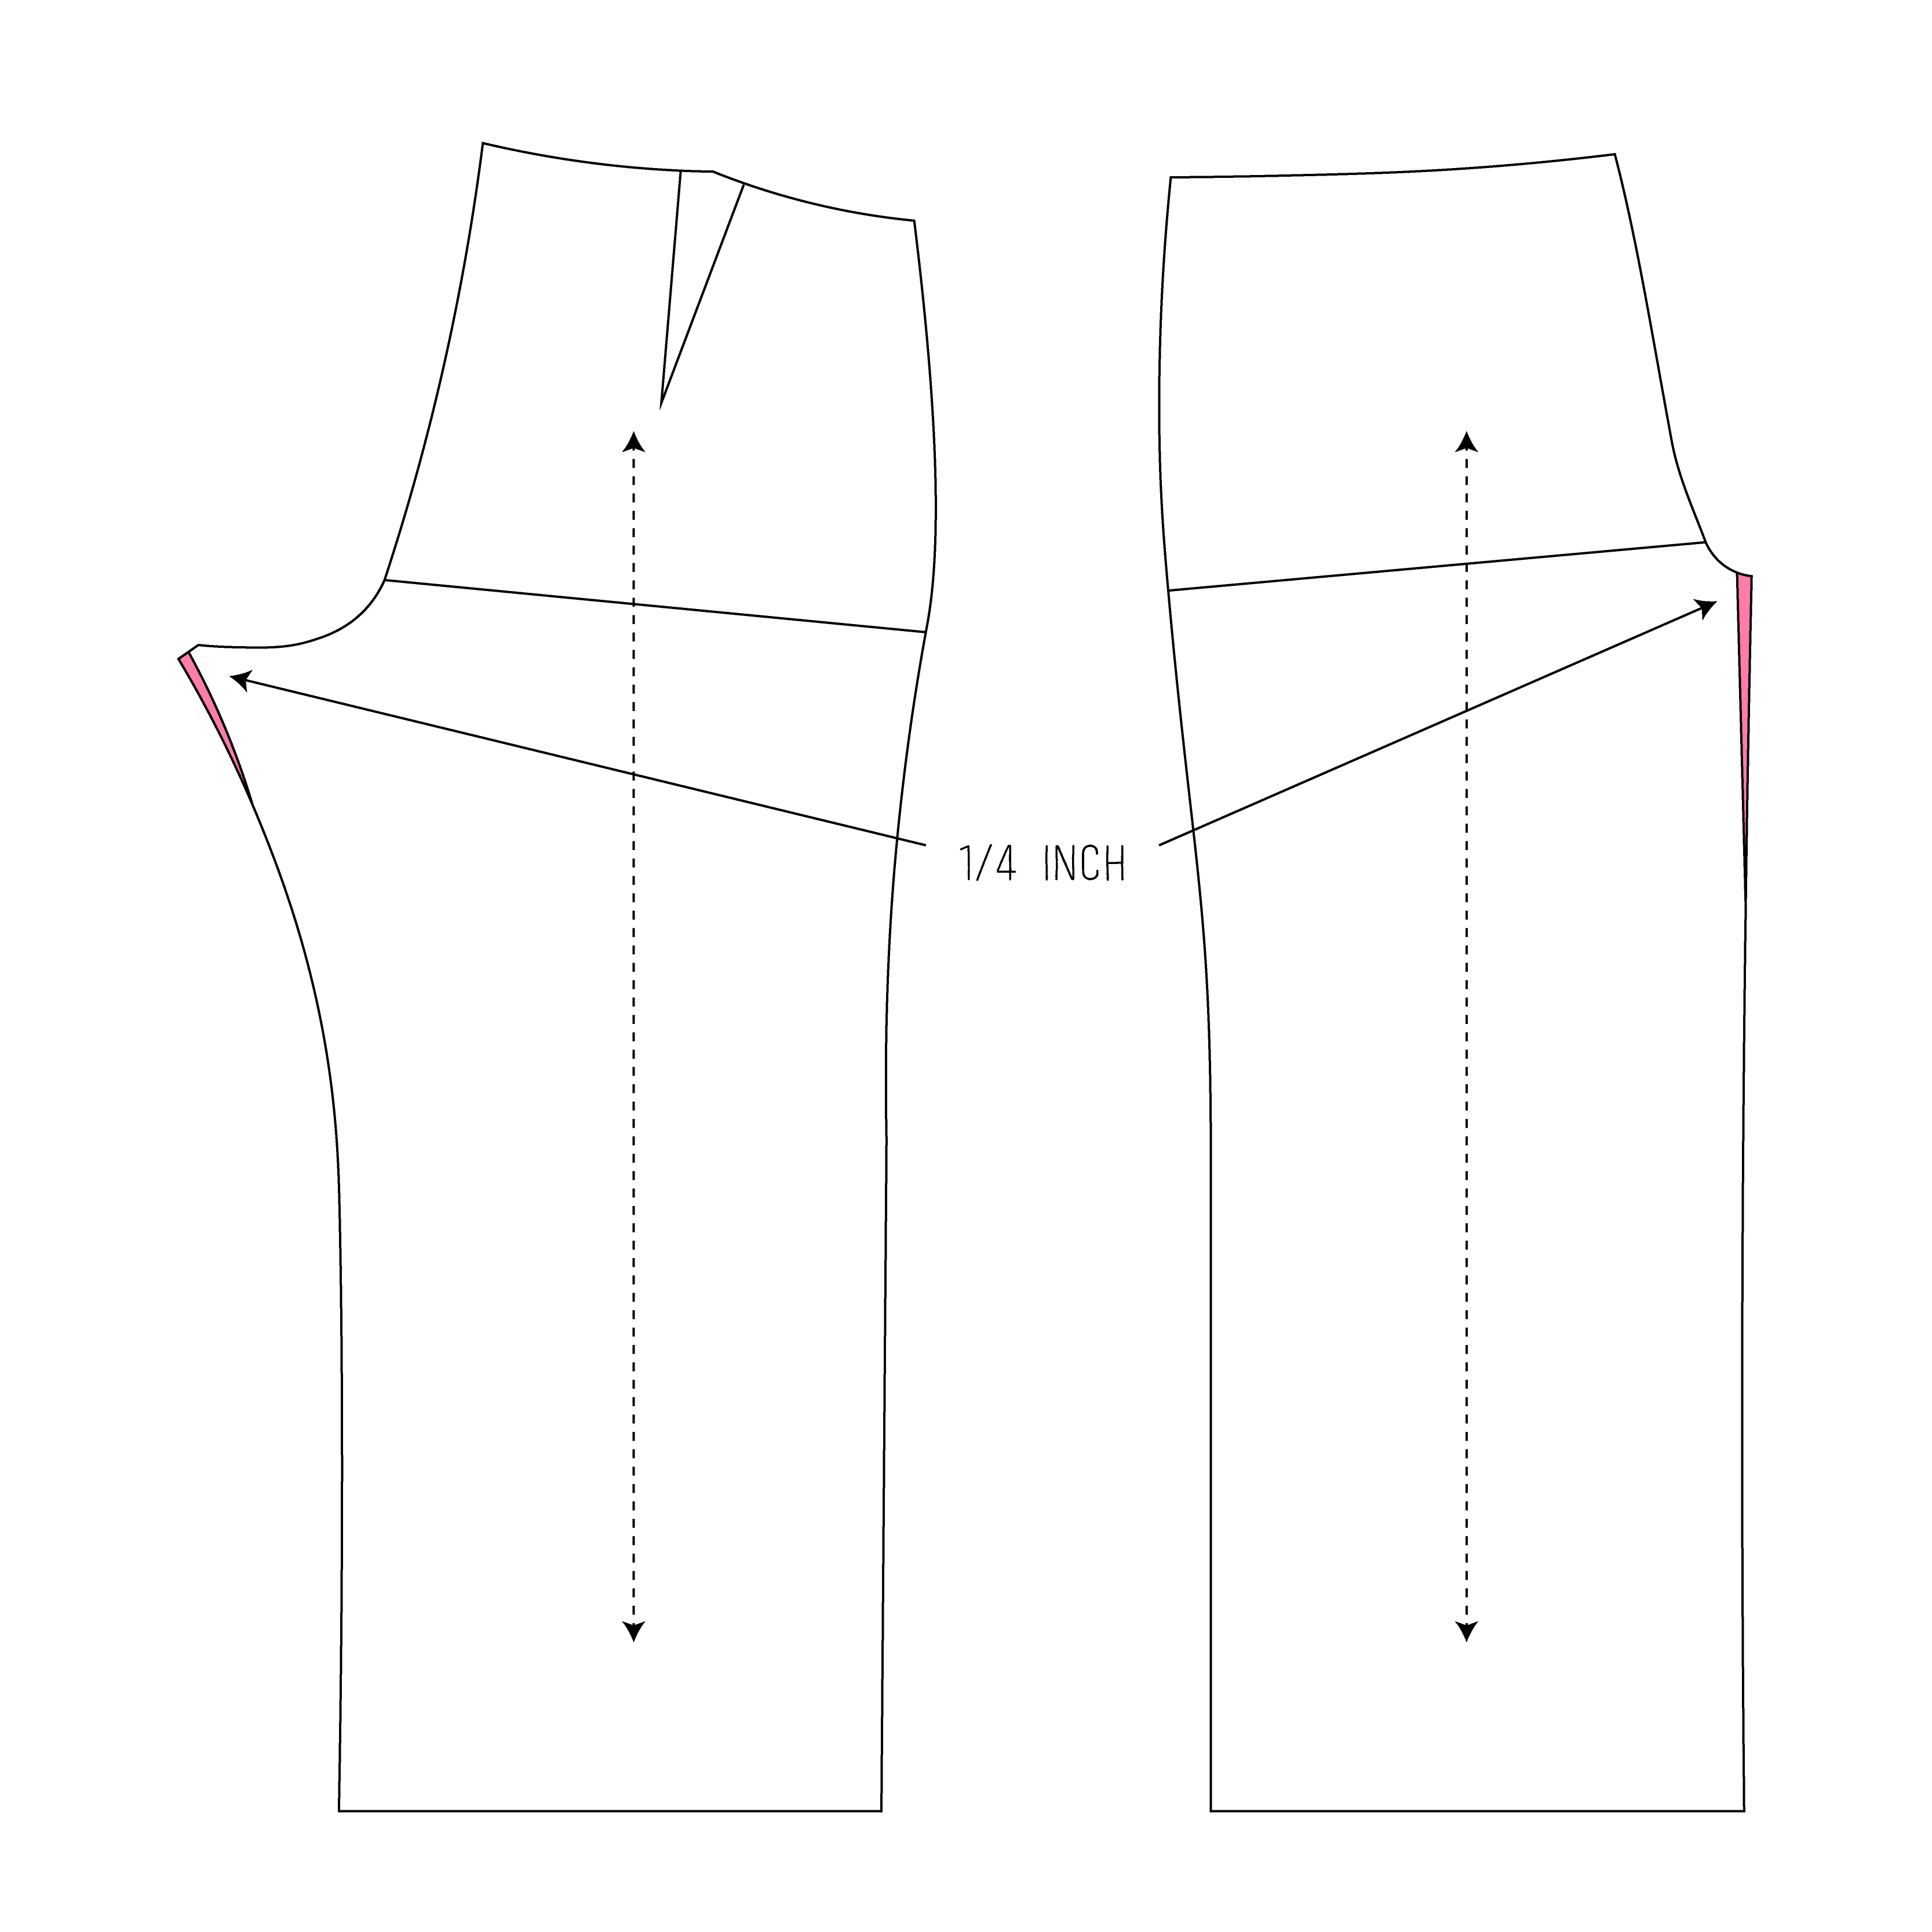
Thin Thigh Adjustment
Remember after I made all those adjustments on my jeans, I needed to make a thin thigh adjustment afterwards. Same alteration needed to be made with this pattern, but not much. I took ¼” from the front and back pieces. Just gives it a little better fit right below the crotch.
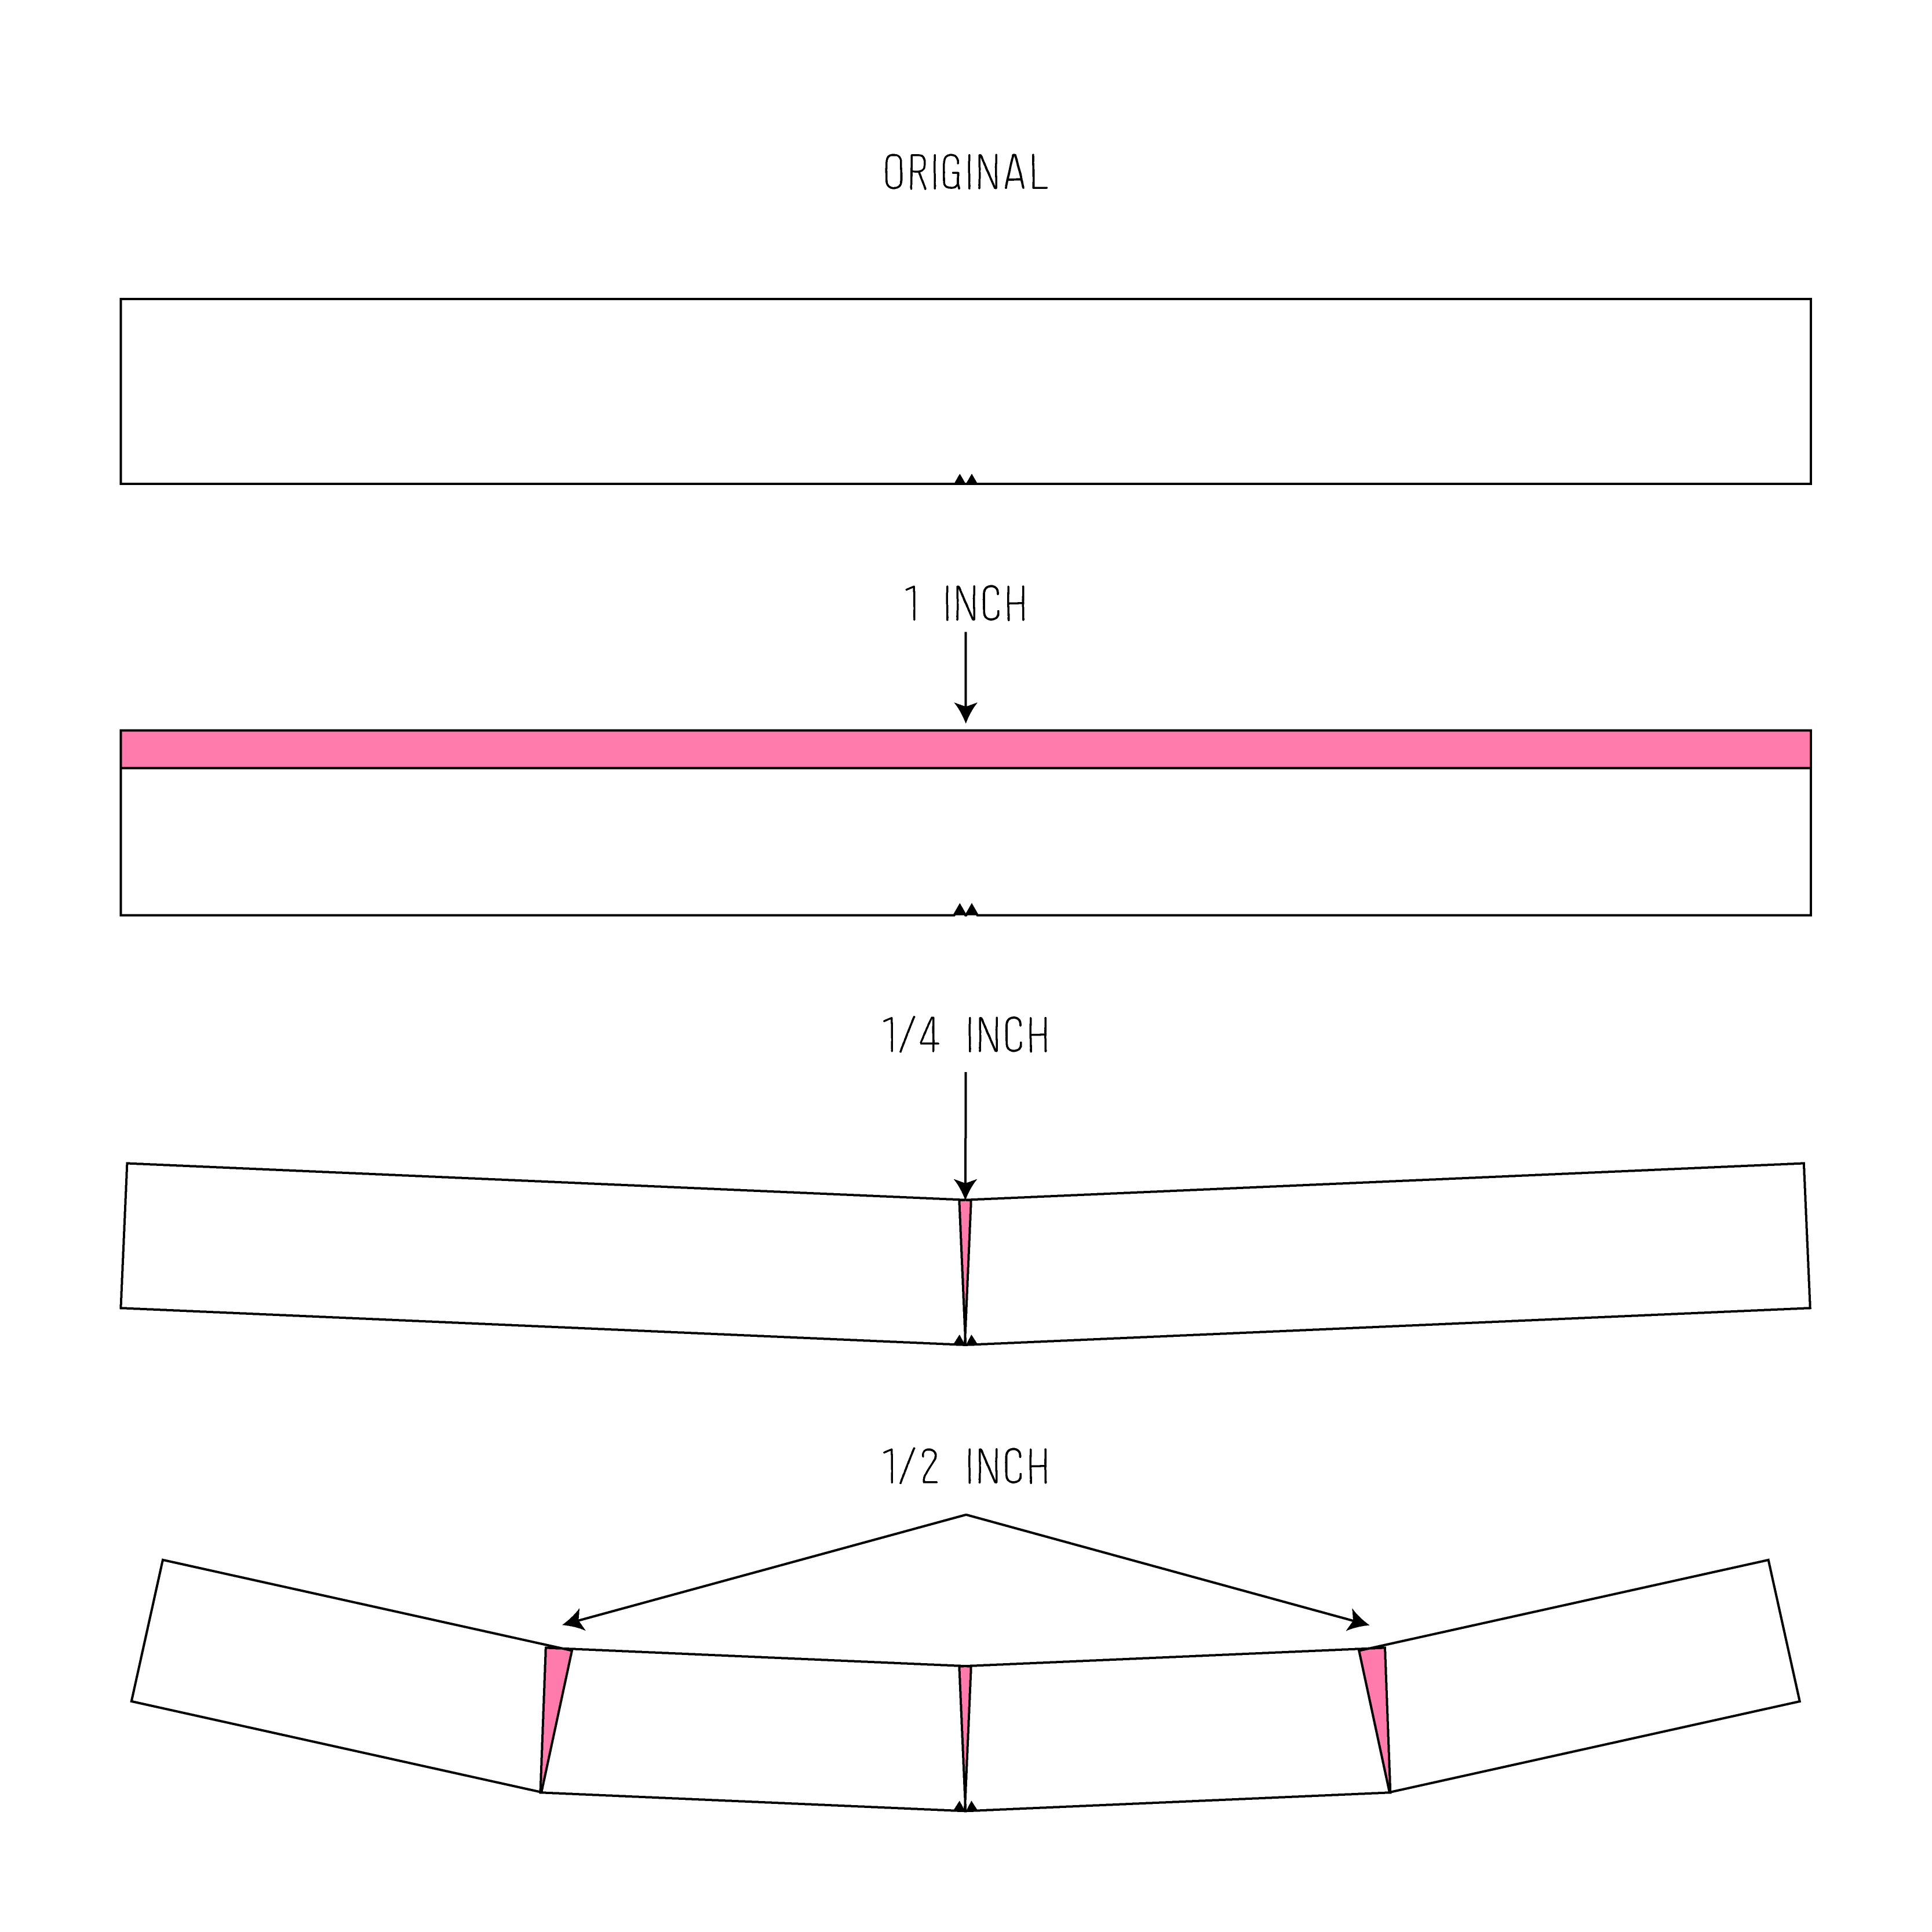
Curve Waistband
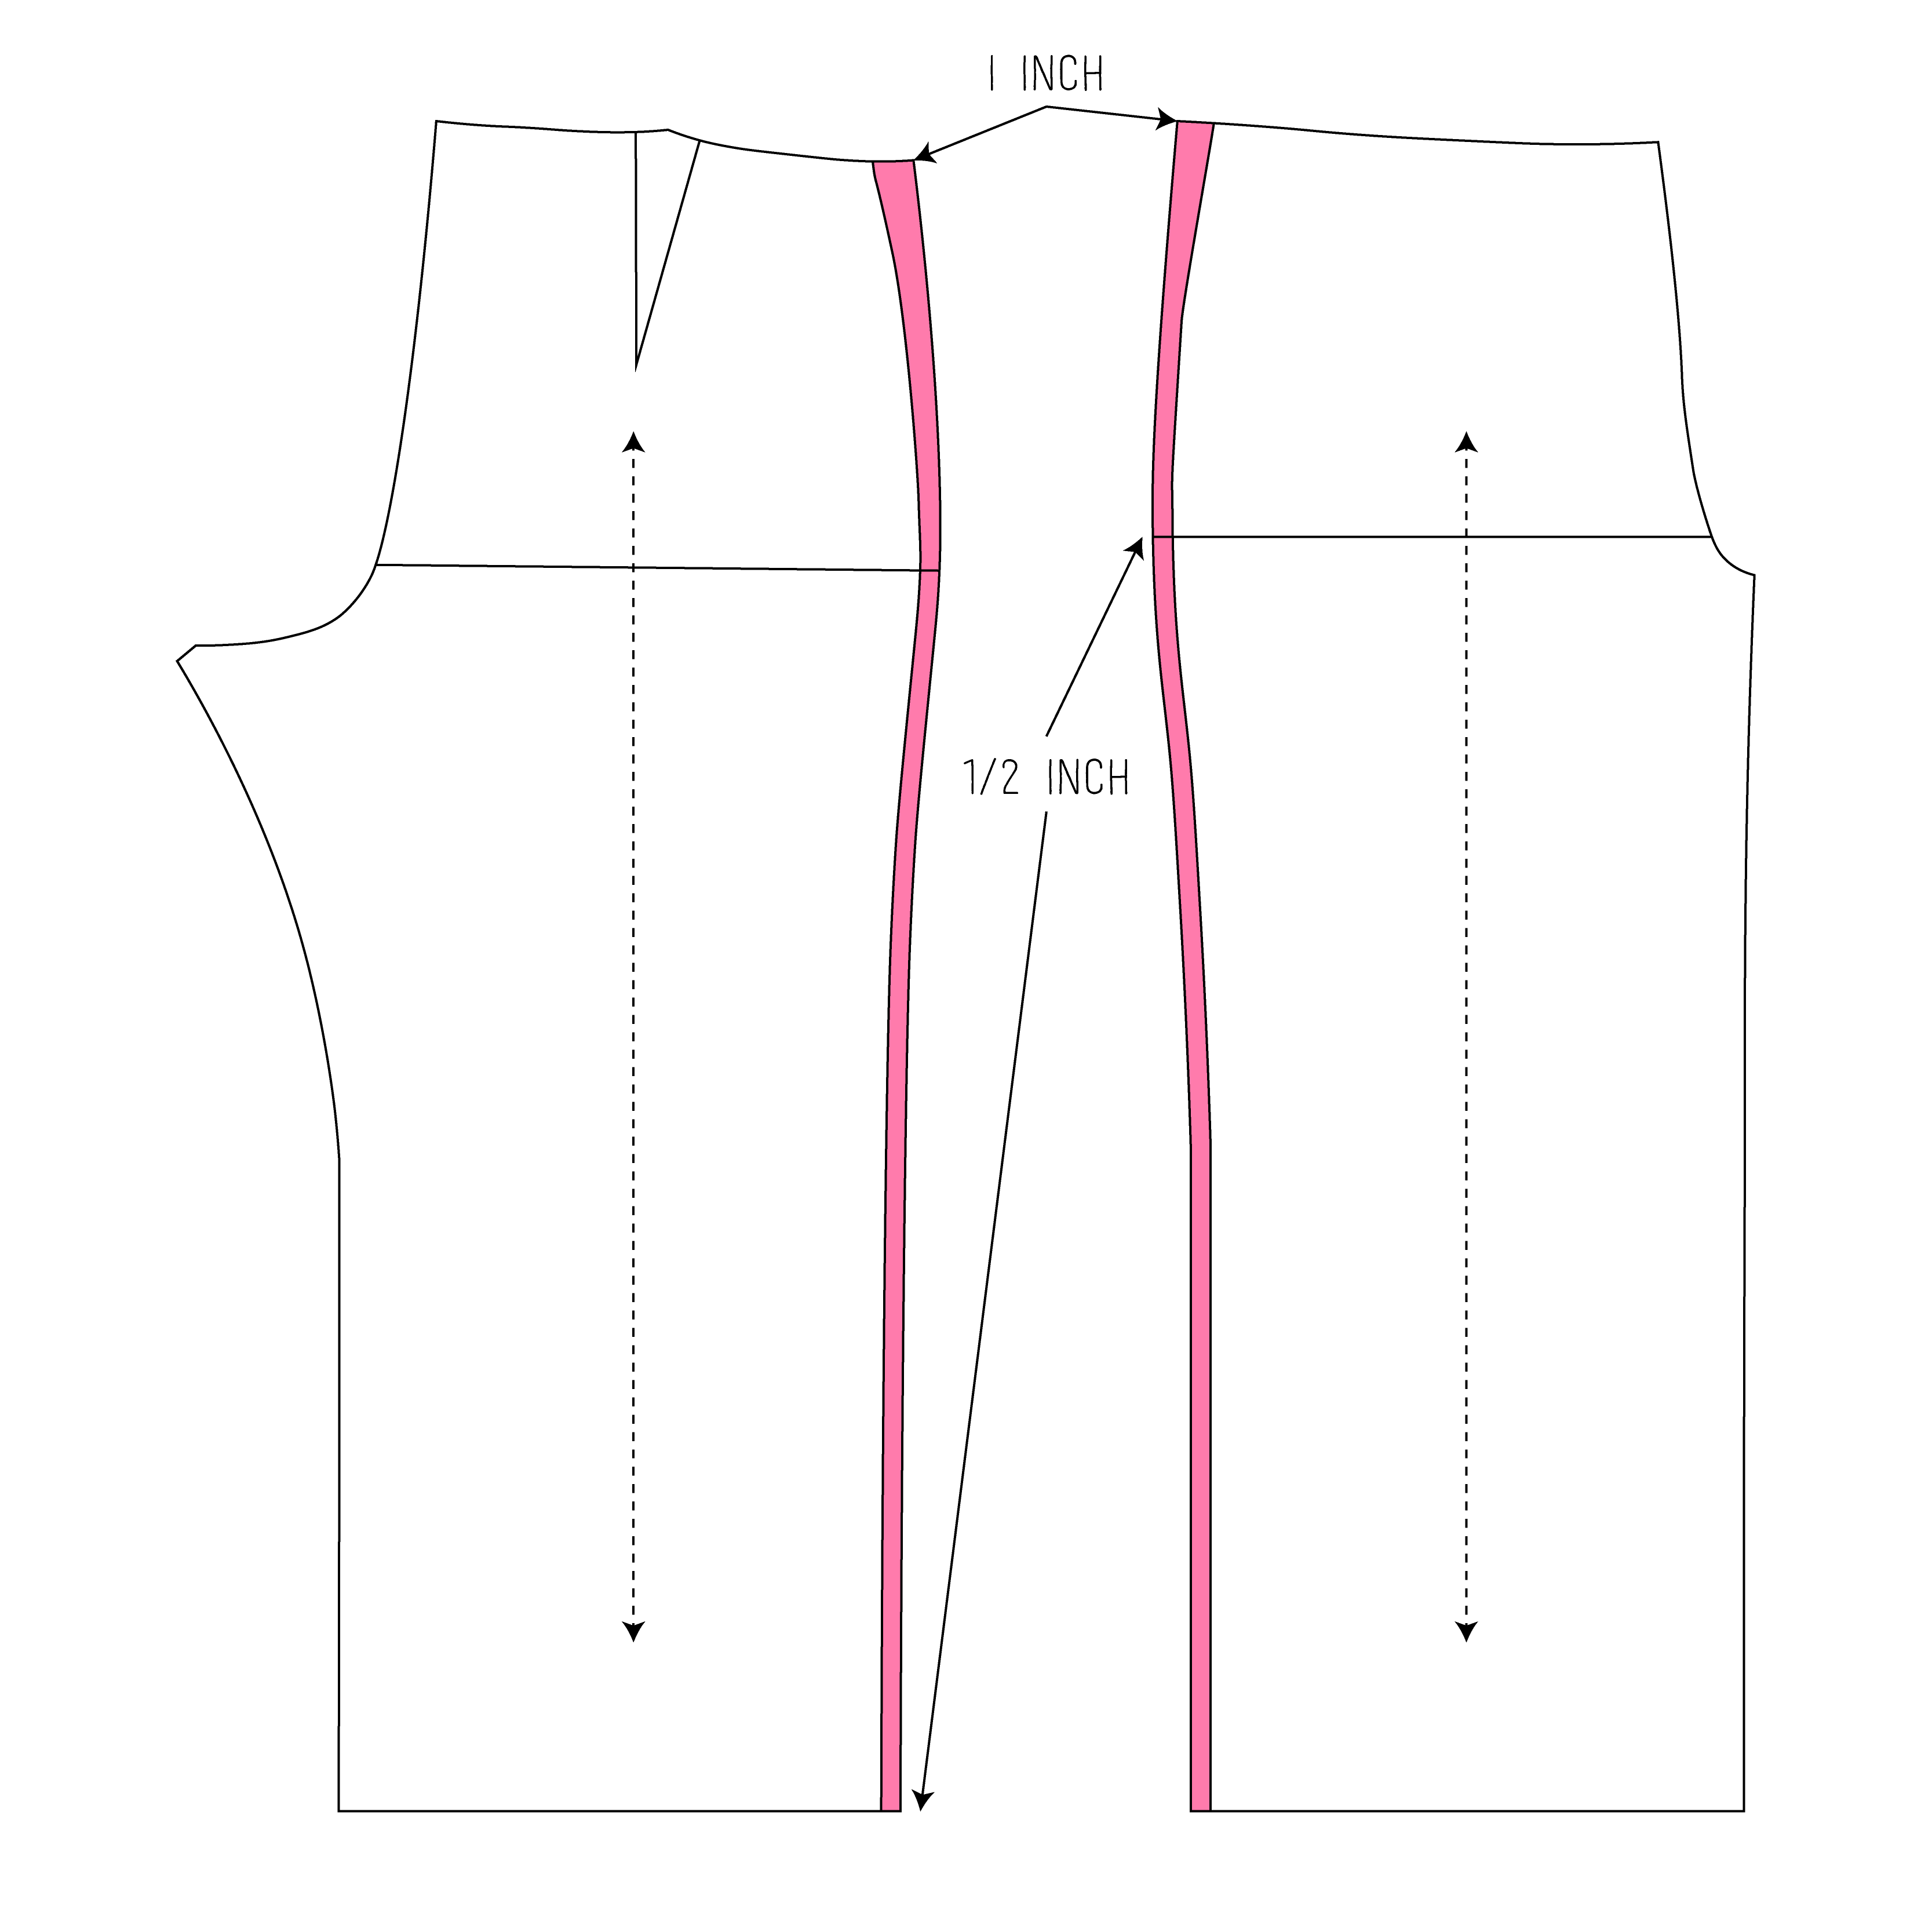
I also had to curve the waistband. There’s no WAY I could wear a straight waistband. Because the waistband needs to be curved, I’ll have to cut out two waistbands and sew them together. Therefore, I removed 1 inch from the height of the waistband, since the original pattern had you just fold the waistband in half. Second I overlapped along the center back seam by ¼” and overlapped at both side seams by ½”. I don’t care if my waistband is longer than the pants, so that’s why I didn’t shorten the width of the waistband. I can always cut off the excess later.
Length
I’m still playing around with length as I want to be able to wear these pants with my lovely, slouchy, mid-calf leather boots. I don’t think I’ll need to lengthen the pants at all. I’m almost certain I’ll use View B, which is described as ankle length, but is more mid-calf length for me.
For some styling examples, check out this blog: http://www.seasons-and-salt.com/everlanes-take-wide-leg-crop/
Before and After
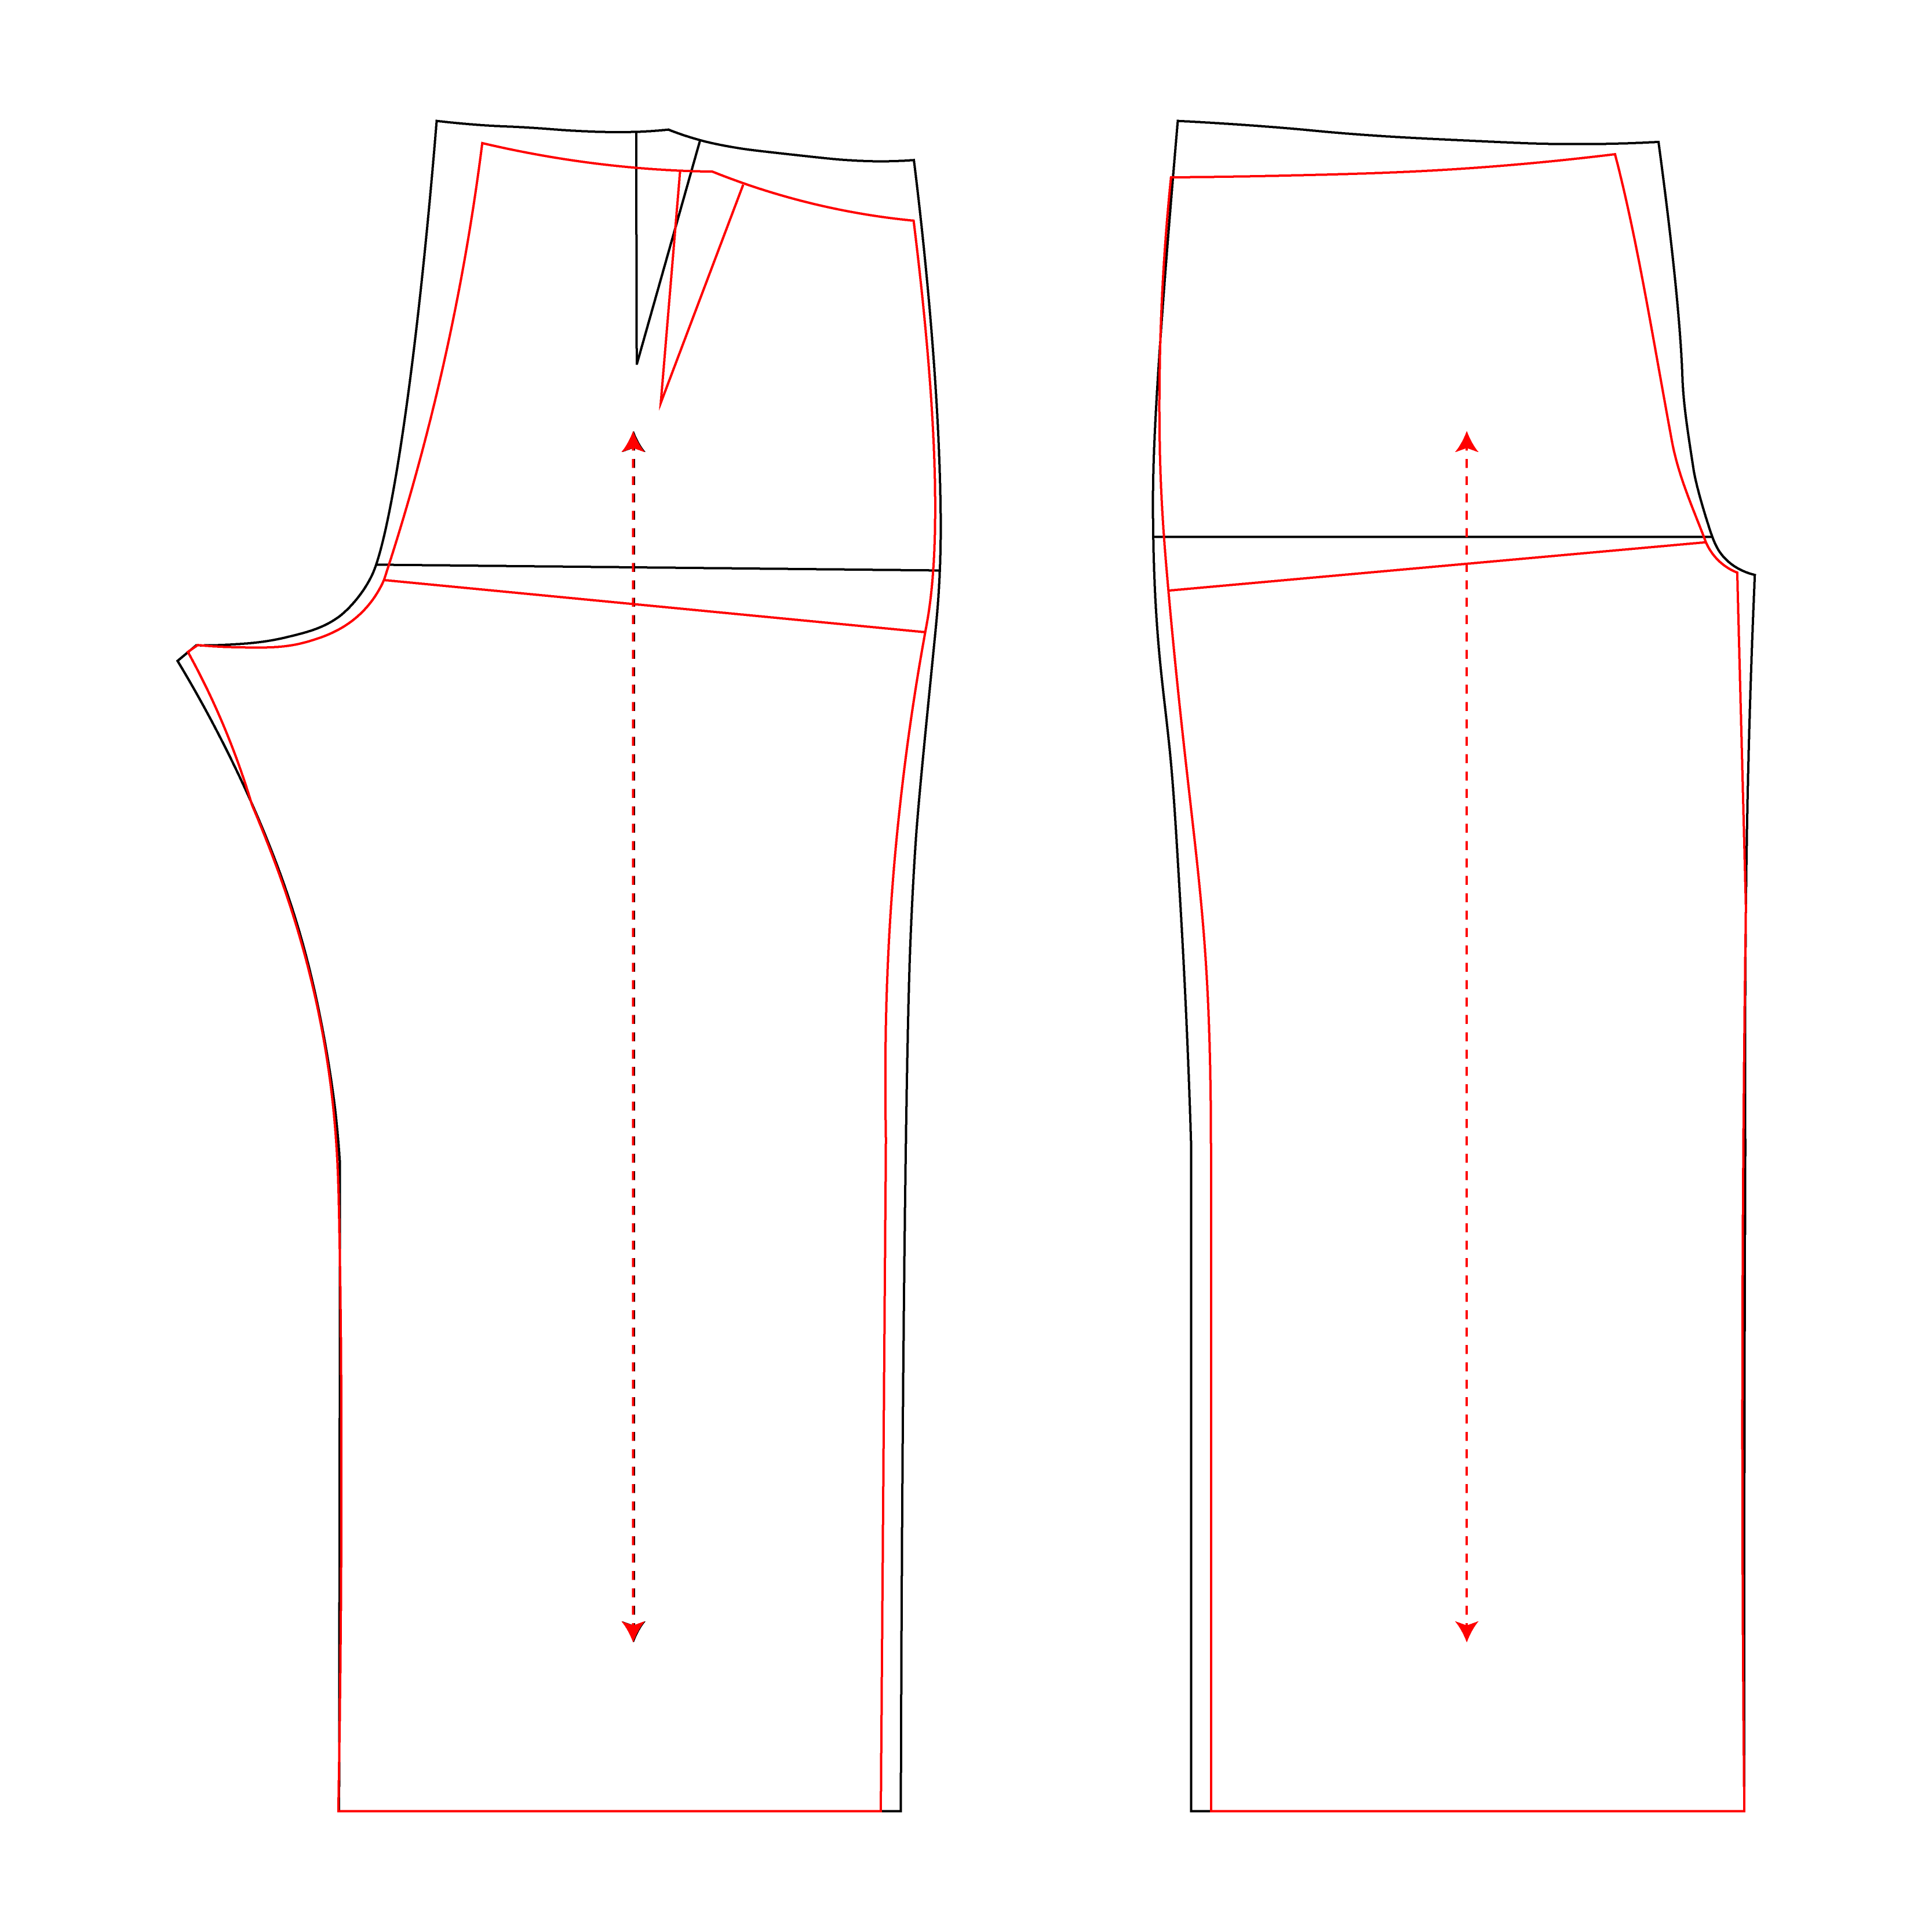
Original pattern in black, final adjustment pattern in red. By the way, how amazing is it that I don’t have my make any adjustments along the crotch curve or length? I’m stupefied at how great the pants fit. Hopefully, this post wasn’t too long, and I was able to provide some helpful tips on how to make pant alterations and to avoid the mistake of using a ½” seam allowance for the side seams instead of 1″.
Now to sew me some Lander pants!


Another great example of expert fitting and how to do it! Thank you for sharing this priceless knowledge!!! 🙂
LikeLiked by 1 person
These are great descriptions and illustrations. What software are you using for your line drawings?
LikeLiked by 1 person
I just used Adobe Illustrator to put these rough sketches together.
LikeLike
Thank you! I wanted to say this a 1000 times to you 🙂 I have bookmarked, starred, saved every one of your blog posts on pants fitting. Absolutely brilliant. I don’t have the Lander pant pattern but I see that after working your way through the Gingers you’re ready to take on any pant pattern which indicates where I should start too 🙂
LikeLiked by 1 person
The lander pant pattern is super popular because it doesn’t require sewing in a zipper or a hidden fly, but just uses buttons. The front and back pockets are also as easy as you can get. With wide legs and simple construction, I know a lot of people are choosing to make this pattern and for good reason. It looks great with denim, twill, wool, linen, corduroy, etc. I figured I would give it a try given it is so popular!
LikeLike