
Like my dad says, there’s no home improvement project that doesn’t take at least three trips to Home Depot. The last issue with muslin #2 was that the leg around the knee was super twisted. Now let’s talk about how I fixed the issue?
Bow Legged vs. Knock Kneed
Here’s where we left off with muslin #2.
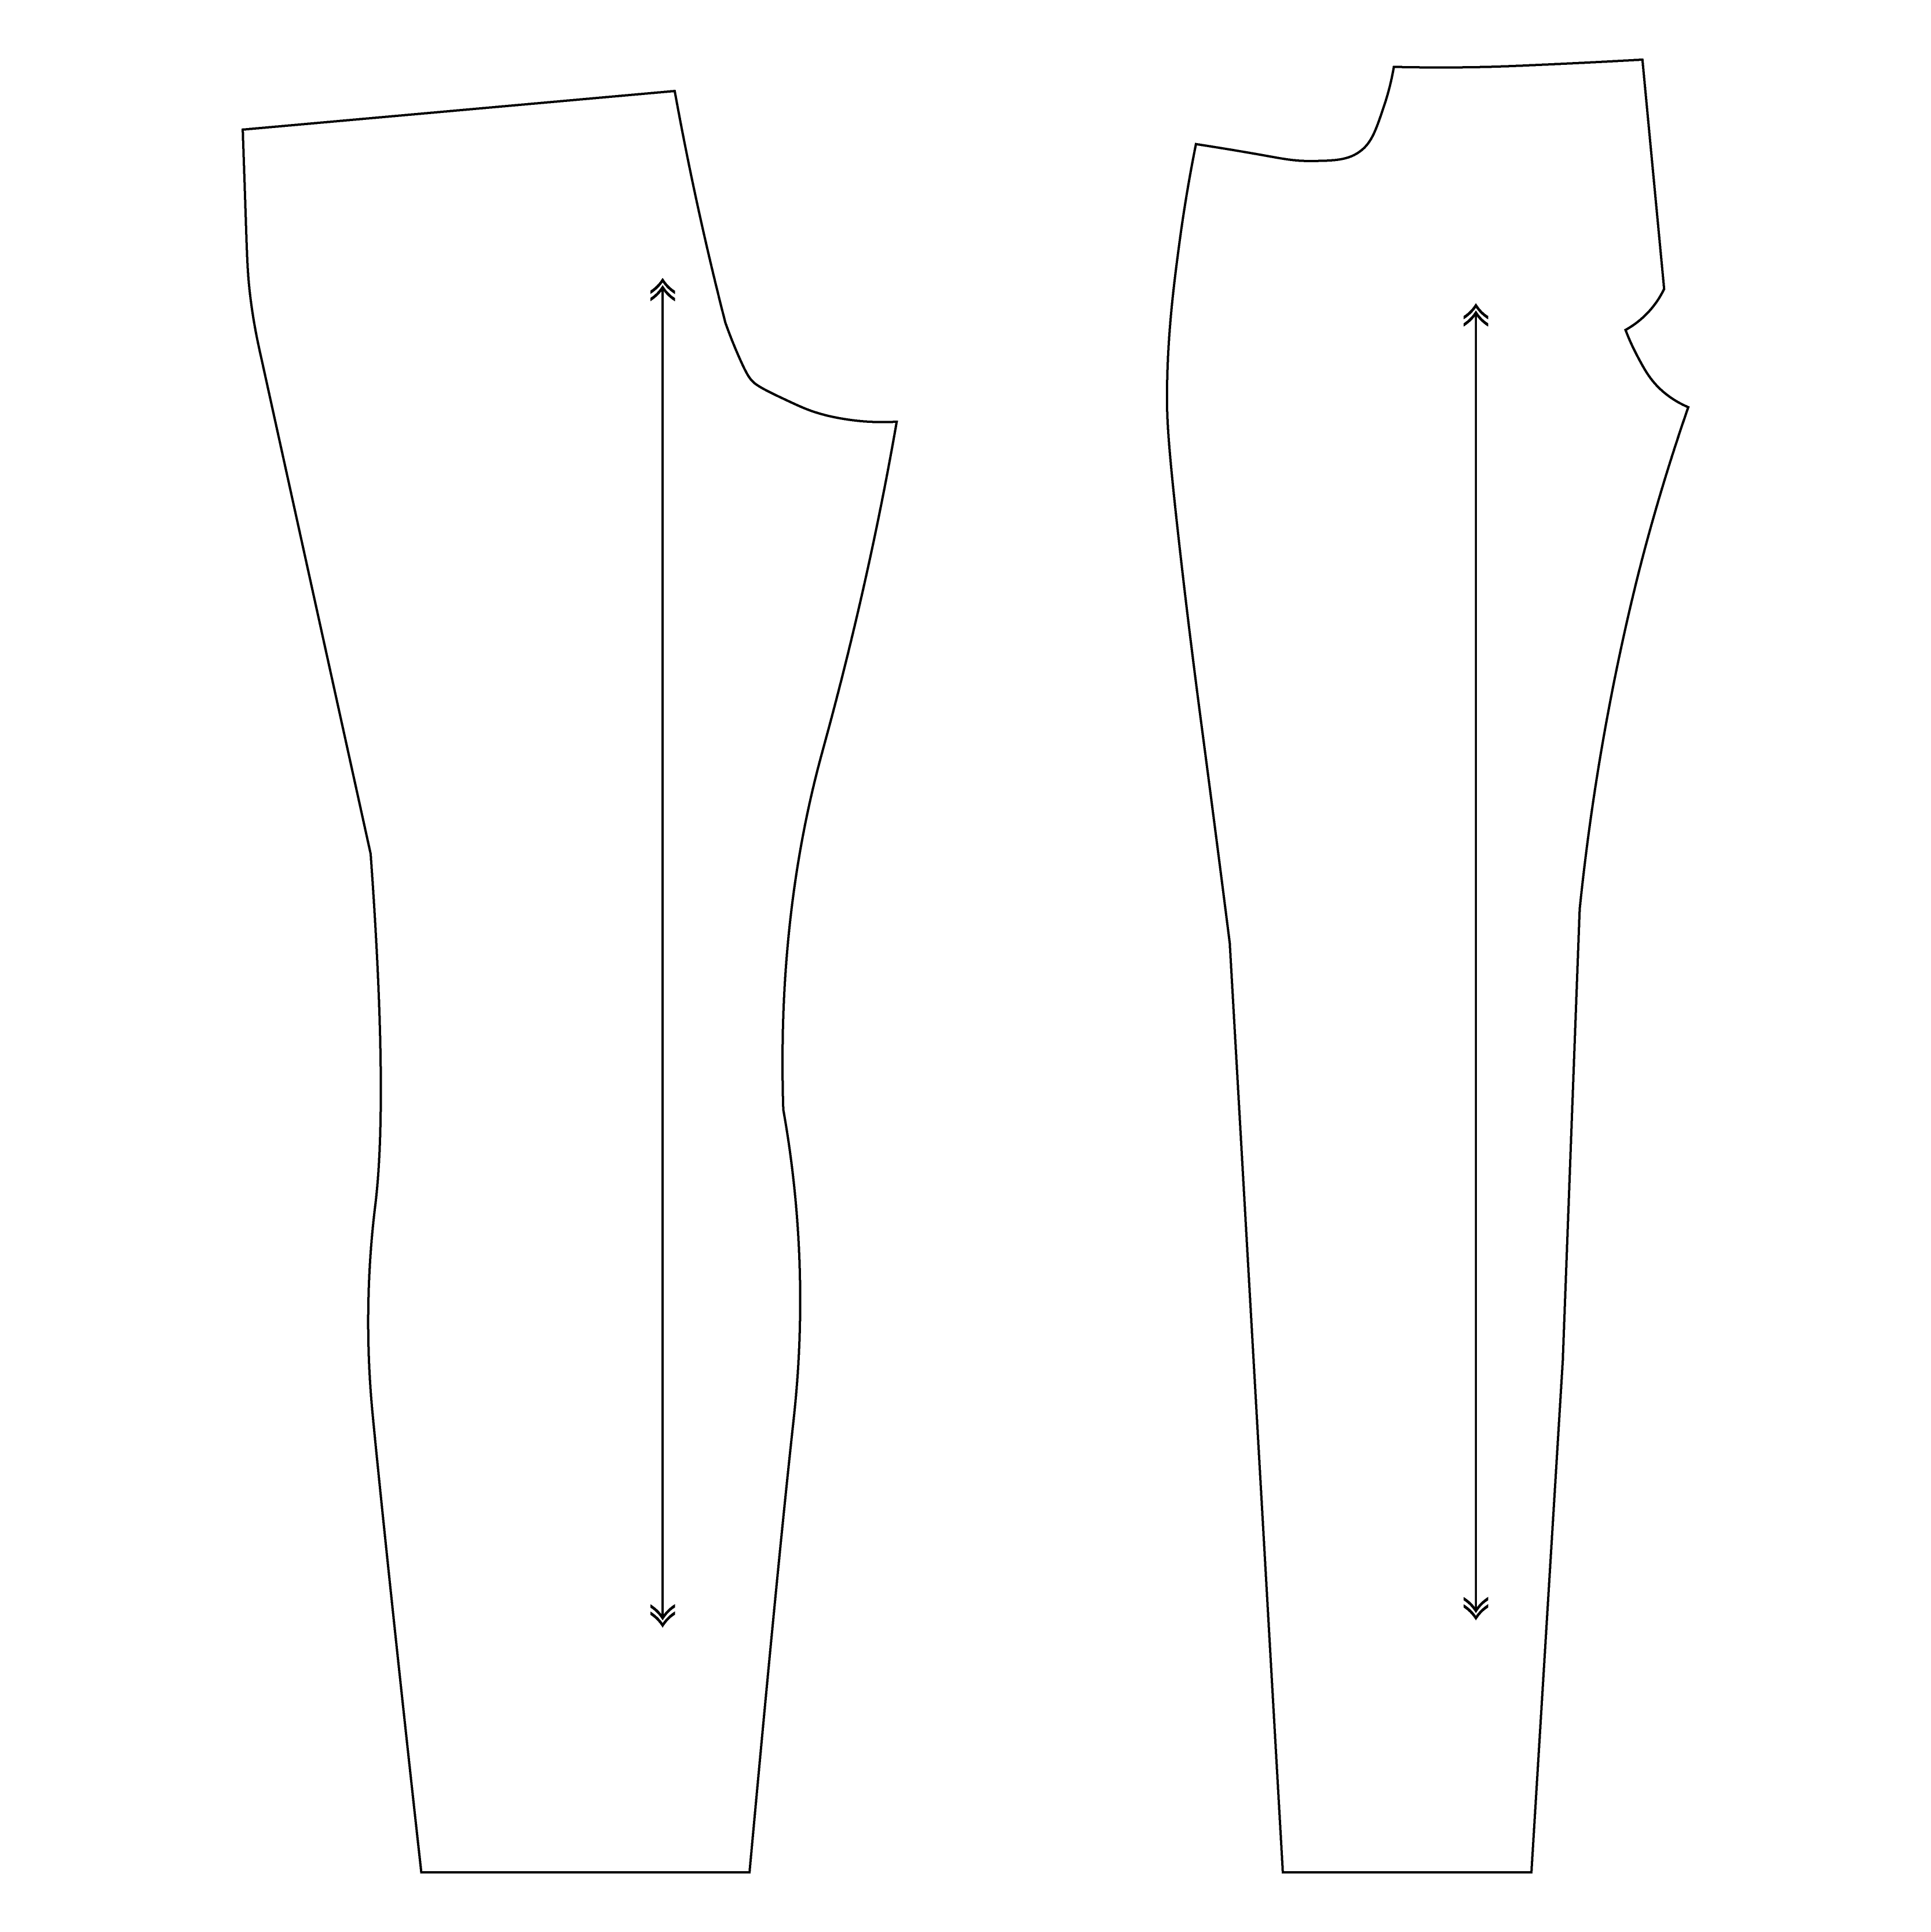
I’ve never had to make an adjustment like this. Or more likely, I had but didn’t realize I needed to? That’s possible as well. While wearing muslin #2, I pinched out fabric at the side seam and inseam on the leg to see which side would undo the twisting. Super scientific method!
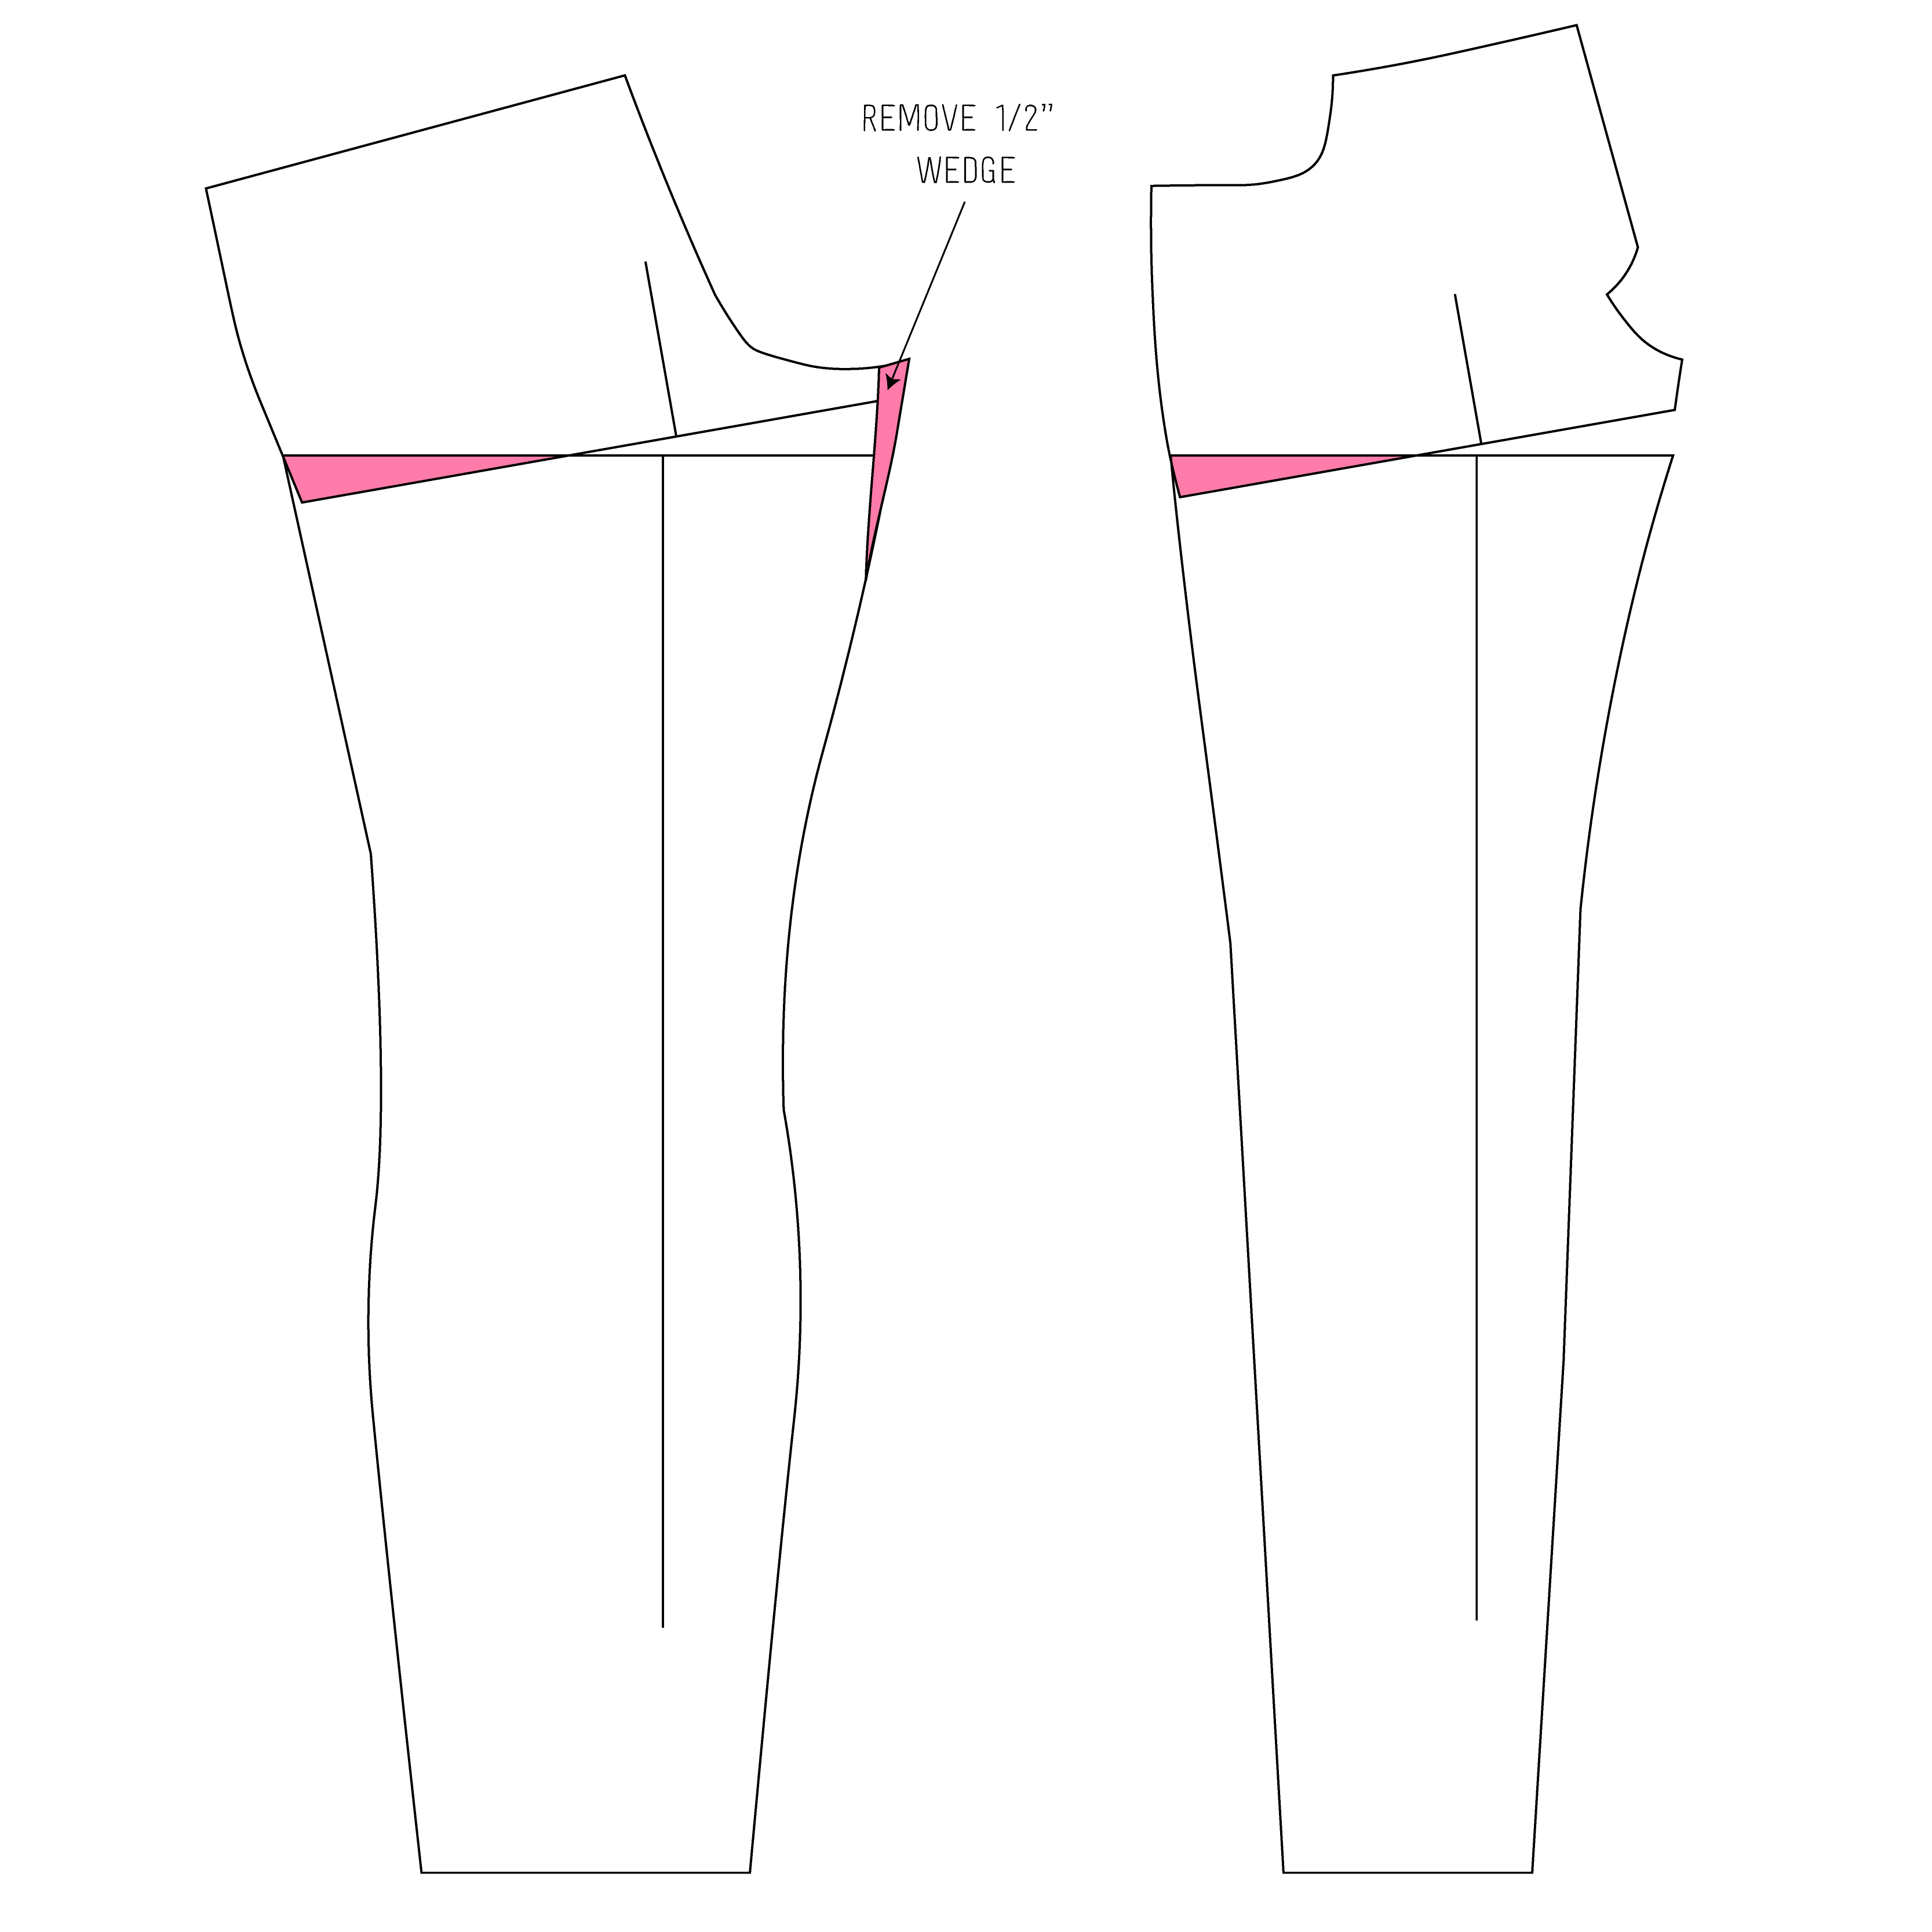
What I realized was that when I pulled up/pinched out fabric on the side seam (outside) the pant leg below untwisted. If I did the same thing on the inseam (inside), it didn’t do anything. That told me that I needed to make a knock-knee pant adjustment. Who knew!?
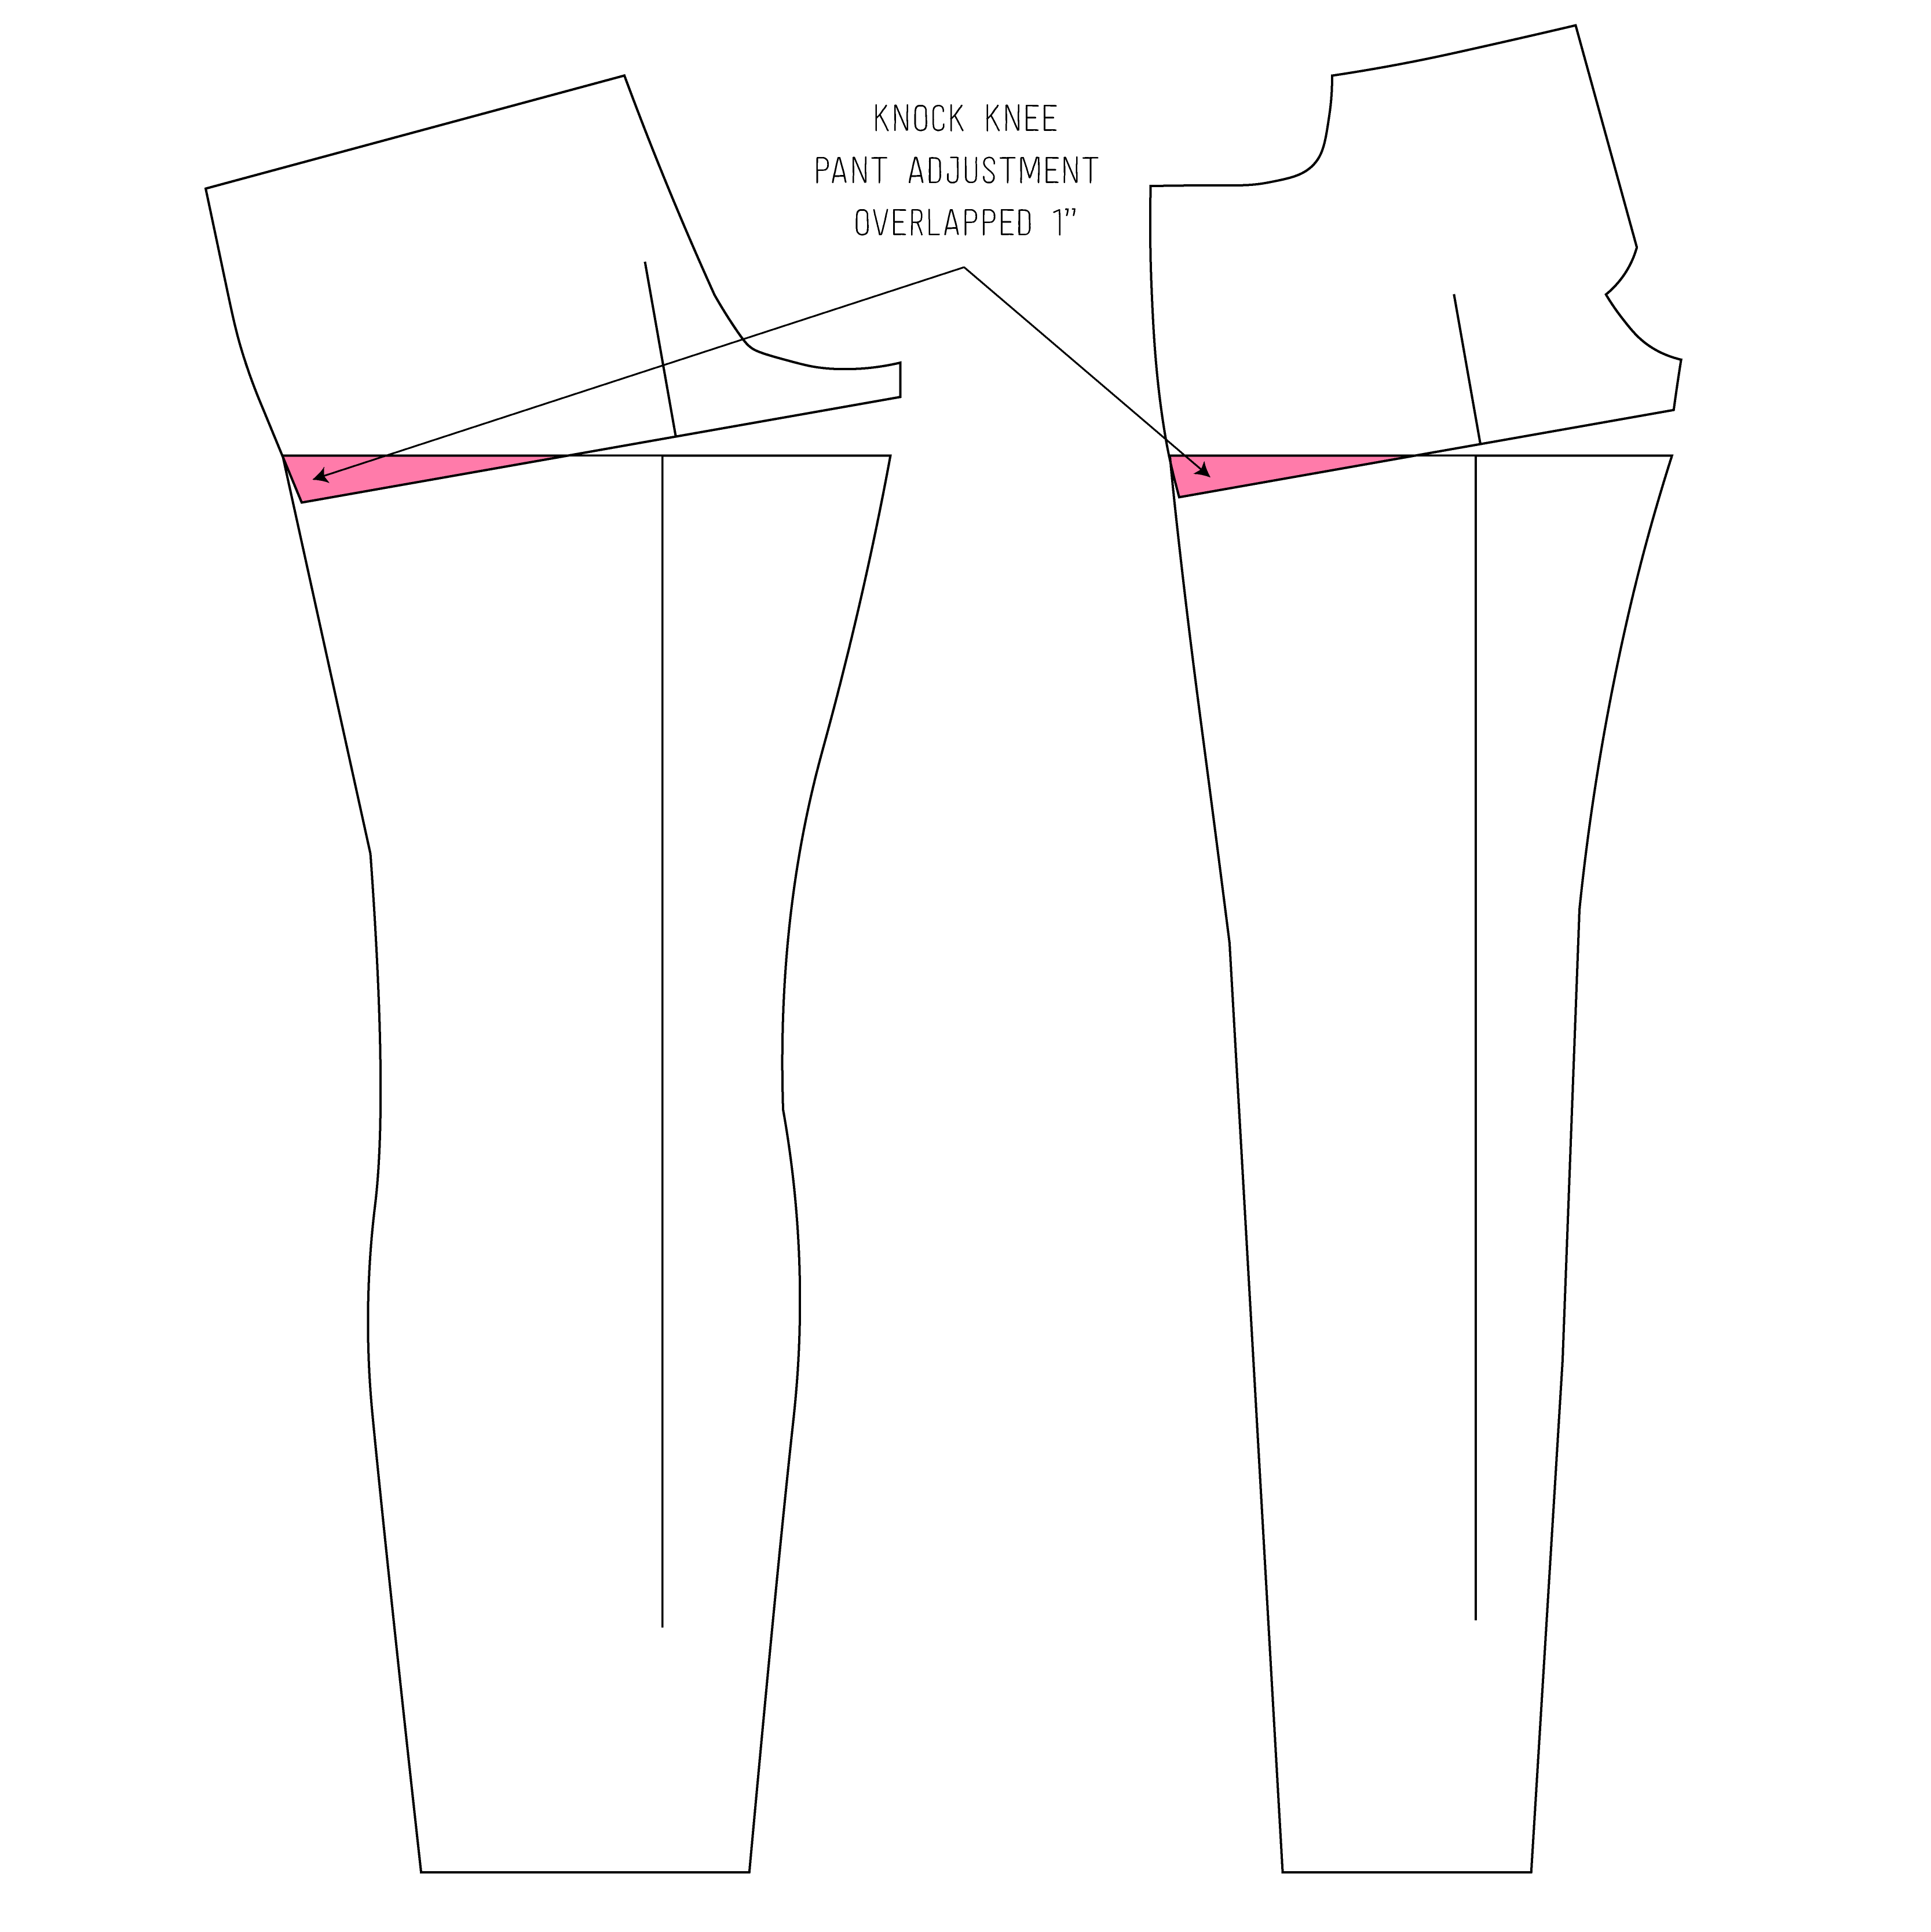
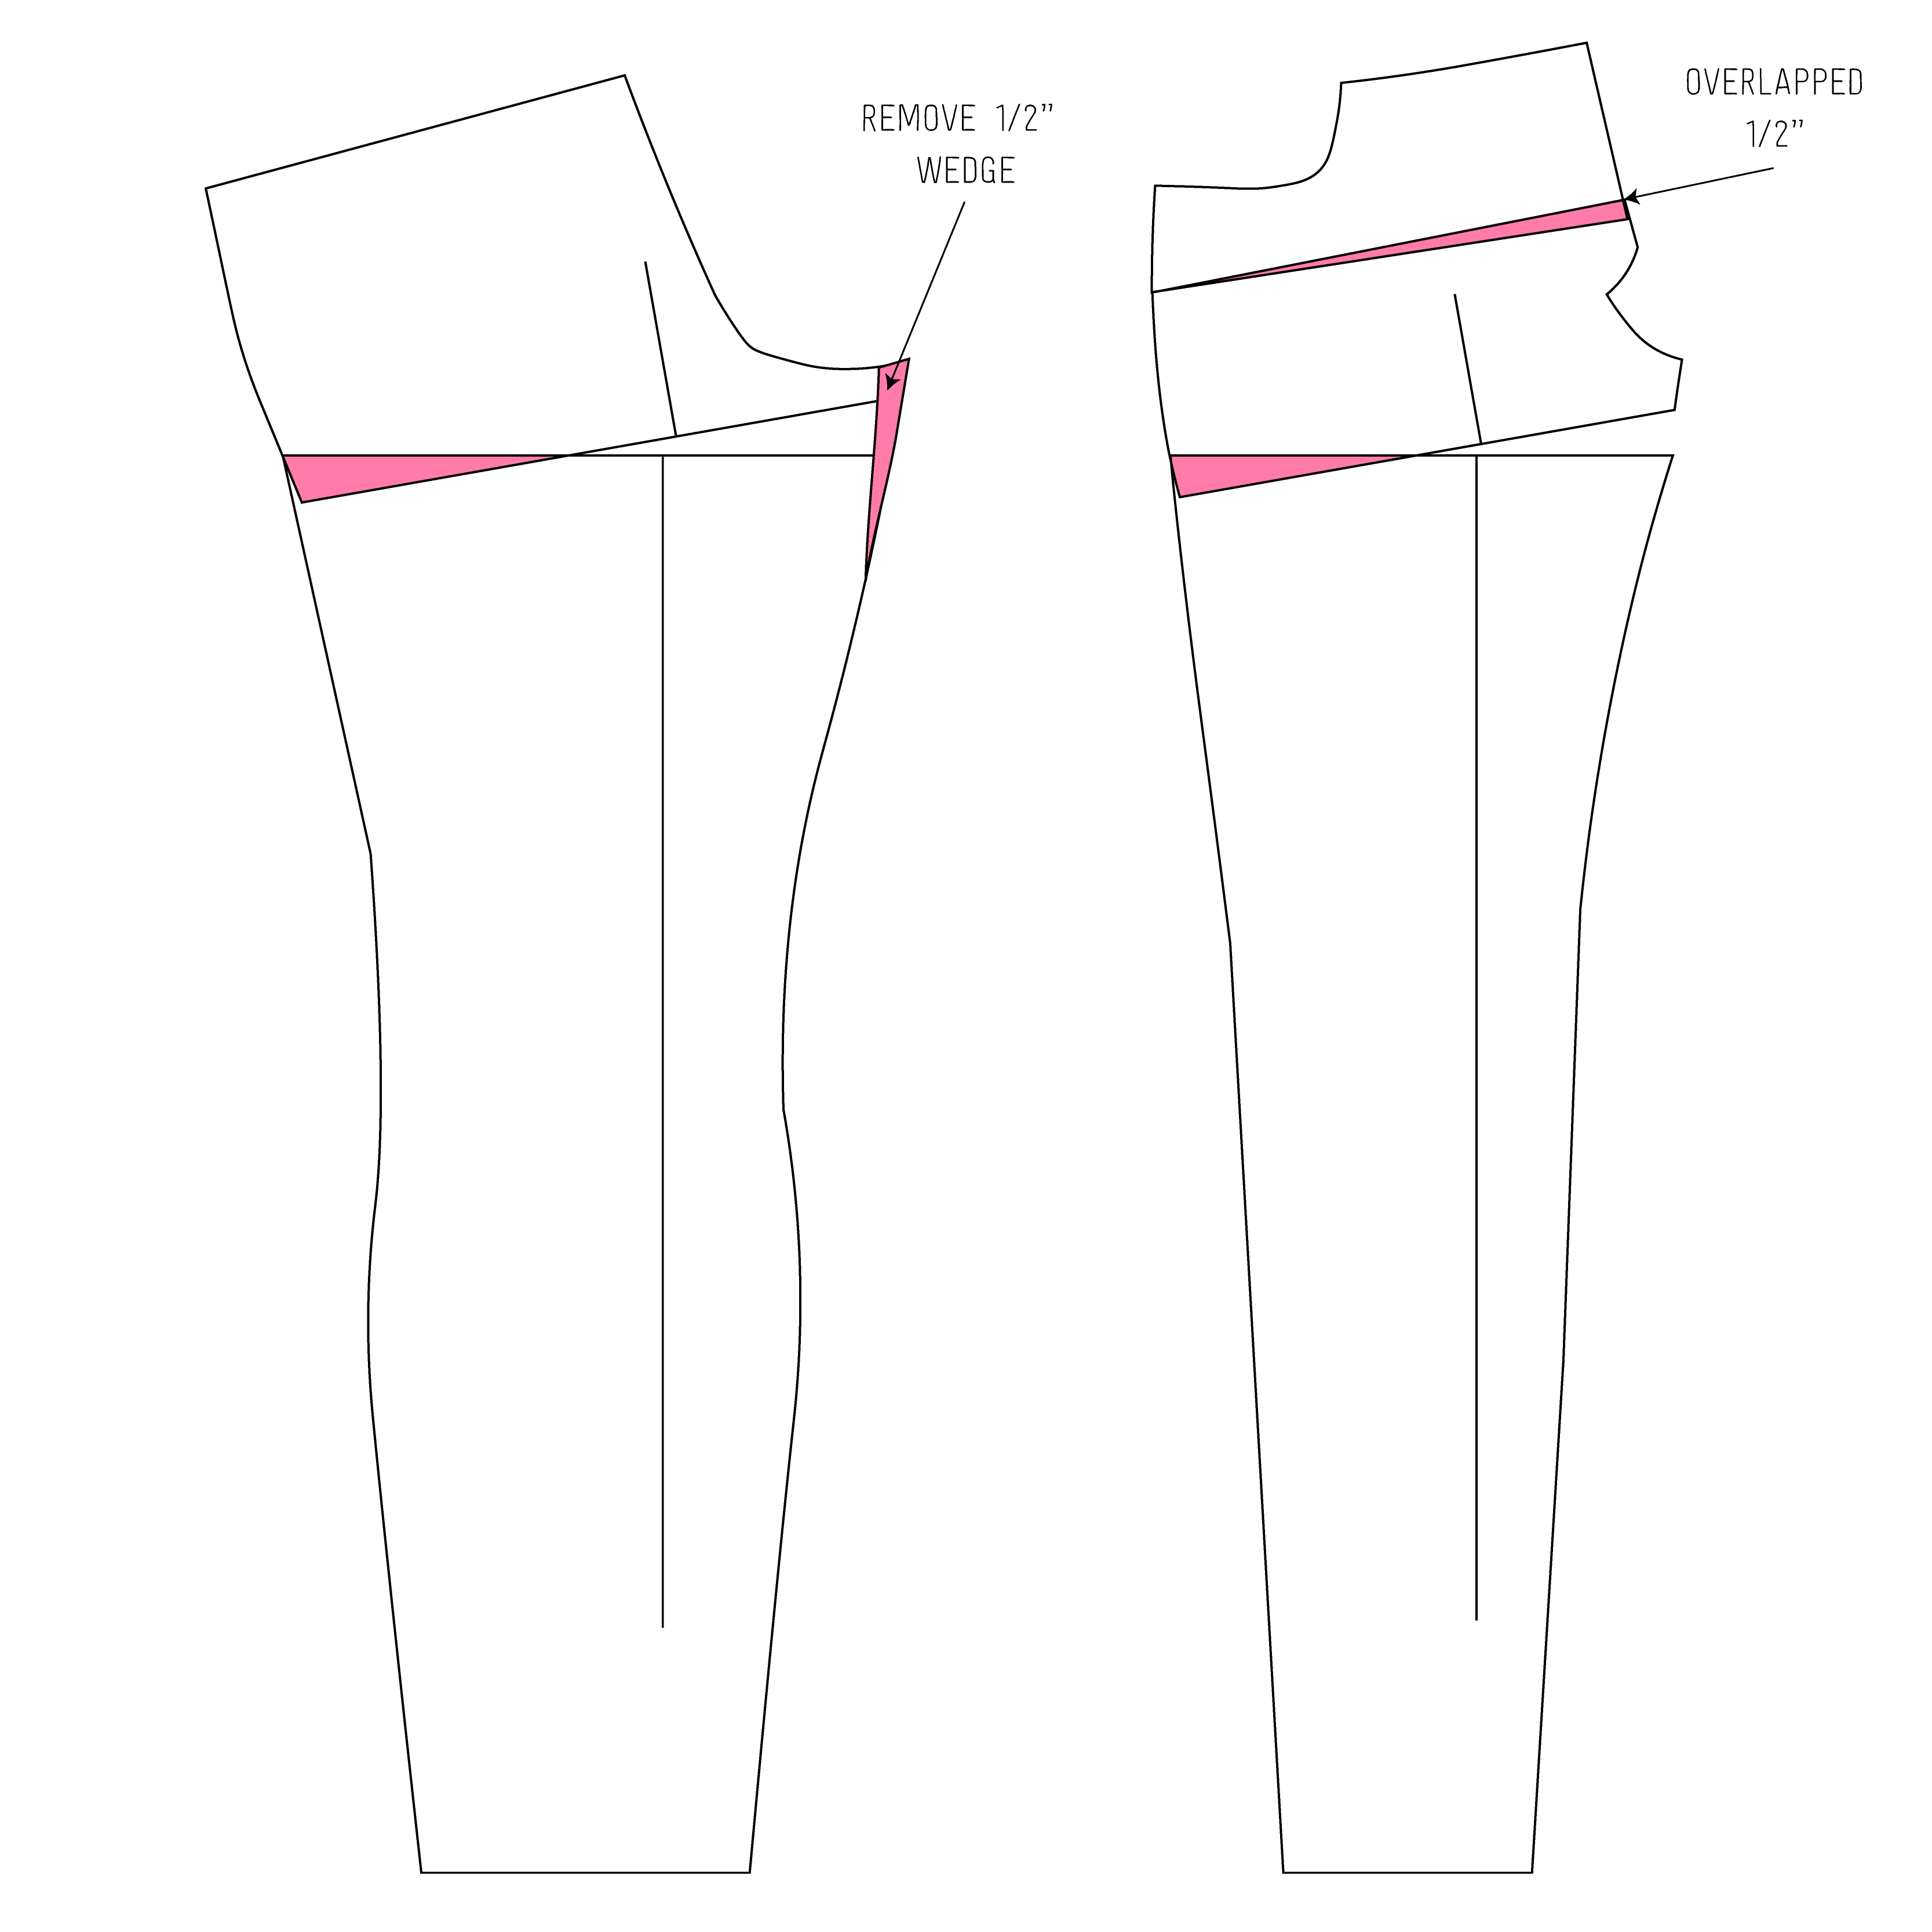
The first time I made the adjustment I only shifted things by ½”.
You can see that didn’t entirely fix the issue. Bummer. The second time I made the adjustment, I shifted things by a full inch.
The shocker of the whole process was how big my adjustment needed to be! My left leg looks like it could use an even bigger adjustment, but there’s no way I’m going to have different patterns for my right and left legs. I’m not that much of a perfectionist.
Cascade
Thin Thigh Adjustment
I told you, make a change to your pattern, and that’ll have a cascading effect on the whole dang fit! I needed to make another thin thigh adjustment of ½”.
Lower Front Rise
And I also needed to lower the front rise just a bit too.
Curve Waistband

Oh and while we are on this crazy train, I took out a small wedge on the waistband to curve it a little more.

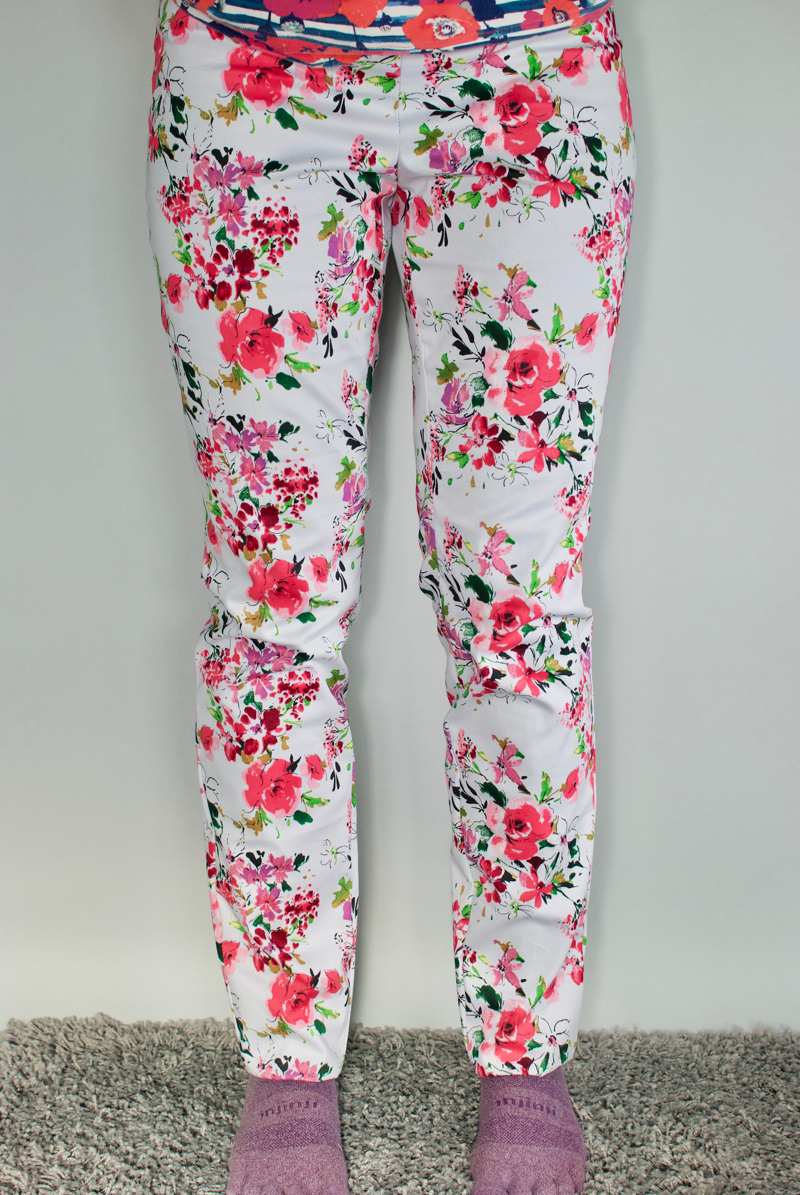
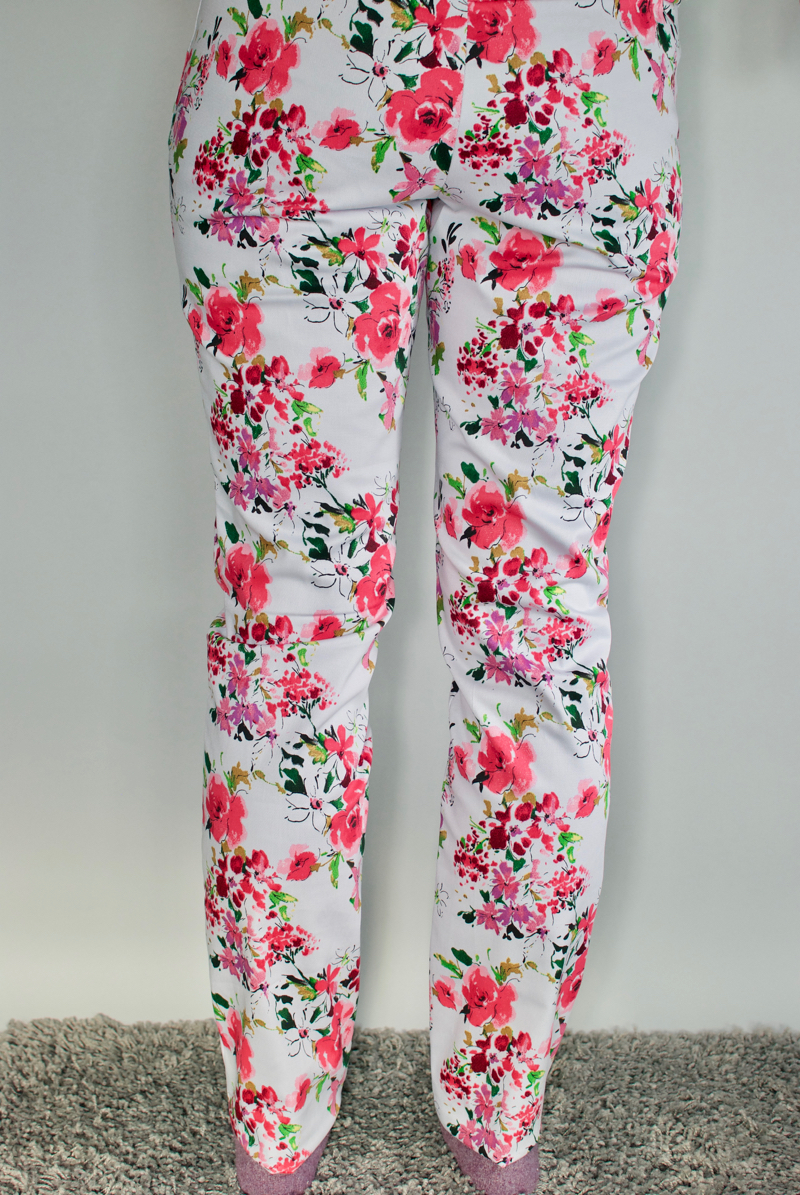
You can see here that when I started doing the knock kneed adjustment that started causing excess fabric under the buttock. This is also a better view of the twisting that’s still occurring around the knee and calf. I only did a ½” knock knee adjustment with these pants below.
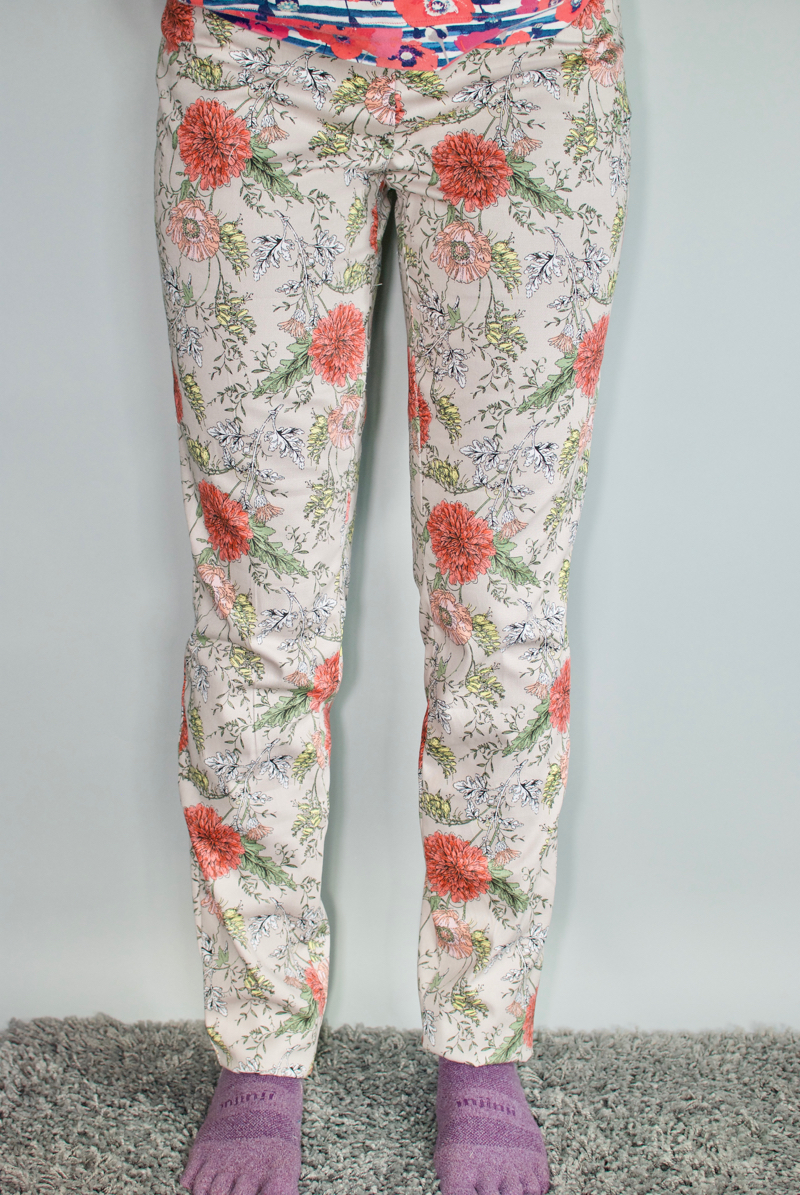
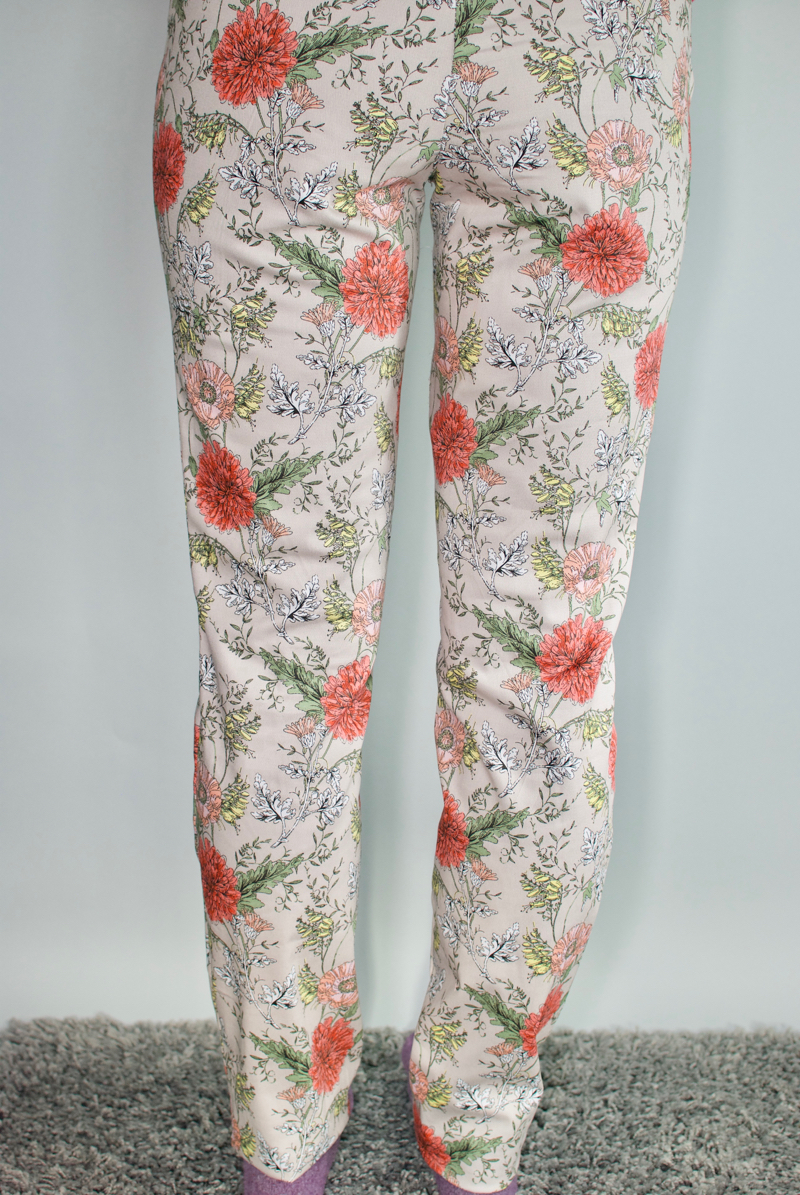
Here’s how the fit looks after making all these little extra adjustments. This is the fit with the full 1″ knock knee adjustment, the second thin thigh adjustment, lowering the front rise, and curving the waistband:
Are we there yet?
The obsessive compulsive side of me says, MAKE ANOTHER MUSLIN!!! But I think this is the point at which I need to say, good enough. Time to cut my actual Ginger Jeans fabric and do a baste fitting, just because stretch fabric can be so different between materials.

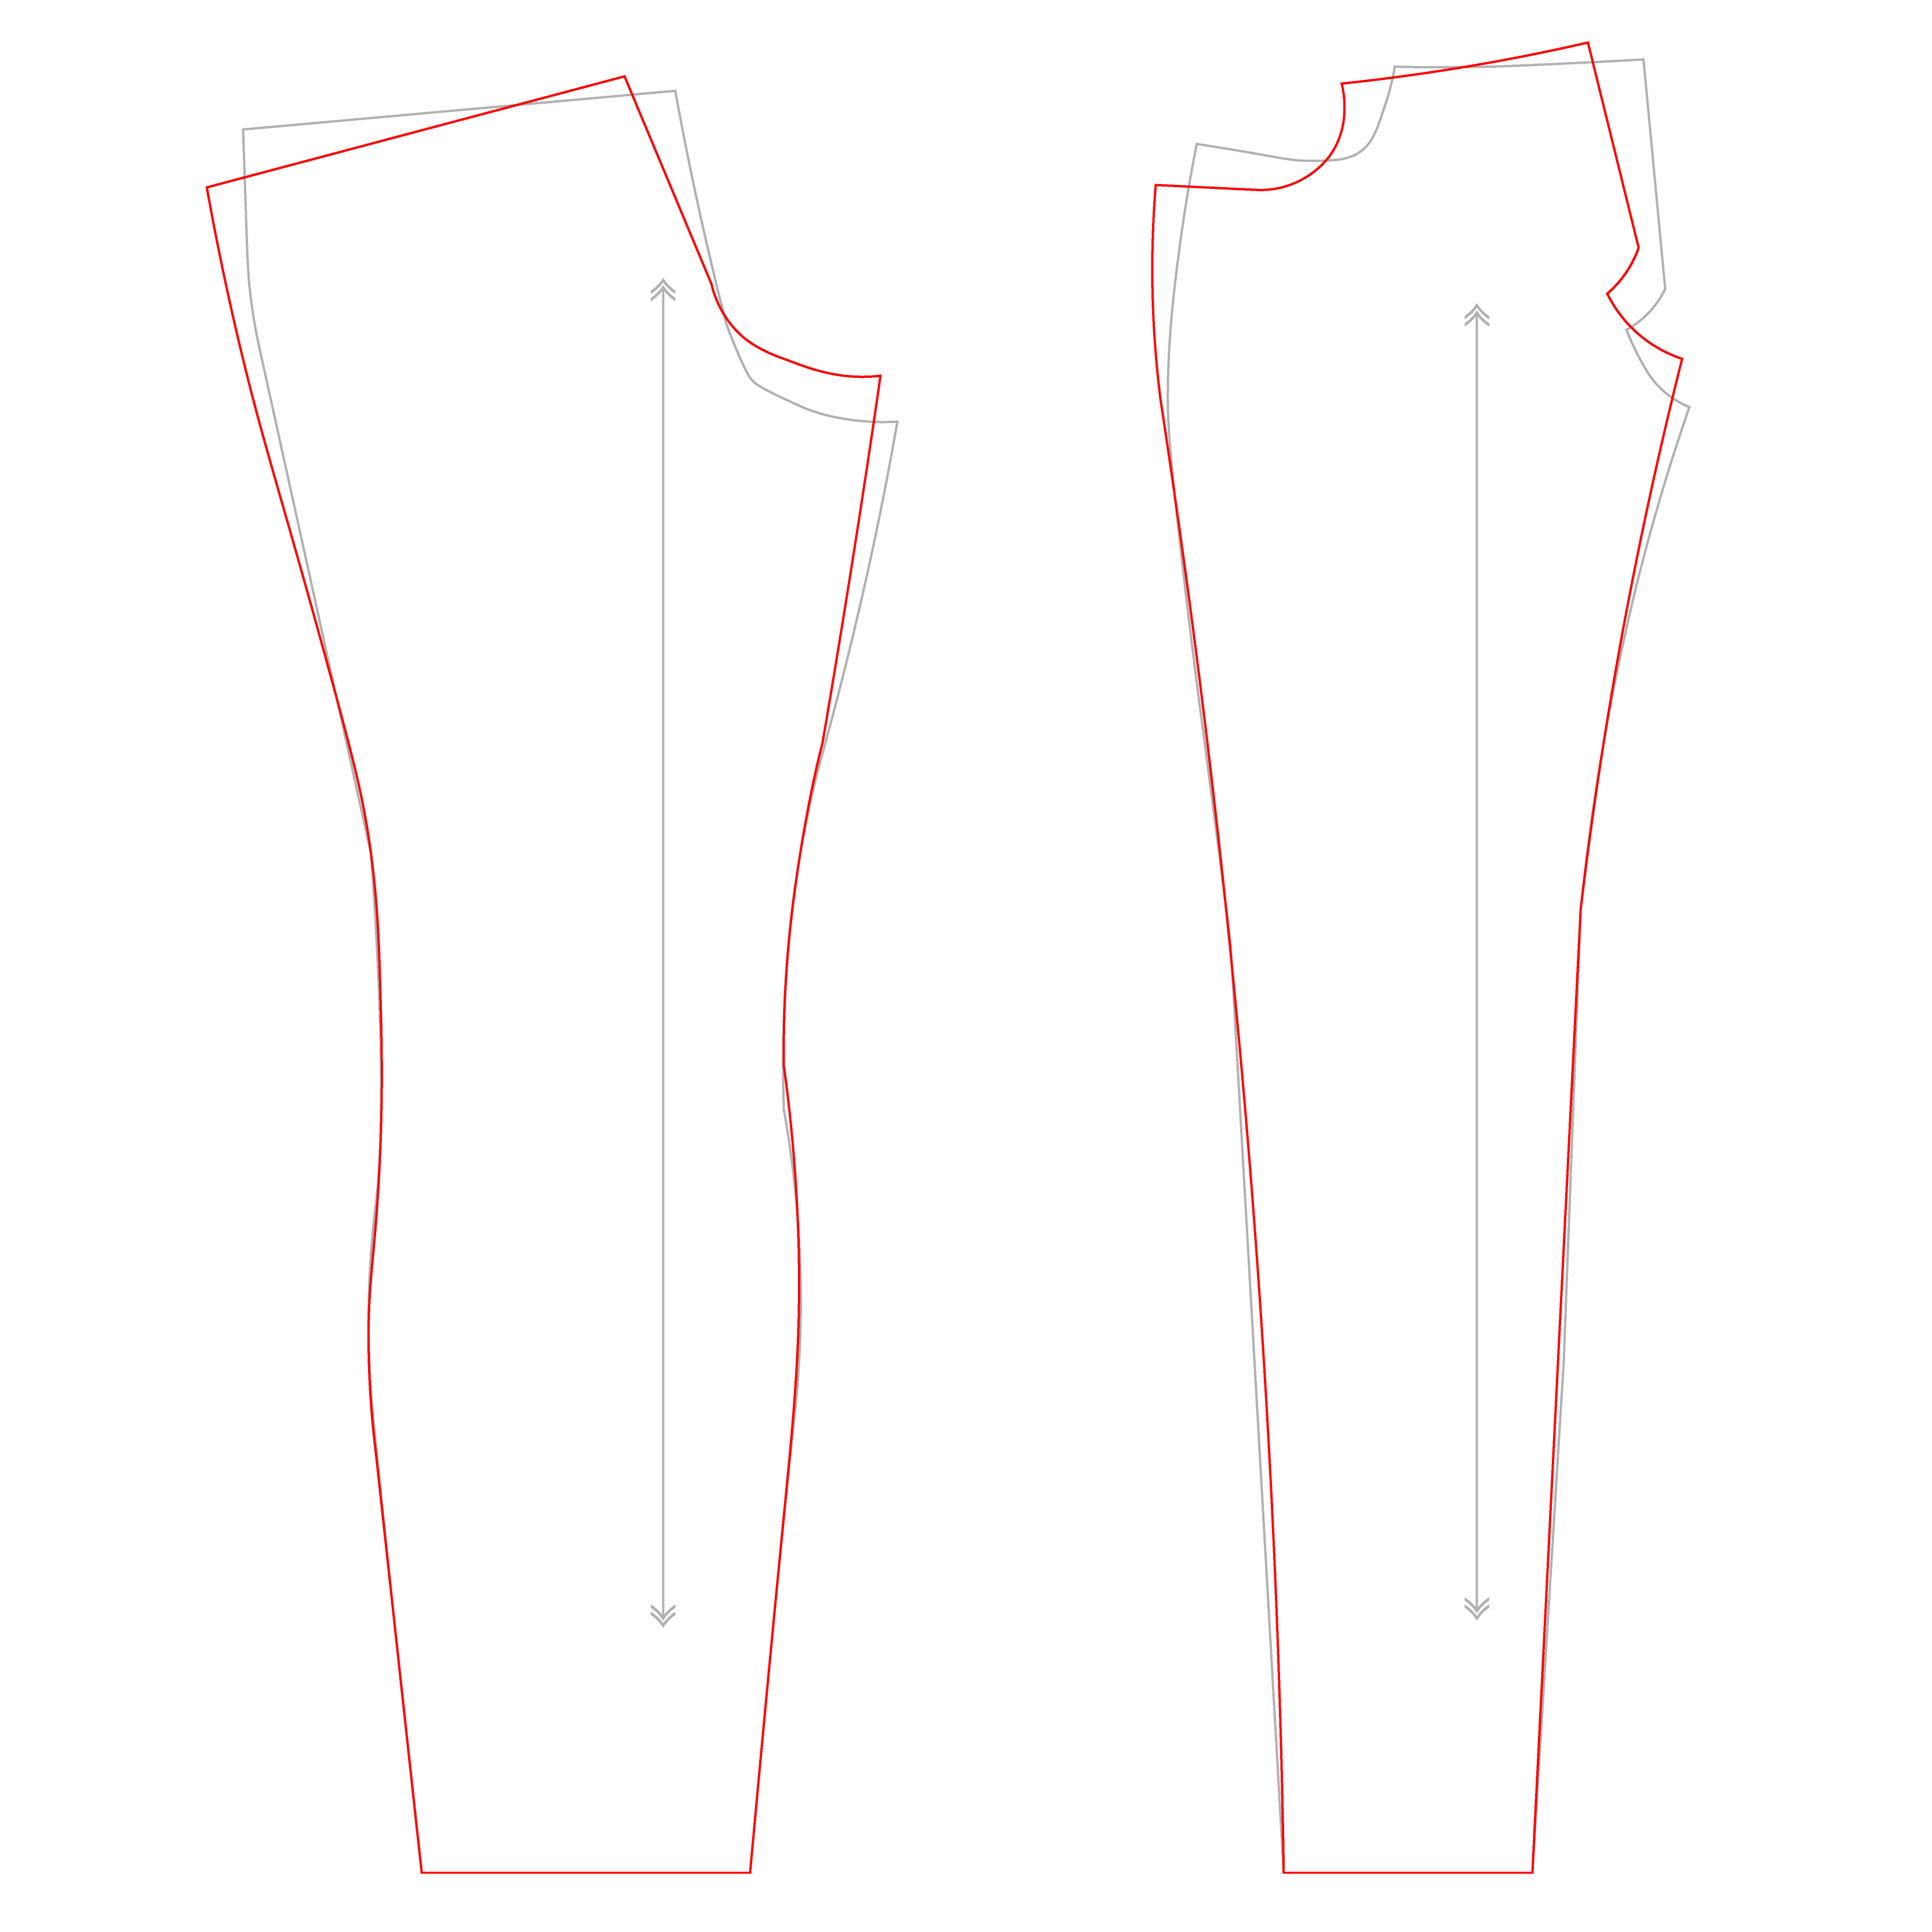
Here’s the final before and after for muslin #2 (gray) and muslin #3 (red).
Honestly, these edits weren’t that frustrating for me. I’ve spent years trying to decode pant fitting, and the one thing I’ve learned is to make sure you have enough room in your hips and buttock area before you even attempt at adjusting fit. Now if I make pants and the first muslin is too small for my hips and buttock, I’ll stop there and go up a size or two. The nightmare of trying to figure out where you need more fabric and how to incorporate it back into a pattern is so much harder I think. These edits to my Ginger jeans were made infinitely easier because I started out with pants that fit.
Stay tuned to find out if I make a fourth (or would it be the fifth) muslin or just go for it and cut my fabric for reals!


Wow this was amazing! Thanks for sharing with illustrations too! I had leg twisting and didn’t feel like trying again but I’ll have to take a look at some of these adjustments.
LikeLiked by 1 person
I would say stop right there with the muslins because these look fantastic! I honestly can’t see anything else that looks like it needs tweaking— especially on the back side. Amazing job!
LikeLiked by 1 person
You are a brave and talented woman with wisdom to share! And soon you will have the perfect pants that fit, well, perfectly for your body! Congratulations on all your very hard and determined work to get to this point! Hear applause in background as you read this! 🙂
Thank you for all the line drawings! They really show the alterations that sometimes are necessary to get the fit we all want!!! Your years of experience and patient experimentation are coming to fruition! Yea!
LikeLiked by 2 people
Not only are your posts hilarious! but they are SO informative – honestly I can’t thank you enough for sharing – I can’t get over how similar our shapes are and I’m sure my adjustments will need to be almost identical! You’ve actually encouraged me to give this a serious go which I’ve been wanting to do for almost 2 years 🙂
LikeLike