Here’s a practical and easy technique for preserving green beans from your garden. This entire post is going to be one long pro-tip on how to pressure can your green beans, so you can enjoy them throughout the year. If you go back and look at my first post about preserving the harvest (see here), you will note that one of the drawbacks of freezing food is that you run the risk of losing all your food if your freezer stops working or your electricity goes out. I would be absolutely devastated if I lost a year’s crop worth of green beans because of a glitch.
Now canning green beans doesn’t come without its own risks. I’m sure you’ve heard about botulism. Botulism is a bacteria that is ubiquitously present in our food, but grows best when there is a lack of air. The bacteria therefore does not cause problems on fresh fruit and vegetables. There was a big scare several years ago with botulism in canned green beans that you find in the grocery store. Unfortunately, the news media over generalized and started to attack homemade canned green beans as well. However, canning green beans at home is perfectly safe, so long as you follow the recipe. Eating food in America is far more dangerous than canning green beans from your garden and given the rise in food poisoning across the nation, I’d like to have as much control over my food as possible.
“I grow green beans in my garden. The one thing I know about harvesting them is that you need to train your eyes to see the beans. At first it all looks like leaves, until you see one bean and then another and another. If you want clarity, too, you have to look hard. You have to look under things and look from different angles. You’ll see what you need to when you do that. A hundred beans, suddenly.” – Deb Caletti
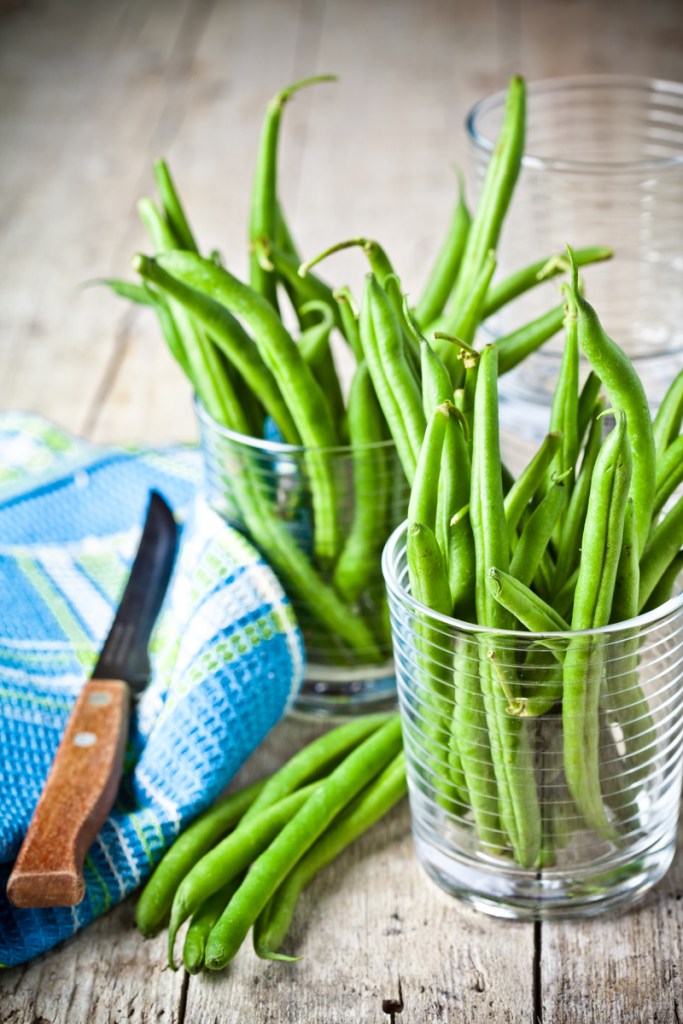
Though I don’t have a garden, I do have family willing to share their bounty. Over the weekend, we picked the garden clean of green beans. It was absolutely fantastic. First of all, I haven’t really seen a bean plant, let alone searched and hunted for beans to be picked. As an academic, I love learning and I got to learn about bean plants and how to can green beans. Never stop learning, so I’m always too excited to learn something new. We picked roughly 9 pounds of fresh green beans and we ended up canning 16 pints. The process was simple, place the green beans in a bowl with cold water. Snip the ends of the beans so the length of the bean will allow 1-inch headspace in whichever canning jar you are using. We used wide-mouth pint jars, so I measured a nice straight bean first and used that as my template for the rest of the beans. Once the beans were washed and snipped, I was able to tightly pack the jars with raw green beans by placing the jar on its side and stacking the green beans like logs of wood. You really want to pack the beans super tight in the jars. For reference, I measured the jars with the packed green beans to make sure ever jar had approximately the same amount of green beans. My wide-mouth jars plus green beans came to approximately 1 pound. In other words, I was adding approximately 6 ounces of green beans to each jar, which weighed 10 ounces.
The only other difficult part with canning green beans is that you ABSOLUTELY must pressure can and not try to can them in a waterbath. Pressure canning will force the temperature high enough to make your food safe to eat. In a water bath, the temperature never gets hot enough to kill all the bacteria in green beans. If you have never used a pressure canner before, may I suggest learning from someone who has experience first. I’m sure you can easily find a class around your city or a friend who is willing to show you how it is done. Pressure canners are bombs and can cause a lot of damage in your house if you do not know what you are doing. Bombs and deadly bacteria, doesn’t canning green beans sound like so much fun?!

Subscribe to continue reading
Become a paid subscriber to get access to the rest of this post and other exclusive content.
