In May of 2024, I completed a whole series on how to fit a shirt. I broke the process into manageable steps starting with the shoulders and slowly working down to the hem, section by section. At the time, I tried this new fitting approach using the Elbe Textiles Sage Tee pattern. Click here to link to that post and the whole series. It has been nearly two years and I find myself no longer fitting into my shirts, but not in the way you would think. This post is a perfect example of why getting the fit of the shoulders right is the most critical step and, therefore, the first step of the fitting approach.
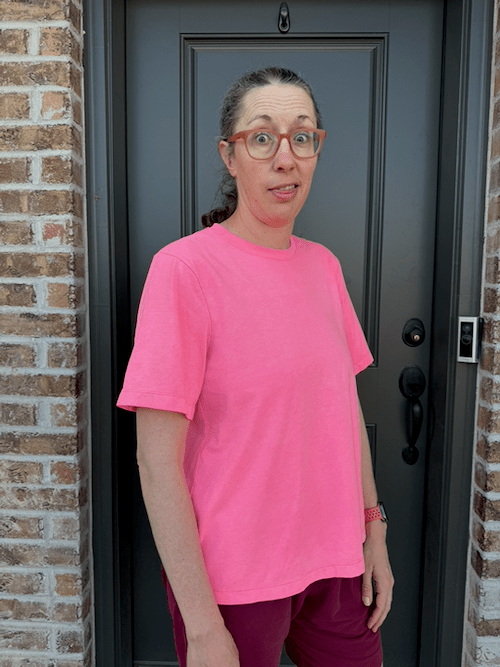
My 2024 Pattern in Pink
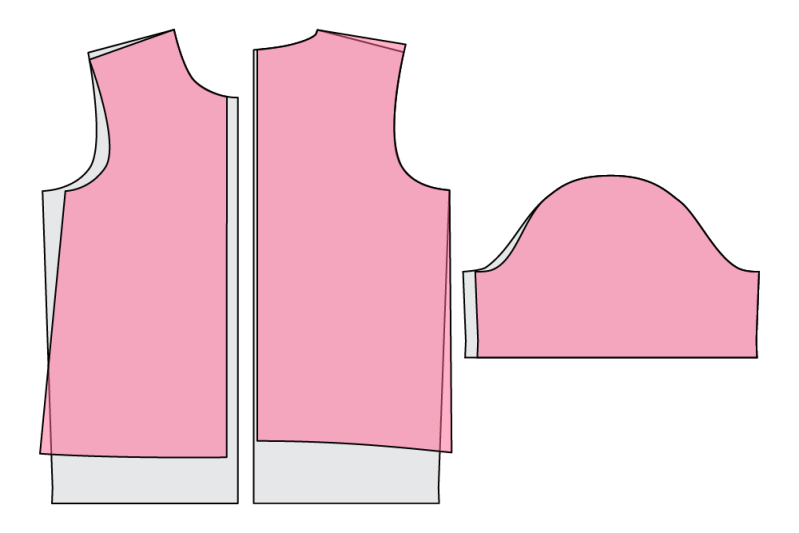
Here is a quick refresher on how I changed the original Elbe Sage Tee (grey). I did not need to change the length of the shoulder at all. I did a 1/2 inch forward shoulder adjustment, but then all my adjustments were focused on the center front, the center back, hem length, and the front armhole shaping.
Identifying the Fit Issue
I have stuck with my personal trainer since graduating from physical therapy in April 2024. I enjoy not having to come up with my own workouts or deal with cleaning up a gym space, and I get to work equal amounts of legs, core, and upper body. I had some painful neck muscle spasms back in November that were likely due to a combination of insufficient vitamin D and general muscle weakness, both of which I have since resolved with vitamin D supplements and lots of shoulder shrugs.
You can see where this is going. At some point, the fit of my shirts changed as I progressed from 10 pound up to 40 pound shoulder shrugs. I started noticing that my center front liked to push up into my neck, and I was fidgeting more and more with my shirt trying to keep it in place. Eventually, I grew so frustrated that my shirt would never stay put on my shoulders that I knew it was time…
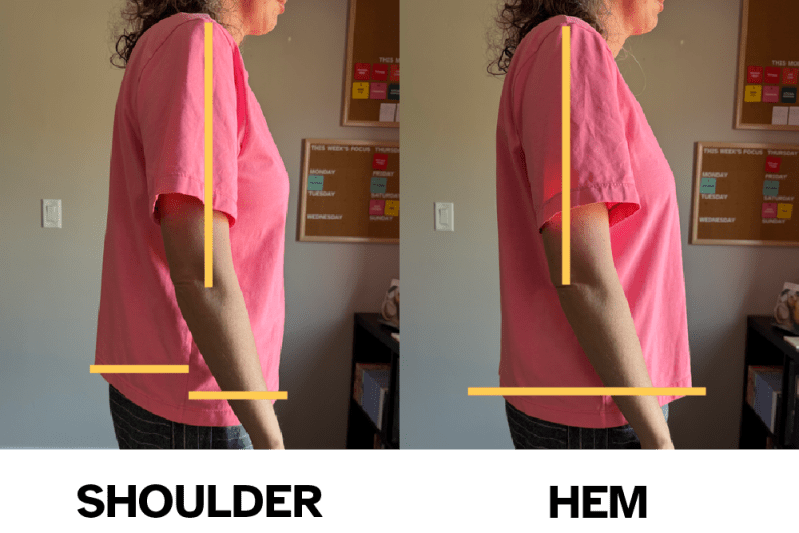
With the shoulder seam placed correctly on the top of my shoulders, I immediately identified the problem. The back hem was sitting much higher than my front hem, even though when I originally made the pattern, my center front and center back were on the same horizontal plane. In the image above, on the left I’ve force the shoulder seam in the correct place and on the right the hem is balanced.
What happens throughout the day is the shirt wants to be balanced at the hem, so the shoulder seam inevitably gets pulled backwards. I’ve marked the top of my shoulder in the image above. You can see how far back the shoulder seam has to move in order to balance the hemline.
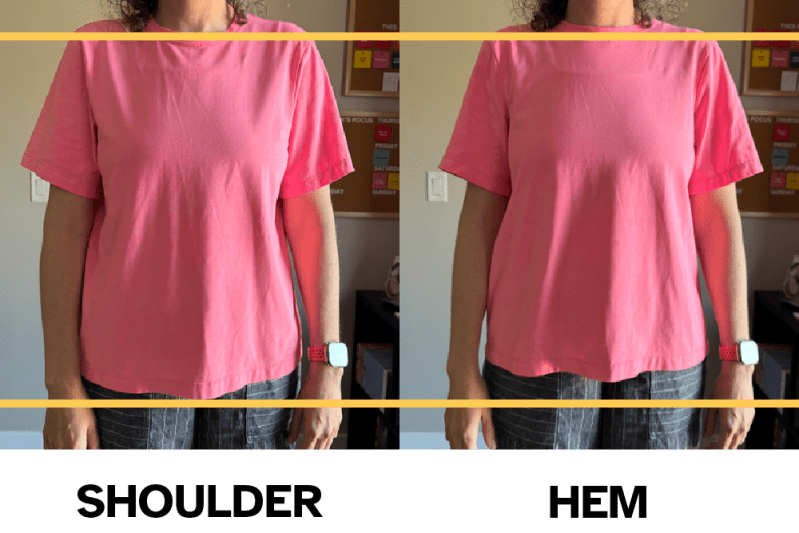
Here you can see when the hems balanced on the right, the front neckline rides up into my throat. That’s absolutely unacceptable for a comfortable fit!
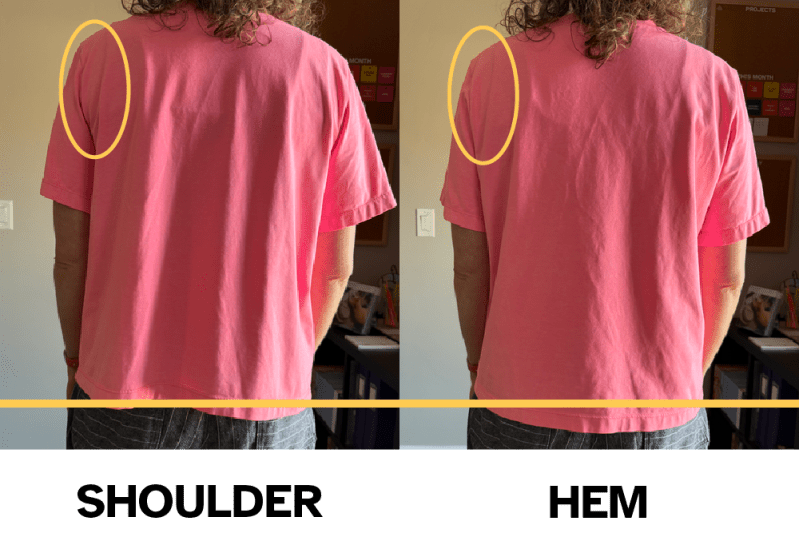
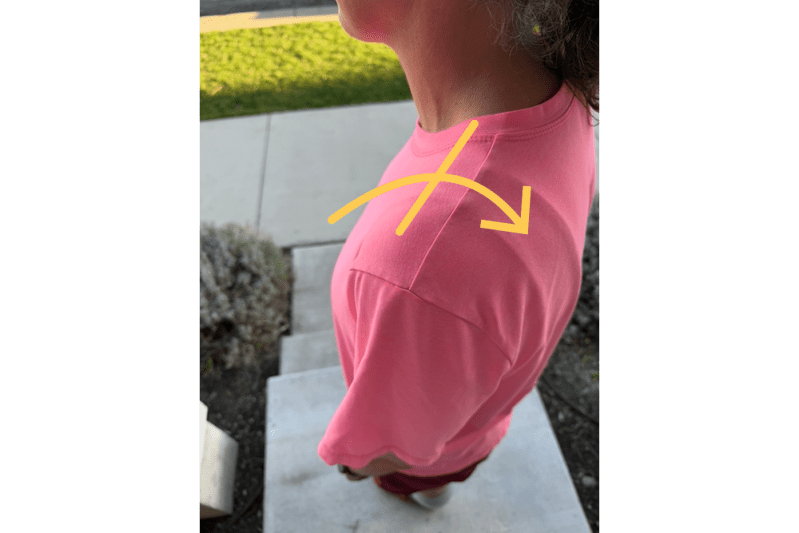
The other telling sign was that when I forced the shoulder seam onto the top of my shoulder, I could see draglines pulling from the armscye up toward the shoulder. All of these issues told me clearly that I needed to add length to the back shoulder.
Adjusting the pattern
Once I understood what I was looking at, the fix was obvious. On the back bodice pattern piece, I located the notch on the armscye, which is that small triangular marking along the curved edge of the armhole. From that notch, I drew a horizontal line straight across the pattern piece from one edge to the other. This is your slash line. Once you have that line drawn, cut straight across it so that you now have two separate pieces of your back bodice.
From there, I spread the two pieces apart by a full inch, sliding the upper portion straight up while keeping both pieces aligned vertically. I confirmed that one inch was the correct amount using the muslin method I had established in my earlier fitting series, which I always recommend doing before you commit to cutting into your good fabric. Once I was satisfied with the measurement, I taped the pieces down with the gap held open and redrew my lines.
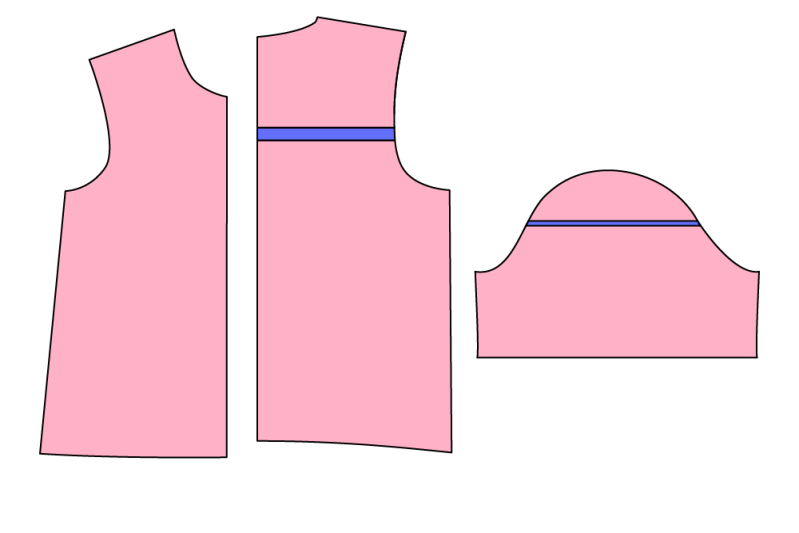
Because spreading the back bodice adds length to the overall circumference of the armhole, I needed to account for that extra inch in the sleeve as well. If you skip this step, your sleeve cap will be slightly too short relative to the armhole it needs to fit into, and you will find yourself stretching the fabric more than you should during construction. To correct for this, I cut horizontally across the sleeve cap and shifted that upper portion up by about 3/8 to 1/2 of an inch. The adjustment blended smoothly back into the existing sleeve lines with minimal redrawing, which is usually the case with small raises like this.
Improved Fit
Let the weight lifting continue! I was able to correct the fit with that one simple adjustment. Now I just have to remake all of my shirts, but honestly that is completely fine because I am going to become an absolute pro at binding the neck seam from shoulder to shoulder!
And honestly, the fact that my body has changed enough to require a full pattern adjustment is something I want to celebrate rather than be frustrated by. All of that work in the gym, the shoulder shrugs, the consistency with my trainer, it showed up in my fabric. My clothes not fitting the way they used to is actually proof that something is working. That is a pretty wonderful reason to remake a whole closet full of shirts.
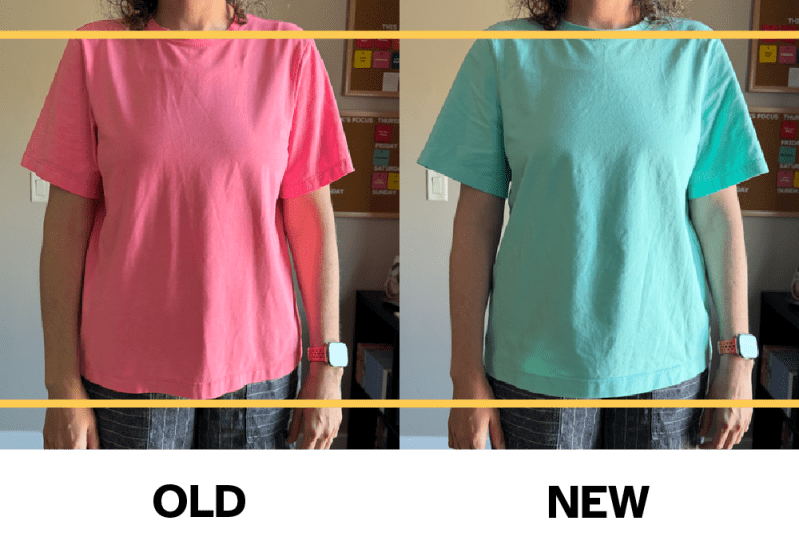
I’ve lined up the shoulder seam on the old shirt, meaning the hems are currently unbalanced. The front view should look essentially the same.
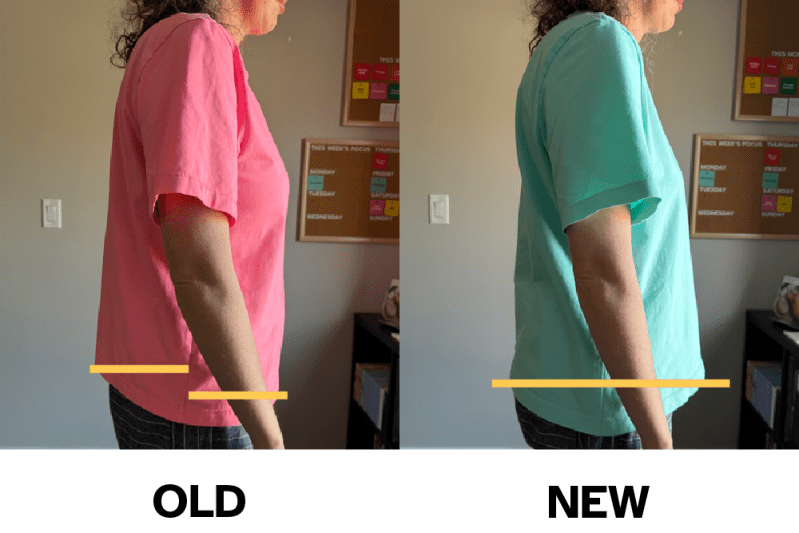
From the side view, you can see the unbalanced hem on the old pattern and a balanced hem on the new pattern.
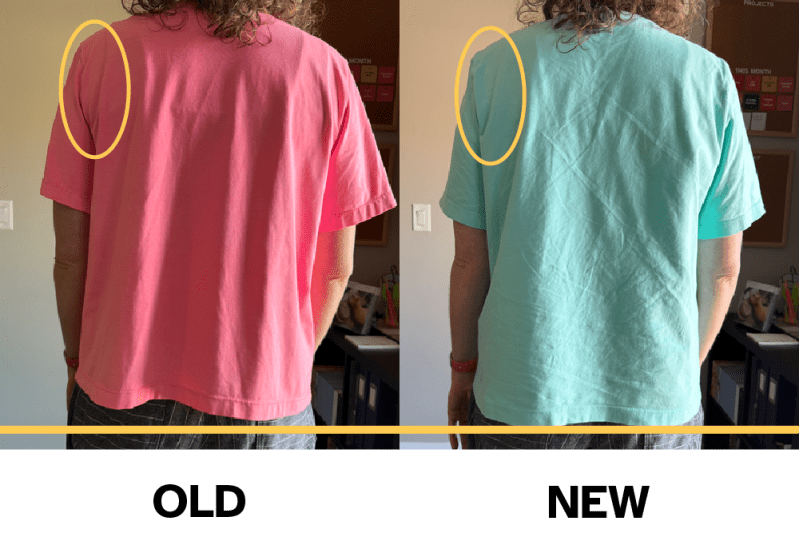
With the added length, I no longer have pulling at my armhole.
Personal Aside
I love knowing there are other people just as devoted as I am to something as seemingly simple as a t-shirt. I cannot tell you how many people in the sewing community I have heard complain that sewing a t-shirt is pointless and not worth their time because they can just pick one up at Target or Old Navy. They would rather sew beautiful things like dresses and special occasion outfits. I can appreciate that perspective, especially if you find the fit of store bought shirts acceptable. I, on the other hand, want my everyday clothes to be the absolute best they can be. There is something deeply satisfying about knowing that I have a closet full of basic t-shirts that simply fit well. They are my dependable daily uniform. Comforting, trustworthy, and always predictable.
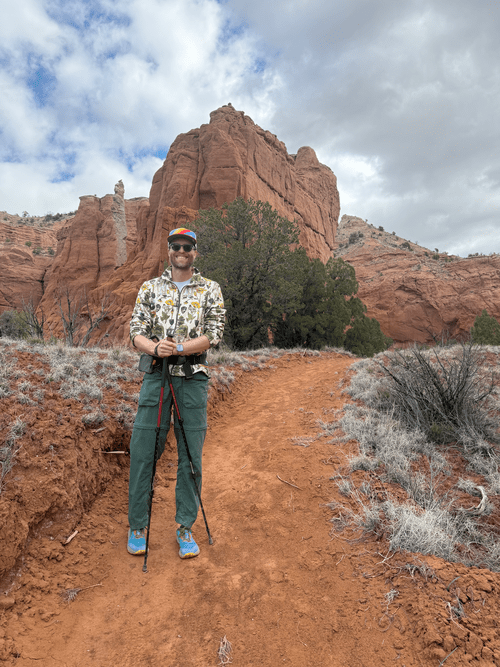
With Ryan’s sister unexpectedly passing in January, I made it my mission to get back to traveling. Michelle lived life with no regrets, and I am all too familiar with how quickly everything can change in an instant, as my clot journey has taught me more than once. We recently took our first real trip since June of 2023, which was roughly when the whole blood clot saga began for me. I have not been able to tolerate long car rides because they cause significant swelling and pain in my legs and torso, so this time we rented a vehicle that allowed me to sit more upright and hopefully maintain better circulation in my lower body. Four hours in the car, with stops every 60 to 90 minutes to walk around, was still genuinely difficult and I was in considerable pain afterward. Thankfully, I have learned that continued movement is what eventually makes the pain subside. The hardest part of the trip was not allowing my anxiety about being so far from any medical facility to take over. We had no cell service, the nearest urgent care was an hour and a half away, and the nearest emergency room was a full three hours by car. All of that is to say, I faced my fears and genuinely enjoyed the trip despite my initial apprehensions.
And yes, I am fully aware that I still need to write a post about those incredible fleeces.


IF YOU FOUND THIS POST HELPFUL, CONSIDER SUPPORTING MY WORK BY SIGNING UP FOR A PAID SUBSCRIPTION.
POSTS OLDER THAN 3 MONTHS ARE NOW FOR SUBSCRIBERS ONLY — YOUR SUPPORT KEEPS THIS SPACE GOING.
INTERESTED IN SUBSCRIBING TO RECEIVE NEW POSTS IN YOUR INBOX?


Leave a comment