
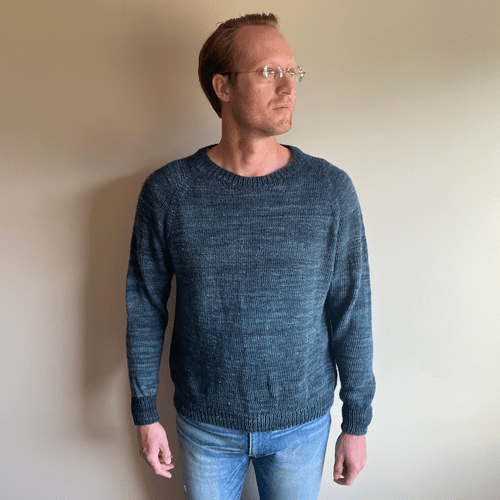
Last year I completed the Melange sweater for Ryan and I just completed the Storm sweater for myself. I never blogged about the Melange sweater, so I’m playing catch up. I made Ryan’s sweater using the women’s version, but after the fact I purchased the men’s version, because I’ve been curious what makes the patterns different. The math behind the design is actually pretty fascinating.
Style and Fit
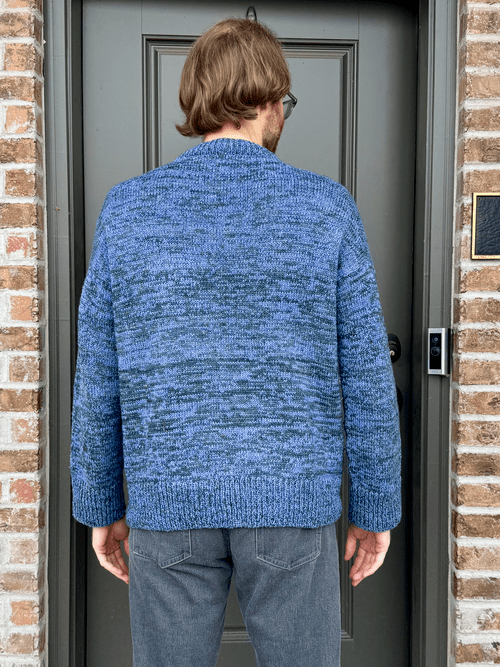
The sweater is worked top down. The back yoke is shaped with short rows to raise up the back neckline and it also creates the slope of the shoulders. The shoulders are worked flat, then joined to form the front yoke. The sweater has dropped shoulders, meaning the shoulder seam extends past the edge of the shoulder for a relaxed silhouette. The front of the neckline is lower than the back, creating a nice jewel neckline. The body and sleeves are worked in the round. The sleeves are worked from stitches that are picked up and knitted along the armholes, which makes for a seamless finish. Finally, the neckline is finished with a folded double rib.
The sweater is meant to have a lot of positive ease, meaning the finished garment should be 6+ inches bigger than your actual bust circumference so the drape and look are as intended. I find it odd that people get mad about the fit of PetiteKnit patterns, because they look awful when they go down a size and eliminate the positive ease. These designs rely on that volume to look intentional rather than just “ill-fitting.” The sweaters are not designed to fit tightly, so of course your results will vary based on how well you follow instructions.
Sizing

Ryan’s chest measures between 39-40 inches, same as me. I have always made size L for myself and Ryan, since I use the same patterns. I decided to go up a size just to see how it would look, so I made Ryan a size XL in the women’s version.
Details
For this project, the pattern recommends 600-650 g of Tynn Peer Gynt by Sandnes Garn. The sweater is worked with two strands held together, but the weight listed is the total amount of yarn you need to buy, not the amount needed per strand. I’ve seen some confusion on this, so just remember that the total weight covers both strands throughout the entire project! In other words, you need about 300-325 g of each color to create the Melange look.
In my case, the yarn I used was actually recycled from an old project. I decided to frog a sweater I finished back in May 2020 because the fit just wasn’t working. Honestly, Ryan just doesn’t look great in raglan sweaters. On top of that, the arms were too short, the hem was too tight, and the shoulders were not wide enough. The neckline is getting pulled out of shape. I hated seeing this gorgeous single-ply yarn go to waste on a garment that didn’t fit right!
Yarn 1
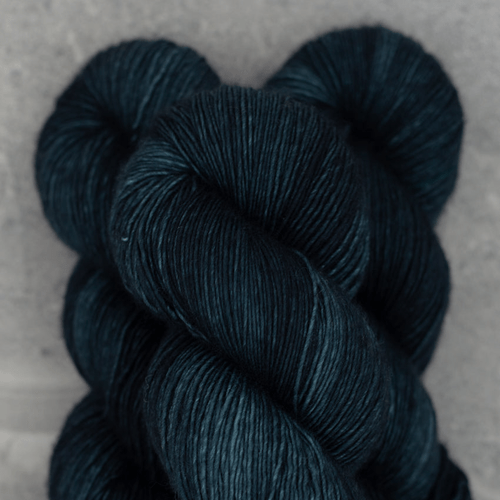
Madelinetosh, Tosh Merino Light + Tweed (Color: Snake) This is easily the most popular fingering-weight yarn on Ravelry, and for good reason. It’s a single-ply and has incredible softness and drape.
- Details: 100% Superwash Merino wool | 421 yards per 107g.
- Amount Used: ~4 skeins or 435 g (roughly 1,711 yards).
Yarn 2
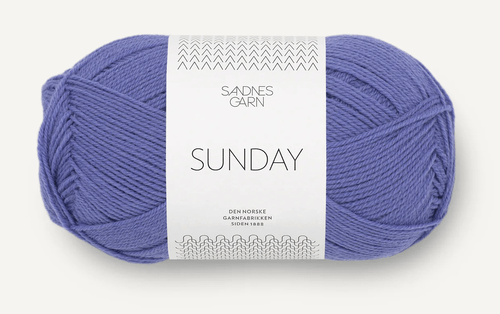
Sandnes Garn, Sunday (Color: Blue Iris 5535) This is a great staple yarn.
- Details: 100% Merino (Not Superwash Treated) | 257 yards per 50g.
- Amount Used: 6.2 skeins or 310 g (roughly 1,593 yards).
I obviously used more yarn than what the pattern recommended, but that’s because I lenghtened the body and arms a lot to fit Ryan.
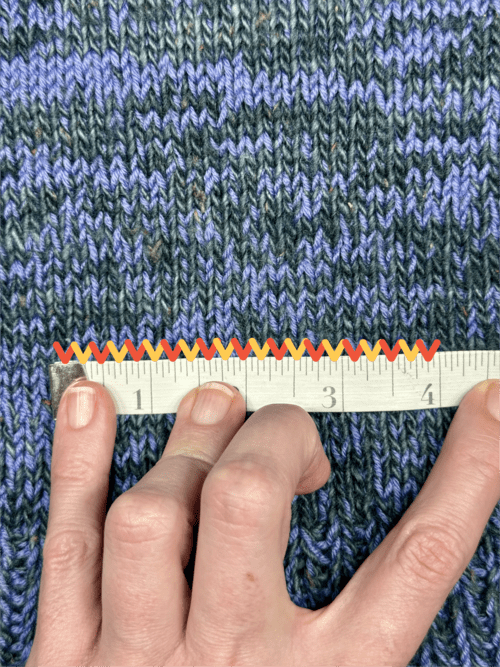
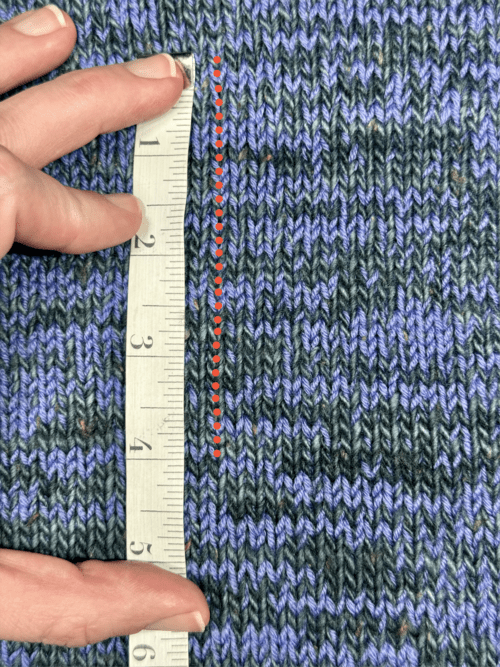
Needle and Gauge
Because I was mixing a single-ply superwash with a non-superwash treated wool, getting the gauge right was even more important to ensure the two fibers behaved well together.
- Needles: 4 mm [US6] needles (or the size needed to hit the stitch count).
- Gauge: 20 sts x 30 rows = 10 x 10 cm [4 x 4 inches] in stockinette stitch.
I got gauge as close as I could get: 21 sts x 30 rows in stockinette stitch.
The Data: Women’s vs. Men’s Patterns
PetiteKnit does not spell out how her women’s and men’s patterns differ, so I got curious and lined them up side by side. Below is a comparison of the Women’s L and XL against the Men’s L, broken down by construction stage.
Intended Ease
The women’s sweater is meant to be relaxed and slouchy. The men’s sweater is meant to sit closer to the body without being fitted:
- Women’s version: 15 to 20 cm (6 to 8 inches) of positive ease.
- Men’s version: 10 to 15 cm (4 to 6 inches) of positive ease.
Overall Length
The men’s sweater is significantly longer:
- Women’s size L length: 61 cm (24 inches).
- Men’s size L length: 72 cm (28¼ inches).
That is over 4 inches of extra length in the torso alone.
Back Yoke
Back yoke depth before armhole increases is longer in the men’s version.
Cast on stitches:
- Women’s L: 112 (40 for each shoulder, 32 for back neckline)
- Women’s XL: 118 (42 for each shoulder, 34 for back neckline)
- Men’s L: 114 (41 for each shoulder, 32 for back neckline)
Back yoke depth after short rows (from mid back):
- Women’s L: 5 in
- Women’s XL: 5.25 in
- Men’s L: 5.25 in
Back yoke depth before armhole increases (from mid back):
- Women’s L: 9.5 in
- Women’s XL: 9.75 in
- Men’s L: 10.25 in
Total stitches after armhole increases:
- Women’s L: 116
- Women’s XL: 122
- Men’s L: 116
Shoulders
Picked up stitches:
- Women’s L: 40
- Women’s XL: 42
- Men’s L: 41
Women’s sweater works more rows before neckline increases. This creates a slightly deeper front scoop.
Rows before neckline increases (shoulder length):
- Women’s L: 26
- Women’s XL: 26
- Men’s L: 22
Total stitches after increases:
- Women’s L: 47
- Women’s XL: 49
- Men’s L: 48
Front Yoke
Front yoke is explicitly worked longer than the back in the men’s pattern, creating extra chest depth. This creates more vertical room through the chest and upper torso. The women’s sweater, by contrast, reaches the underarm more quickly.
Cast on extension between shoulders:
- Women’s L: 18 (112 total)
- Women’s XL: 20 (118 total)
- Men’s L: 18 (114 total)
Front yoke depth:
- Women’s L: 9.5 in
- Women’s XL: 9.75 in
- Men’s L: 11.5 in
Total number of stitches after armhole increases:
- Women’s L: 116
- Women’s XL: 122
- Men’s L: 116
Body
Total number of stitches once the front and back are joined in the round:
- Women’s L: 236
- Women’s XL: 252
- Men’s L: 236
Body length from mid back:
- Women’s L: 20.75 in
- Women’s XL: 21.25 in
- Men’s L: 25.25 in
Ribbing length:
- Women’s L: 3.5 in
- Women’s XL: 3.5 in
- Men’s L: 3.25 in
Sleeves
Women’s sleeves are shorter. Men’s sleeves are noticeably longer. However, women’s cuffs are longer and more relaxed. Men’s cuffs are shorter and tighter.
Picked up stitches:
- Women’s L: 78
- Women’s XL: 82
- Men’s L: 88
The women’s patterns include short rows before working in the round for added shaping. The men’s version goes straight into the round. This subtly changes how the sleeve hangs. The women’s sleeve has a slightly more sculpted top that accommodates a narrower shoulder slope.
Work until the sleeve measures from where stitches were picked up and knitted:
- Women’s L: 15.25 in
- Women’s XL: 15.25 in
- Men’s L: 18.5 in
Decreases are worked along the length of the sleeve. The total of number of stitches at the end of the sleeve:
- Women’s L: 66
- Women’s XL: 66
- Men’s L: 64
Cuff ribbing length:
- Women’s L: 4.75 in
- Women’s XL: 4.75 in
- Men’s L: 2.25 in
Neck Edge
The men’s neckline is shorter and sits closer to the neck. The women’s neckline is deeper and visually bulkier.
Picked up stitches:
- Women’s L: 114
- Women’s XL: 116
- Men’s L: 108
Rounds for folded double rib:
- Women’s L: 25
- Women’s XL: 25
- Men’s L: 17
What This Tells Us
The men’s version is built for a deeper armhole and a significantly longer torso. This shows up most clearly in the front yoke, where the Men’s L is nearly two inches longer than the Women’s XL.
Interestingly, the Women’s XL has a broader shoulder width and a wider neck opening than the Men’s L. The women’s versions also work more rows before neckline increases, creating a slightly deeper front scoop.
The neck treatment is one of the starkest differences. The men’s version picks up fewer stitches and works far fewer ribbing rounds, resulting in a shorter, snugger collar. The women’s versions use a deeper folded double neck rib that reads as softer and more substantial.
In short, the differences are less about circumference and more about neckline shaping choices and finishing details.
Neckline Insurance Policy
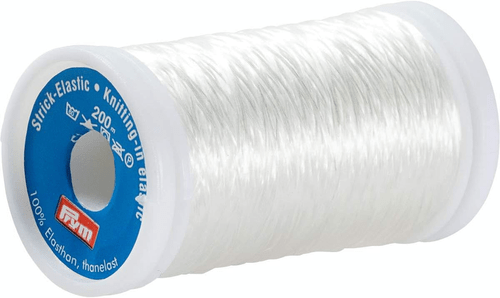
If you’ve ever finished a gorgeous, oversized sweater only to find the neckline sagging and pulling toward your shoulders, you’re not alone. Dropped-shoulder designs like the Melange are especially prone to this because of the weight of the sleeves and the fact that there’s absolutely no stability along the shoulder seam. The best way to keep that jewel neckline sitting crisp and circular is to sew in transparent knitting elastic. DO NOT SKIP THIS STEP:
I’ve had my roll of Prym clear elastic for years now. This will last you for dozens of sweaters:
To Size Down or Not? My Take on 1×1 Ribbing
When it comes to finishing details, ribbing is often where knitters have the strongest opinions. This pattern recommends switching down to a 3.5 mm [US 4] needle for the 1×1 ribbing, a common suggestion meant to keep edges looking crisp and snug. In practice, I find this can create fit issues.
The reality is that 1×1 ribbing is already tighter than stockinette. The alternating knit and purl columns naturally pull toward each other, reducing the overall circumference without any help from a smaller needle. Dropping down a needle size compounds that effect.
On a sweater designed with generous positive ease, this extra tension can cause the hem to cinch at the hips and the cuffs to grip the wrists too firmly. Instead of enhancing the shape, it interrupts the drape and makes the sweater hang awkwardly.
I prefer to work 1×1 ribbing on the same needle size used for the body. Staying on 4 mm needles allows the ribbing to pull in just slightly, enough for a clean finish without distorting the silhouette. The result is a straighter line at the hem and cuffs and a sweater that hangs better I think.
If you want a sharp, close fitting edge, sizing down your needles may be the right choice. For me, a softer ribbing creates a better balance and a more relaxed, wearable fit.
Final Fit

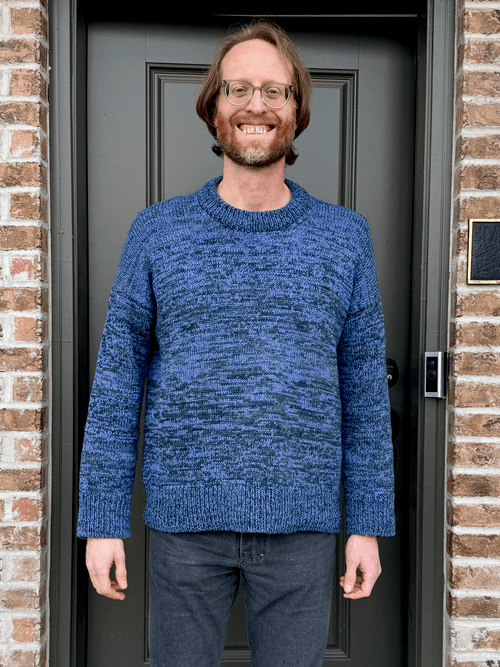
I will concede that the men’s version would fit Ryan better. You see how his front hem is higher by about 2 inches than the rest of the hem. The extra length on the front yoke would totally fix this fit issue! Oh well, the rest of the sweater looks amazing and you don’t notice the hem issue when he’s moving around in the sweater. He just looks cozy and comfortable.
Conclusion
Comparing these two patterns was educational for me. Whether you choose the men’s or women’s version, the real secret to success with PetiteKnit designs is adhering to the oversized fit and taking the time to add those professional finishing touches like neckline elastic.
However, none of those details matter if you don’t wash and block your finished sweater. Because this design uses two strands of wool held together, the stitches can look a bit “stiff” or uneven right off the needles. A good soak in wool wash allows the fibers to bloom and settle into their final shape. Blocking is also where that positive ease really comes to life—it transforms the fabric from a bunch of wool into a garment with beautiful, intentional drape.
If you’ve put in the dozens of hours to knit a sweater, give it that final bath! It’s the difference between a sweater that looks “homemade” and one that looks “handmade.”
Aside: remember how I added 5 inches of length on the Wardrobe by Me Men’s Jean? Yeh, I haven’t had to shorten the jeans yet. Guess all that extra length was really needed!
Personal Aside
I don’t have a fun aside right now. Life has NOT be fun so far this year, quite the opposite!
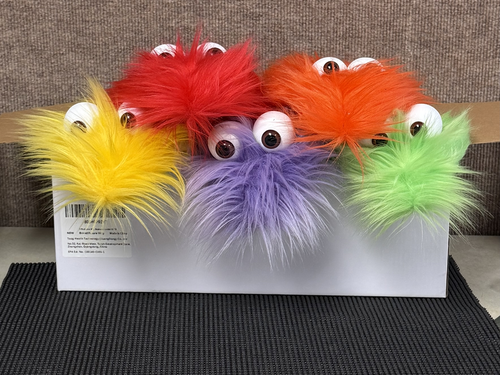
Here’s a box of hand puppets that Ryan made for his students. We have both been making and using our hands to cope with grief and loss. When you are dealing with a loss that feels too big to hold, there is a profound relief in focusing on a task that has a beginning, a middle, and an end. Whether it’s Ryan stitching together puppets for his kids or me knitting a new sweater, the act of making gives us a sense of agency. It’s a reminder that even when things feel broken or awful, we still have the power to make something joyful or beautiful. Using our hands gives us the resilience we need to keep going.

Leave a comment