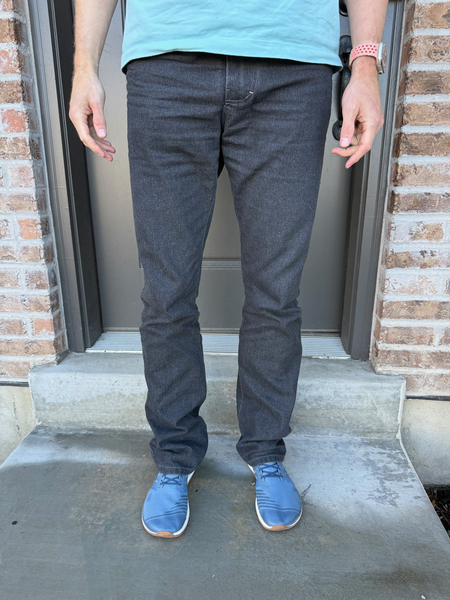
Ryan has desperately needed new jeans for several years now—not because his jeans didn’t fit or were too old, but because even after prewashing the fabric, they still shrank significantly lengthwise over time. Annoyingly, his jeans ended up several inches too short and looked ridiculous. Unfortunately, I didn’t have enough fabric leftover to add panels to the bottom to lengthen them (similar to the Shop Pants pattern). I just couldn’t take his high-waters any longer.
I’ve never used an actual pattern to make Ryan’s pants; they’ve always been self-drafted because of his unique shape. However, on a whim, I decided to try a commercial pattern. I was torn between the Fulford Jeans from Thread Theory Designs and the Wardrobe By Me (WBM) Men’s Jeans. I went with the WBM because I didn’t want to deal with the straight side seam of the Fulford Jeans—only to discover that the WBM also has a straight side seam. I decided, what the heck, let’s try the pattern anyway. If it turned out awful, my backup plan would be the Morgan Jeans from Closet Core Patterns.
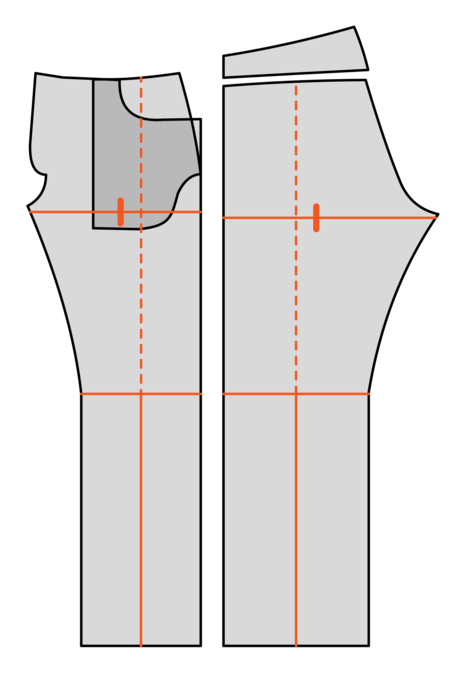
I knew that whichever pattern I ended up using, I would need to include a front dart, and I was planning on using the construction method from the Stokx Pattern Square Pants. However, when I discovered the hidden front dart integrated into the front pocket construction, I was beyond excited. By lucky coincidence, the WBM Men’s Jeans ended up being perfect for Ryan.
I’ve already hinted at this pattern in my last two posts. If you want to read more about my deep dive into bespoke buttonholes, check out that post here. And if you haven’t yet, take a look at my post about front darts here.
Analyzing Style and Fit
On the surface, these look like your classic five-pocket design with a straight, relaxed fit and boot-cut legs. But this pattern has two hidden features that make it absolutely brilliant: straight side seams so you can make the jeans from selvedge denim, and a hidden front dart.
Besides the unique pattern drafting, the jeans come in 15 sizes ranging from 26 to 42 inch waist and 32 to 48 inch hips. Using VStitcher, I rendered the jeans on Oliver in size 34 (34 inch waist, 40 inch hips) across multiple body variations (lean, average muscle, ripped, and belly). The fabric is 8.25 ounce denim (95% cotton and 5% recycled cotton) for realistic drape. To highlight fit, I’ve added drapelines and balance lines as references. The fit of the jeans changes dramatically with the different body types. At the end of the video, I show what would happen if you removed the hidden front pocket dart.
Sizing

Ryan’s current measurements are a 33-inch natural waist and a 41-inch lower torso. The pattern recommends choosing your size based on the waist, but I ignored that and went with the lower torso measurement instead. I made a size 35 for Ryan. I’m glad I did, because the jeans were extremely tight in places at first. Once the waistband was fitted to Ryan’s preferred position, his waistline measured 35.5 inches. However, according to the pattern’s final garment chart, the waistband for size 35 should measure 36.25 inches, which makes me think the pattern drafting might be slightly off.

The final garment chart in the PDF (waistband and hips column) is shown on the left. When I measured from the center of the button to the edge of the buttonhole, I got slightly smaller waistband circumferences across all sizes—about 3/4 inch smaller on average (waistband difference column). For the hip, I measured at the top of the crotch curve, which is where I usually take the widest torso measurement. My results showed the hip measurement getting progressively smaller as the sizes increased (hip difference column).
Now, the hip discrepancy could simply come down to where the measurement is taken. Without a clearly marked hip line on the pattern, there’s no way to know exactly where the designer placed their reference point. But the waistband difference is harder to explain since I measured directly from the button to the buttonhole.
Materials

I made one of those impulsive buys without ordering a sample first. I was hoping to find a denim supplier I could count on long term. This is Etta Washed Denim (100% cotton, 40 g/m2) from mind the MAKER that I bought through Minerva. I really dislike those niche fabrics that disappear after one run. When I bought the upcycle denim a few years ago, it seemed like it would stick around since it was sold everywhere—We Are The Fabric Store, Closet Core, Blackbird, and others. Turns out it was more of a one-time thing. The Etta Washed denim itself is fine, just softer than I expected, which makes the jeans baggy by the end of the day.

I recently stumbled across a new-to-me online fabric store that completely blew my mind. One of my biggest pet peeves is how seasonal fabrics only ever show up in that season’s color palette. Take corduroy, for example—it’s always tied to autumn, which means you mostly see it in deep, rich shades like emerald green, plum, brick red, burnt orange, and mustard. That’s great if I’m sewing for myself, but Ryan looks best in a soft summer palette. Good luck finding corduroy in muted or grayish browns, greens, blues, and purples! Ryan’s favorite pants growing up were a pair of taupe gray corduroys, and now that I’ve found corduroy in so many colors, I think I might have to make him another pair of jeans!
Finding the Drapeline
With patterns that have a straight side seam or no side seam, you can locate the drapeline by marking the midpoint of the front hem and the midpoint of the knee. Normally, connecting those two points gives you a line you can extend up to the waistline to form the full drapeline. However, this particular pattern is a little different because of its bootcut shape. The hem and knee centers line up vertically, which means your drapeline would end up parallel to the selvedge edge—and that doesn’t make sense from a draping perspective.

Subscribe to continue reading
Become a paid subscriber to get access to the rest of this post and other exclusive content.
