Organizing Pattern Pieces
Shelving

I’ve had several requests over the years to give a tour of my sewing space and I have finally come up with a way that for me feels appropriate. You will come to realize very quickly, I am organized and don’t have a lot of extra stuff around. My sewing space is very practical and therefore feels like it would be boring for most people to see. However, I’m hoping that by focusing on my boring organization, it’ll help some people figure out their own style and organization.
Everybody has their own way of organizing pattern pieces. I’ve seen all sorts of methods, but this works best for me. This bookshelf is from the IVAR system from IKEA. The IVAR system is EVERYWHERE in my place. Let’s take a closer look at some of the things on this bookshelf.
Decoration

This is the only trinket in my sewing room. It’s a cross stitch pattern I created and Ryan stitched. I love Star Trek TNG and this is the perfect small addition to my sewing room. I don’t need any other decoration.
Magazine Holders
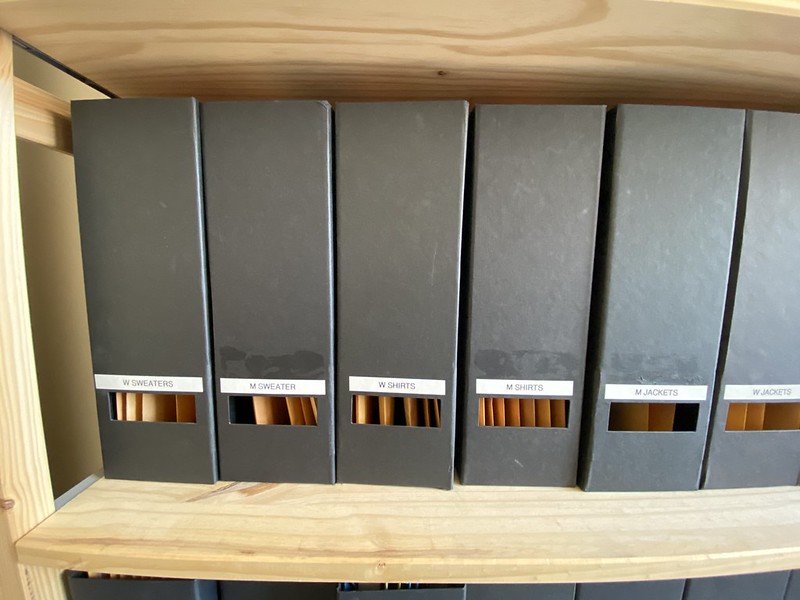
My patterns are categorized and placed in these magazine holders from IKEA. My original version involved using rubber cement to affix cute labels, but then I got rid of that and just used a basic label maker to add labels. Unfortunately I can still see the staining from rubber cement, but that’s ok.
I can fit 8 magazine holders on a shelf so here’s a list of my categories:
- W Trousers
- M Trousers
- W Shorts
- M Shorts
- W Sweaters
- M Sweaters
- W Shirts
- M Shirts
- Jeans
- Dresses
- Child
- Underwear
- Pajamas
- Accessories
- W Jackets
- M Jackets
- Knit Patterns
- Simplicity
- Ottobre
- McCall
- Indie Patterns
- Envelopes
- Labels
- Manuals
Obviously, I still have a lot of room on my shelving and could always get a taller unit, but this has worked for me for years now. Let’s break down this further and discuss what’s actually in these holders. I only keep pattern pieces I’ve actually altered and use for patterns. I make patterns over and over again because I’ve often put a lot of labor into getting a pattern to fit. I don’t want to lose those pieces, since it would be very difficult in most cases to recreate my alterations. I obviously have a few extra odd boxes for organizing. I have a small handful of print knit patterns. I do occasionally buy physical patterns and they get their own holders, but 90% of my patterns are purchased as digital PDFs. I literally have a box labeled envelopes that stores the empty envelopes. I also have a box filled with different types of printer labels. I label everything. Finally, all my sewing manuals are in one place.
Envelopes

I use basic 9″ x 12″ envelopes to store my patterns. I’m not very particular about these. I like that they are uniform. On each envelope I will place, surprise surprise, a label with at least three lines of information: 1) pattern company, 2) pattern name, and 3) who the pattern pieces are for. I have multiple Union St Tee pattern pieces: my standard summer pattern that is loose and flowy and a smaller, long-sleeved version for winter under sweaters. Because these are different sized patterns, they’ll be put in their own envelopes. I might add more description to the label to help distinguish between these two versions.
Paper for Pattern Pieces

What are my pattern pieces? If I’m making something from a physical pattern, I am definitely on “Team Trace” and will trace the pattern to paper. If my pattern is digital, I will eventually get the pattern pieces on my final paper as well. The paper I love and have used from the beginning is dotted alphabet paper. My most reliable source right now is from Mood Fabrics. But I have seen it on Wawak and Amazon. I love this paper because the markings are 1 inch apart. I can easily square up my corners, get the pattern centered on grainline. Sigh. There’s so much this paper does to help with altering and getting patterns straight. The paper is slightly lighter weight than standard printer paper, so it is not as bulky when folded up and stored in the envelopes.
Labels on Pattern Pieces
When I trace out or copy my final alterations to my paper, there are some key things I like to add to the pieces. Obviously, you want to make sure to copy all notches and pattern markings, but here’s a list of things I like to add to my pattern pieces:
- Grainline centered on pieces
- Folded edge if it is supposed to be cut on the fold
- Amount of seam allowance
- Amount and type of hem allowance (⅝” single fold, ½” and then 1″ double fold)
- Cut information (how many and what fabric)
- Seam allowances if different from the pattern seam allowance
- Pattern company
- Pattern name
- The specific piece of the pattern
- Current Date
- The person the pattern is for (e.g., me, Ryan, my mom, etc.)
Conclusion
So there you have it, my organization for physical patterns and all my pattern pieces. Next time, I will discuss how I organize my digital patterns.


