
This blog post is going to be another technical post, but isn’t that my shtick?! Over the past few months, I’ve been getting into the nitty-gritty of fitting pants. I tried to work through patterns and make numerous test pairs to get the fit right. I was methodical and very precise about documenting my alterations. If you remember, my first pant exploration was with Closet Case Ginger Skinny Jeans. I ended up making 3 test pairs, one baste fitting, and finally a wearable version.
- Closet Case Patterns Ginger Skinny Jeans Pattern Muslin #1
- Closet Case Patterns Ginger Skinny Jeans Pattern Muslin #2
- Closet Case Patterns Ginger Skinny Jeans Pattern Muslin #3
- Closet Case Patterns Ginger Skinny Jeans Pattern Baste Fitting
- Closet Case Patterns Ginger Skinny Jeans
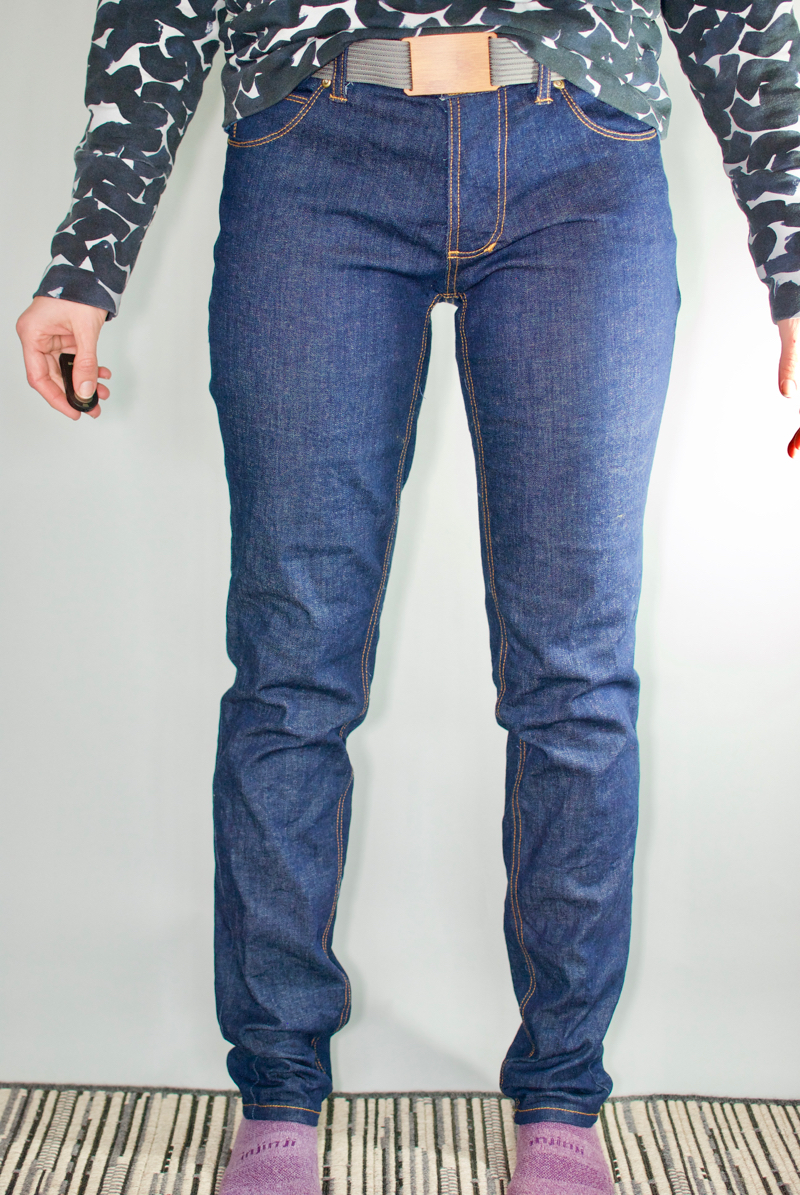
The jeans fit. I’m not 100% happy with the fit, but they fit better than any RTW jeans I’ve ever owned. I take my victories when I can. However, a few fit issues are remaining: twist in the left leg, pinching and rubbing along the inner thigh, and bagginess in the hamstring area. I also don’t love how the front crotch looks in the pant either. I’ve chalked up my complaints to being overly fastidious, which seems to happen for many sewers. We have a terrible habit of over-analyzing fit.
DRAFTING PATTERN
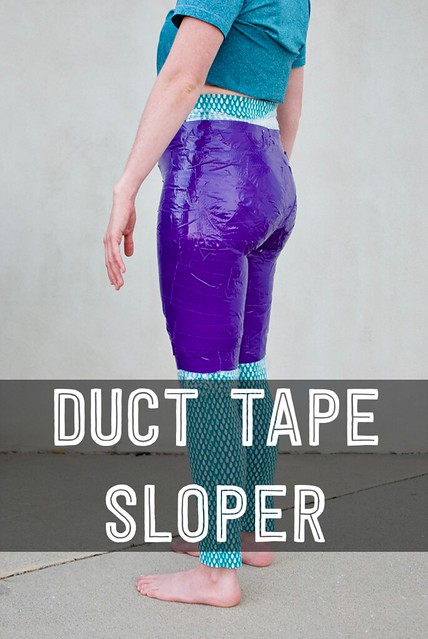
Well, my need to improve fit got the better of me. During my creative flurry with the duct tape sloper, I drafted a skinny jeans pattern and used pieces from Closet Case Ginger Skinny Jeans to guide my pattern drafting.
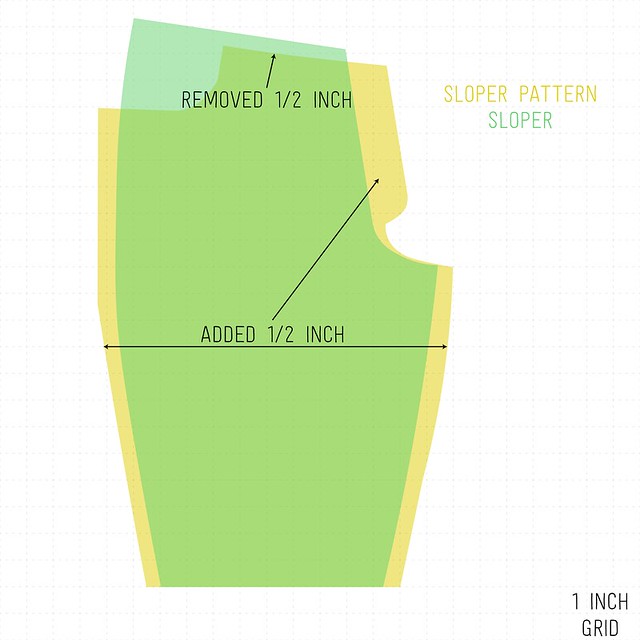
FRONT LEG
I dropped the waistline down a ½ inch because the pattern adds a waistband. I added ½ inch to the side seam, inseam, and along center front. I stopped when I got to the crotch curve and just blended the existing curve down to the inseam. Using the Ginger skinny jean pattern, I added the front fly extension and cut out the shape of the front pocket. I had to also redraft the front pocket pieces, but that was straight forward once I got my front pant piece figured out.
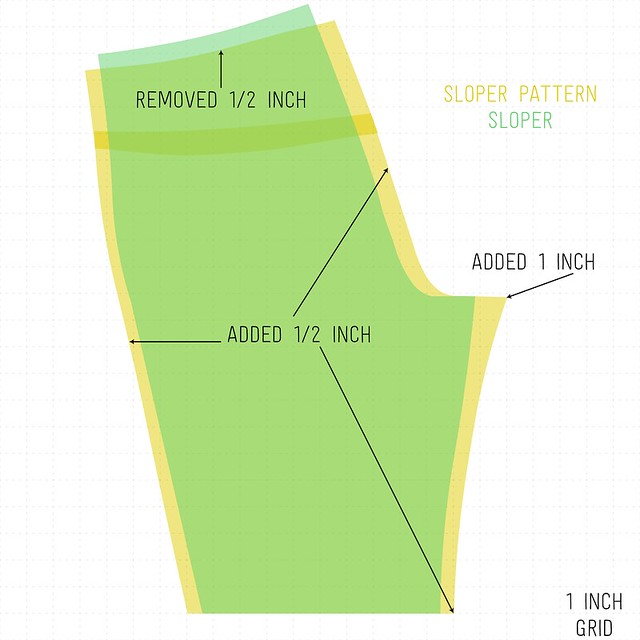
BACK LEG
Again, I dropped the waistline down a ½ inch, because of the waistband. I added ½ inch to the side seam and along center back. For the inseam, I added 1 inch at the crotch curve and quickly graded it back down to ½ inch along the rest of the inseam. Like the front, I blended the back crotch curve into the inseam. On a wing and a prayer, I drafted a back yolk piece.
Why choose ½ inch to add around everywhere? Well, I guessed. I took my sloper and compared it against my altered pattern and just got a sense that ½ inch was the average difference. The seam allowance on the Ginger skinny jeans is ⅝ inch so I’m not adding quite that amount.
GINGER JEANS VS ALTERED
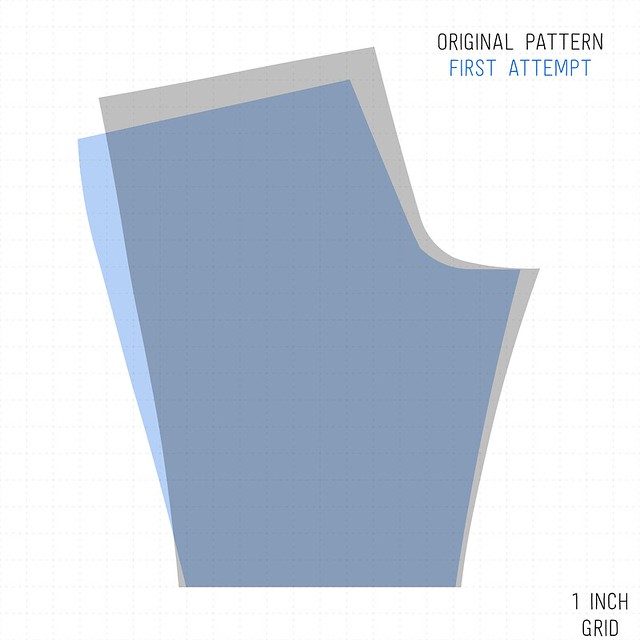
I don’t think I ever showed the final comparison between the original Ginger skinny jeans and my final altered pattern. Before I reveal the comparison of my self-drafted pattern, let’s look at the previous ones.
FRONT LEG
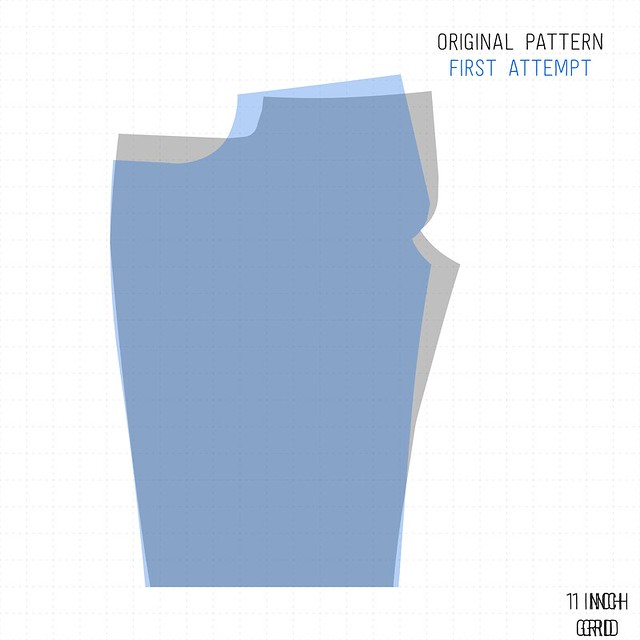
BACK LEG
SELF-DRAFTED VS ALTERED VS GINGER
Here’s the sad truth. I was nowhere CLOSE to altering the pattern to fit right. When I saw my self-drafted pattern compared to the others, I was so distraught. But before I let this wave of negativity hit me, I quickly sewed up a test pair to check fit. Now another wave of emotions, excitement and positivity, counteracted the negative feelings of failure and sense of ineptitude. I was having all the complicated feels. My self-drafted pattern fits better than I could even imagine. I didn’t know what good fit looked and felt like until I experienced it. It was magical. All those self-loathing emotions about sewing a poorly fitting pair of jeans were soon gone because I knew I had a way to make an even better pair!
FRONT LEG

I need to create a new alteration name. We’ve all heard about the full or flat butt alteration, large or thin leg alteration, full or flat belly alteration, etc. How about the “I-do-hundreds-of-squats-and-lunges-daily” alteration? For my front leg, my inseam doesn’t curve inward like every pattern shows, but curves outward.
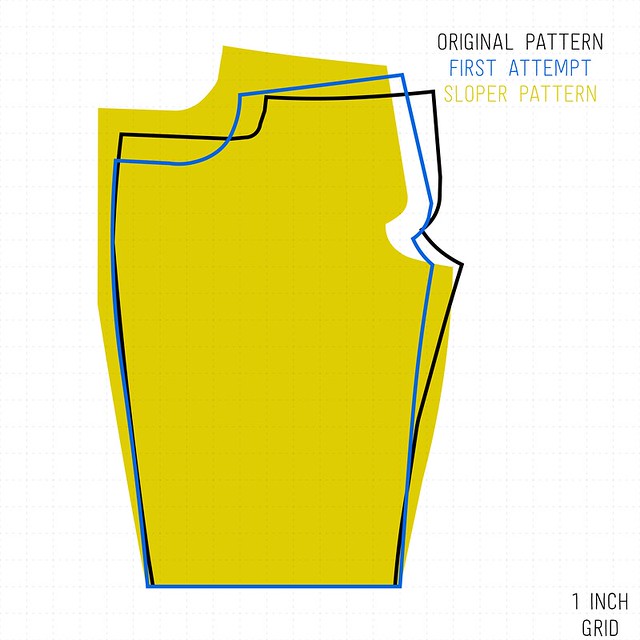
I have no idea how I would go from the original pattern to my self-drafted pattern. They are just so different. I have a flattened oval-shaped torso. My torso is much narrower front to back and broader side to side. How do you alter a pattern for oval shaped verses being cylindrical? I could sit here and think aloud about all the different ways to fit my body, but this is why I made the duct tape sloper, so I didn’t have to over analyze fit.
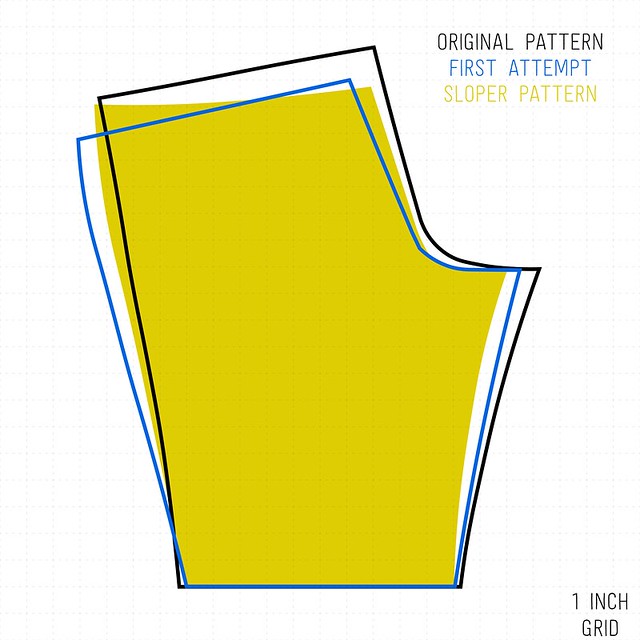
BACK LEG
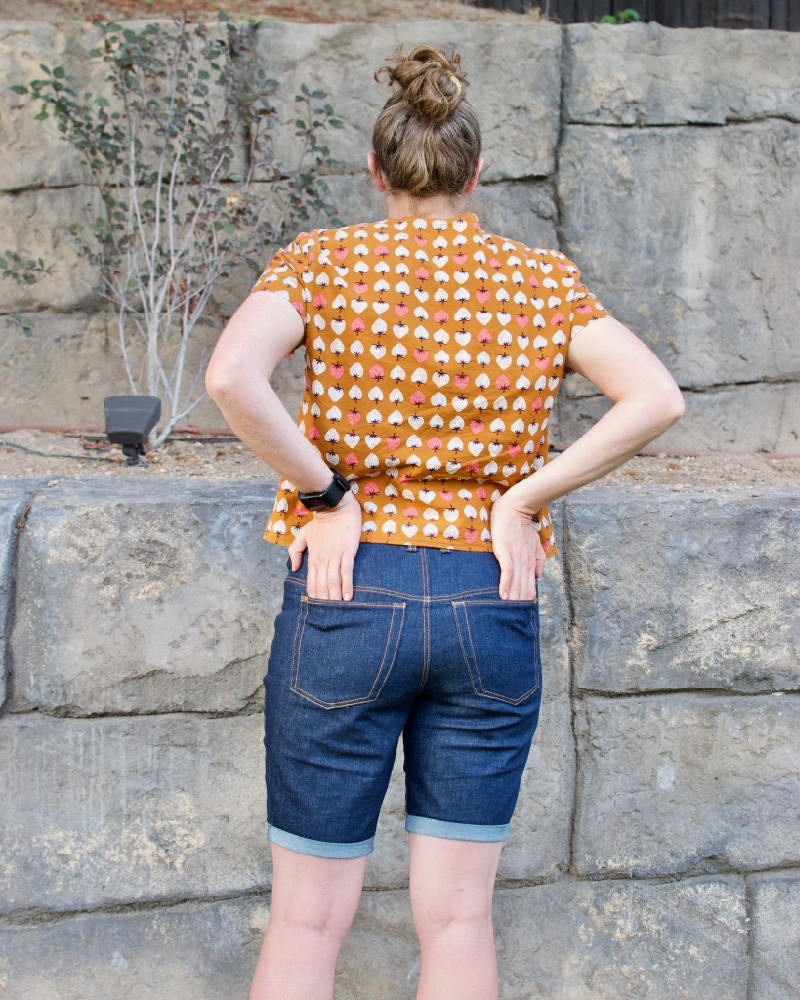
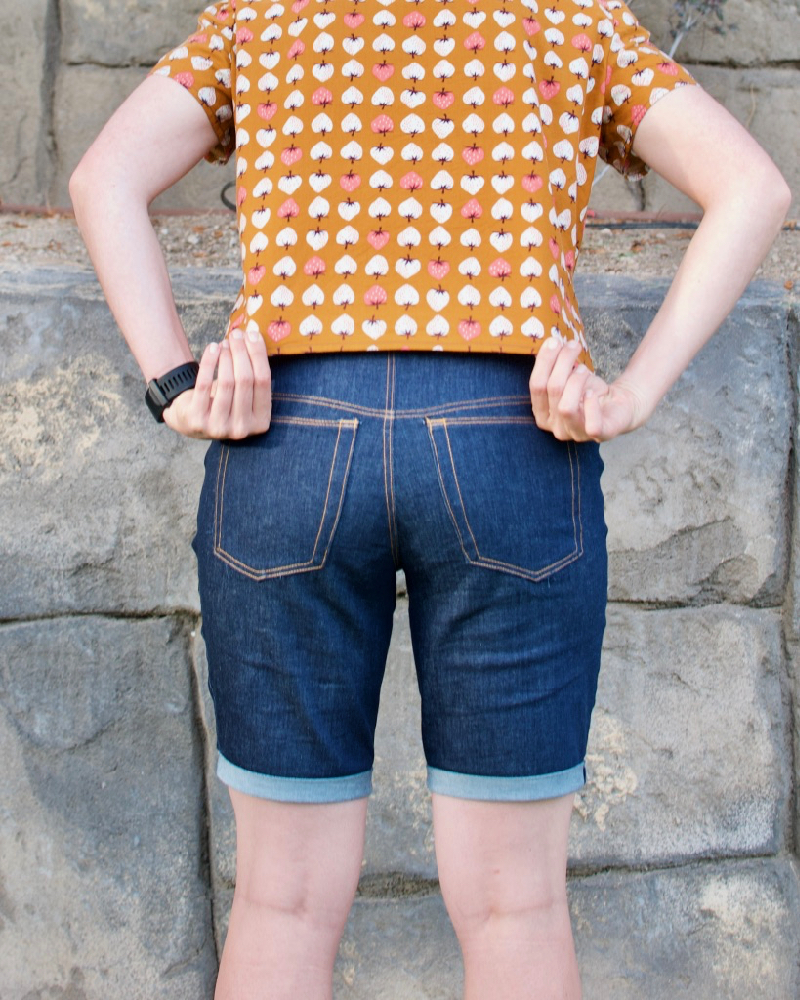
The original Ginger jeans are absolutely not close. My first pair after alterations is ALSO not close. Luckily I love the fit of my self-drafted pattern. Hopefully, this post motivates you to make yourself a duct tape sloper, because it gets you straight to a pattern that fits! I provided a 1-inch grid on my images to give you a sense of HOW MUCH would have to change. In some cases, I would have to make more than a 1.5-inch adjustment.

At that point, you have to ask whether or not you cut out the right size. I am cutting out the right size, but this goes back to the oval versus cylindrical torso issue. I have the same circumference as everyone else, but my shape is oval. I don’t know anymore. I’m seriously considering purchasing the Ash Jeans from Megan Nielsen just to see how far off fit is with that pattern!?
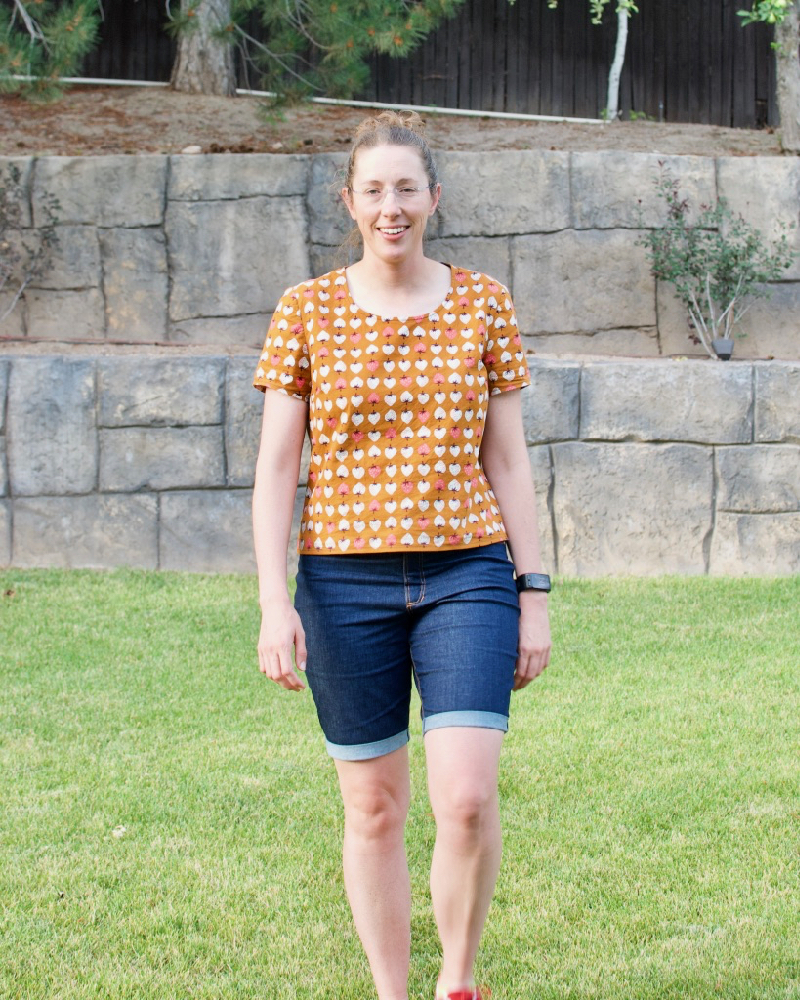
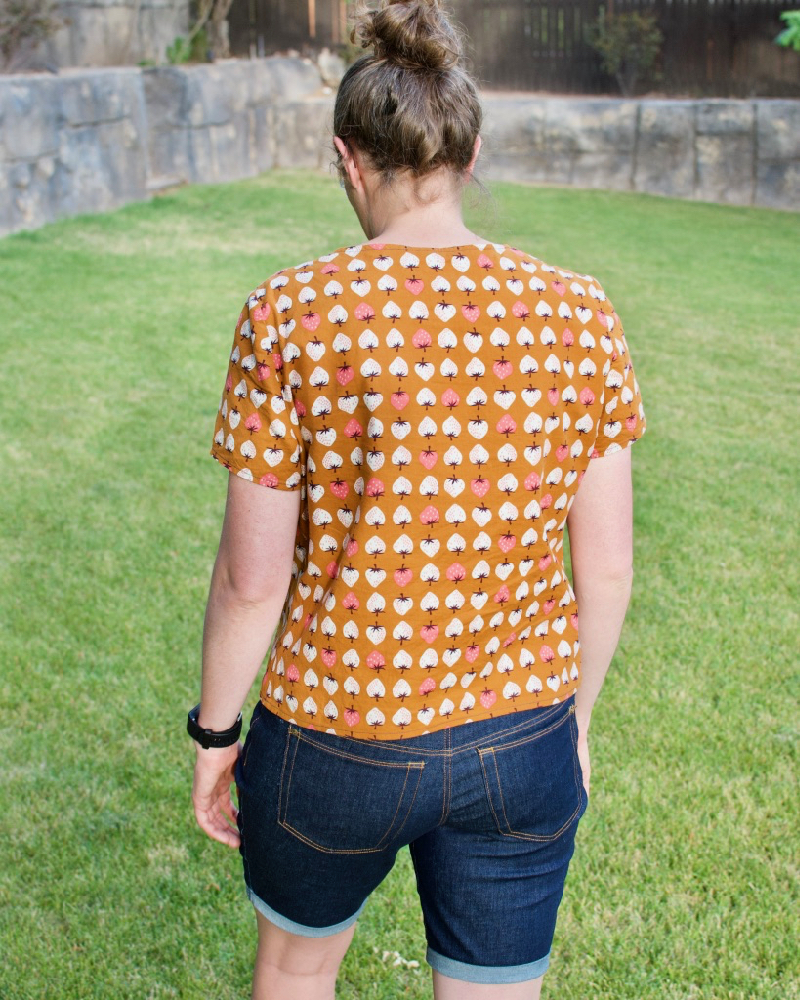
SELF-DRAFTED SKINNY JEAN SHORTS

GOOGLE DRAWINGS
I’ve included my patterns in a google drawing if you want to play around with fit and aligning the images:
FINAL THOUGHTS
Hopefully, my self-drafted jean shorts elevate the often criticized “jorts”.


So glad they FEEL better than anything you could buy! They look so comfortable! Great job on all your hard work! ❤
LikeLiked by 1 person
They look great – such a vast improvement on the originals! And the fact that they feel fantastic means you’ve nailed it!
LikeLiked by 1 person
I realize that they look not that different in terms of fit. However, they feel so much better and it’s no longer uncomfortable to sit.
LikeLike
Wow ! So cool to see this sewn up. I have to give this a try.
LikeLiked by 1 person
I think the fit on your skinny jean shorts is nothing short of AMAZING 🙂 They look fabulous!
LikeLiked by 1 person
Thanks. The feel even more fantastic then they look.
LikeLike