Raise your hand if you: struggle with altering patterns, don’t know how to get pants to fit right, have no idea what your crotch curve should look like, and so on! I have been sewing for less than five years, and pants are still a bit elusive to me. I can sew pants blindfolded with one arm tied behind my back. I’ve got my method perfected, but fitting pants is still a nightmare. I have officially completely solved my pant fit issues.
DUCT TAPE BODY FORM
In the sewing community, we’ve probably all seen the duct tape body form for the poor sewer who can’t afford an actual dress form. That’s at least why I don’t own one. They’re expensive. But the duct tape form doesn’t suffice either in my book, which is why I’ve never made one. But I had this brilliant idea the other day, make the duct tape body form and then cut it out to create…

…an instant sloper!

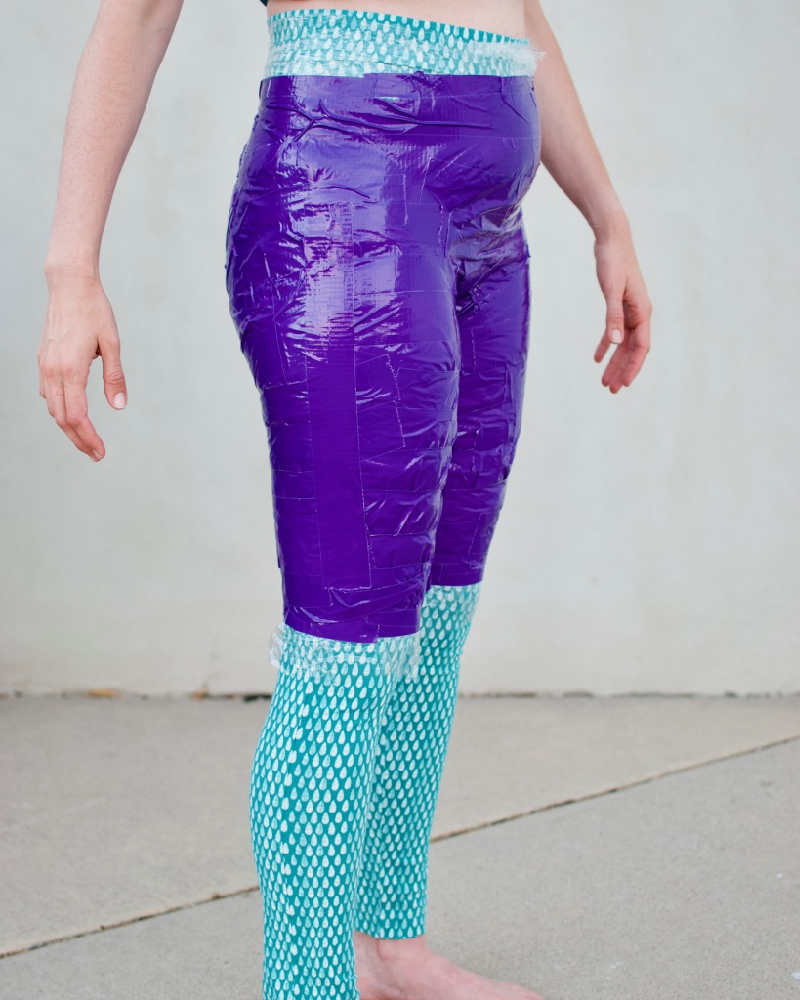
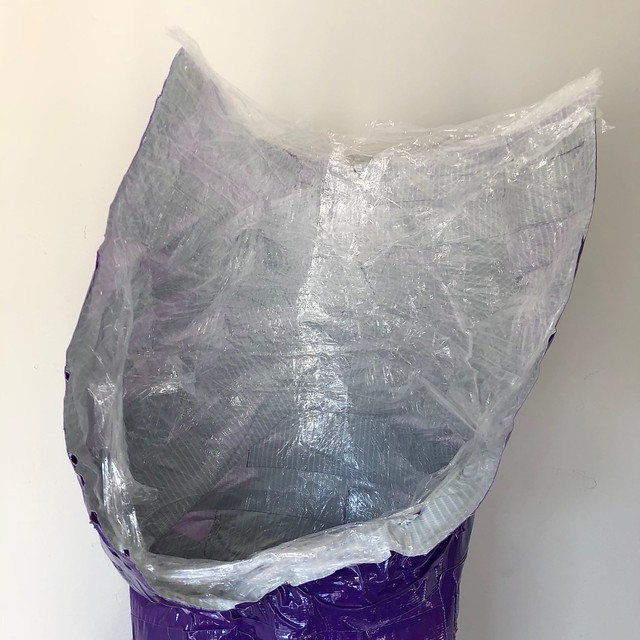
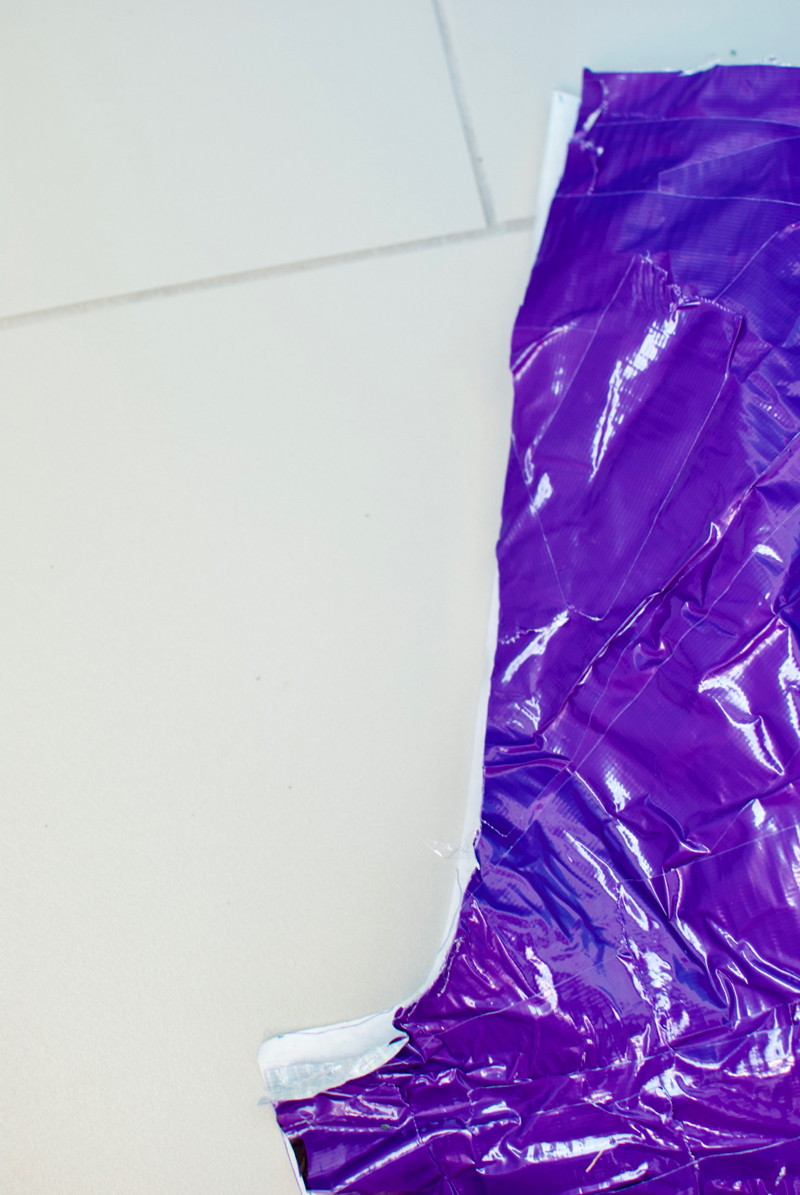
Here’s what you’ll need: 2 rolls of duct tape, saran wrap, and scissors. I created a bottom sloper and will eventually make a top sloper. I found my natural waistline and started there and went down to the top of my knees. You could choose different starting and stopping points; it’s entirely up to you. I didn’t include my calves this time, but maybe the next time I will. I don’t have problems fitting pants below my knees, so that’s why I didn’t duct tape down to my ankles. Start by covering yourself with saran wrap. This gives the duct tape something to stick to that isn’t you or your clothes. Once you have saran wrap placed, start taping. I’m not sure there’s a correct method for taping. I know too much human anatomy, so I was generally following large muscle groups. NERD!!
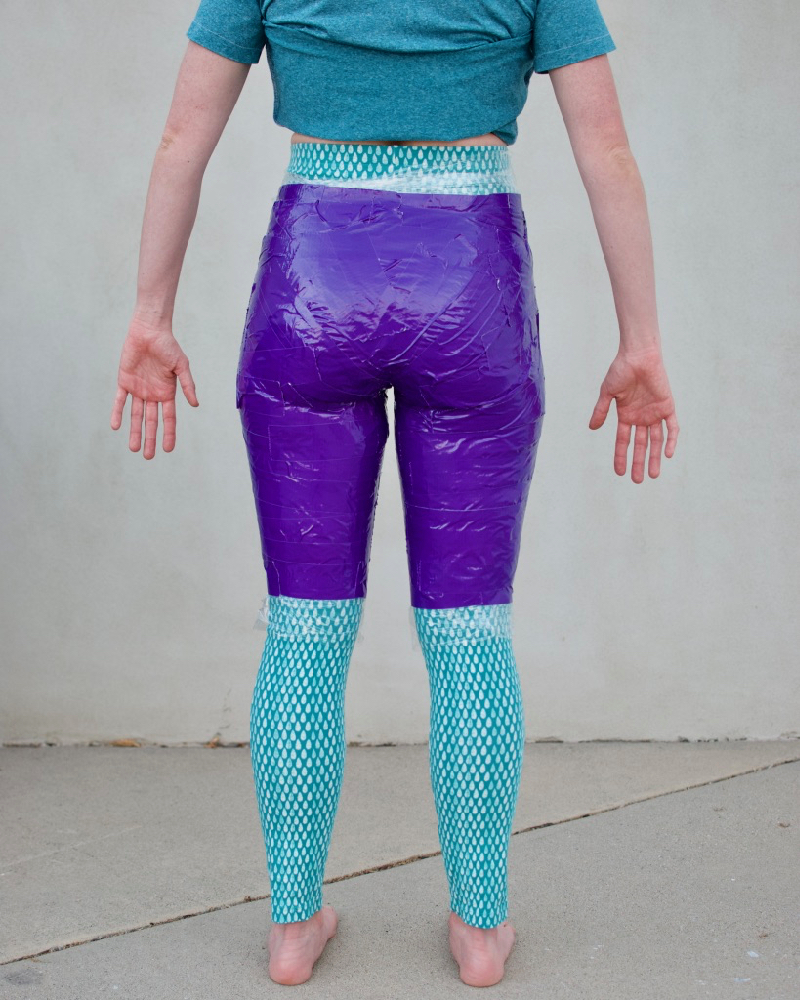
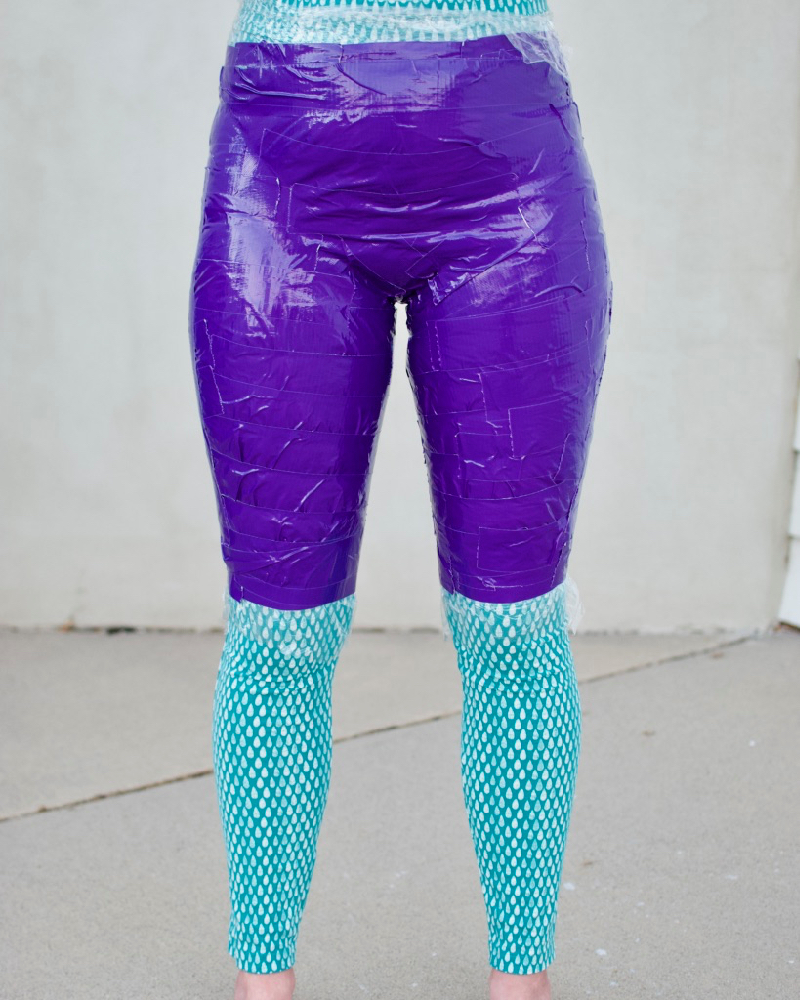
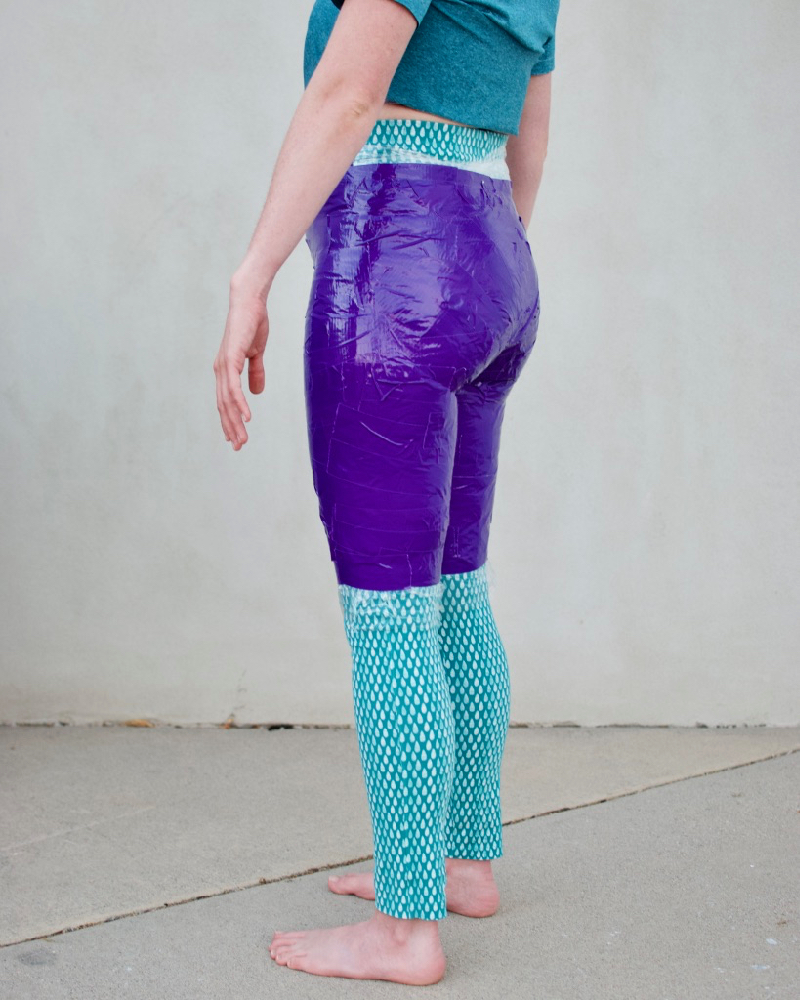
When you are done taping, find a way to mark the center point of your side seam along your hip and the center point of your inseam. Next, cut along the center back until you can wiggle out of the thing. Now you are ready to create your sloper.
SLOPER
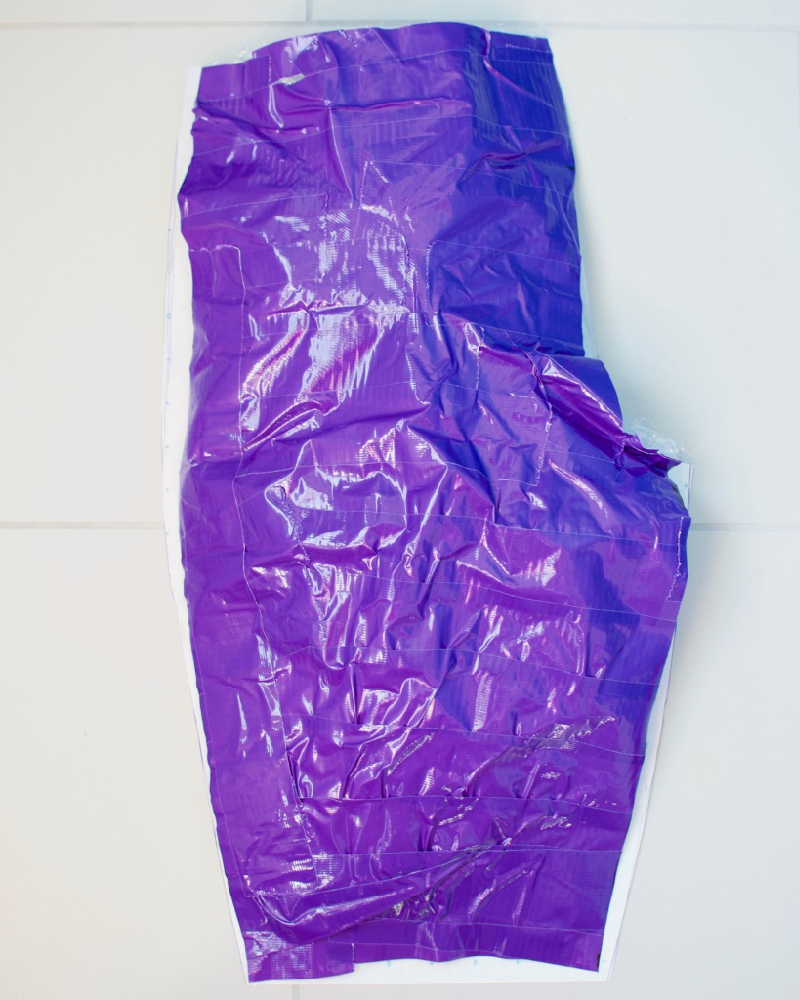
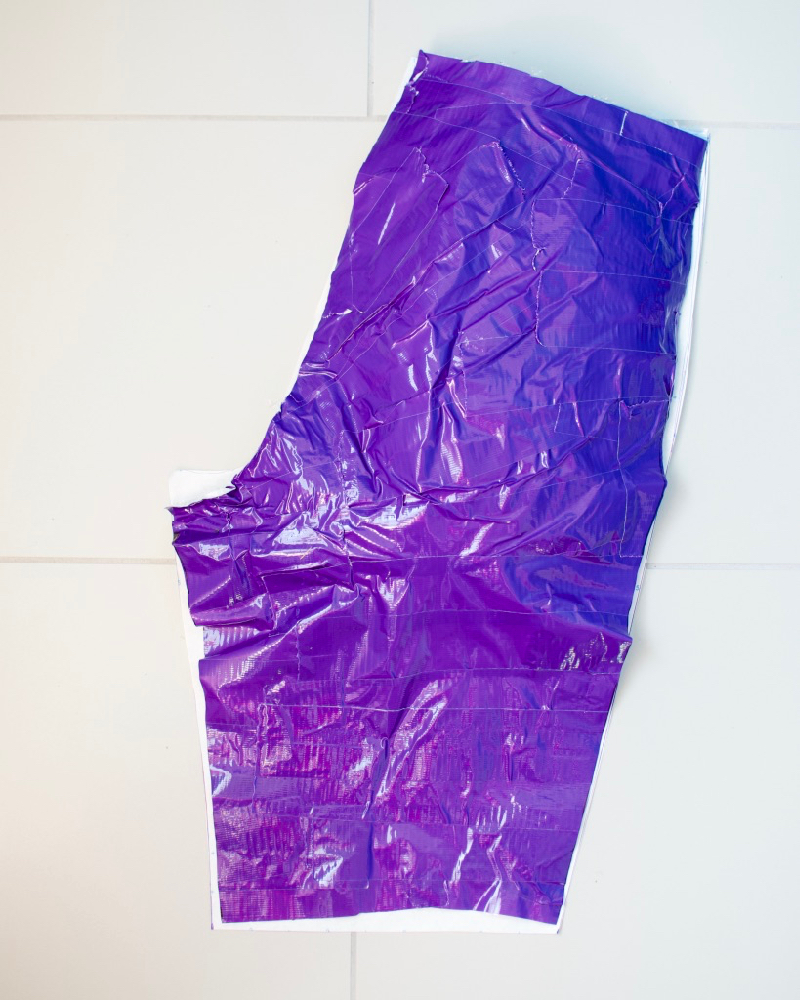
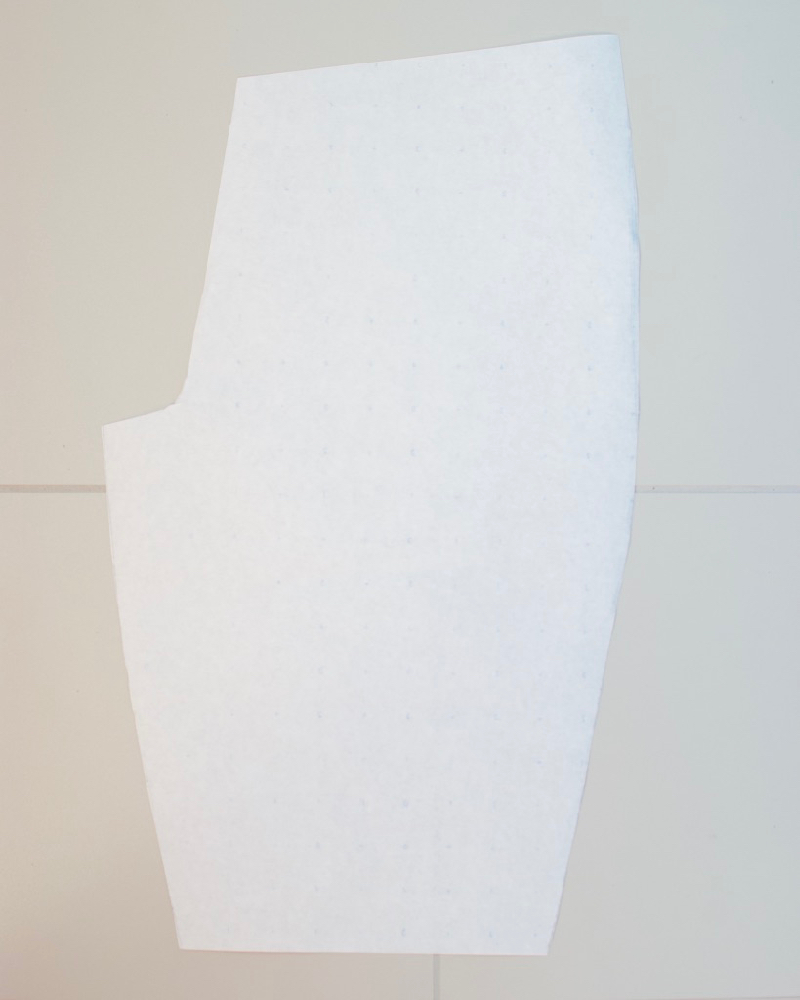
First I split left and right along the center seam. Luckily if you mess up cutting your leg into front and back pieces, you have a second leg as a backup. (Why does this sound like I’m giving dismemberment instructions?). At this point, I was mesmerized by studying the shape of my crotch curve. I’ve never had success in recreating my crotch curve with the flexible ruler or with aluminum foil. The joy at this point was overwhelming.

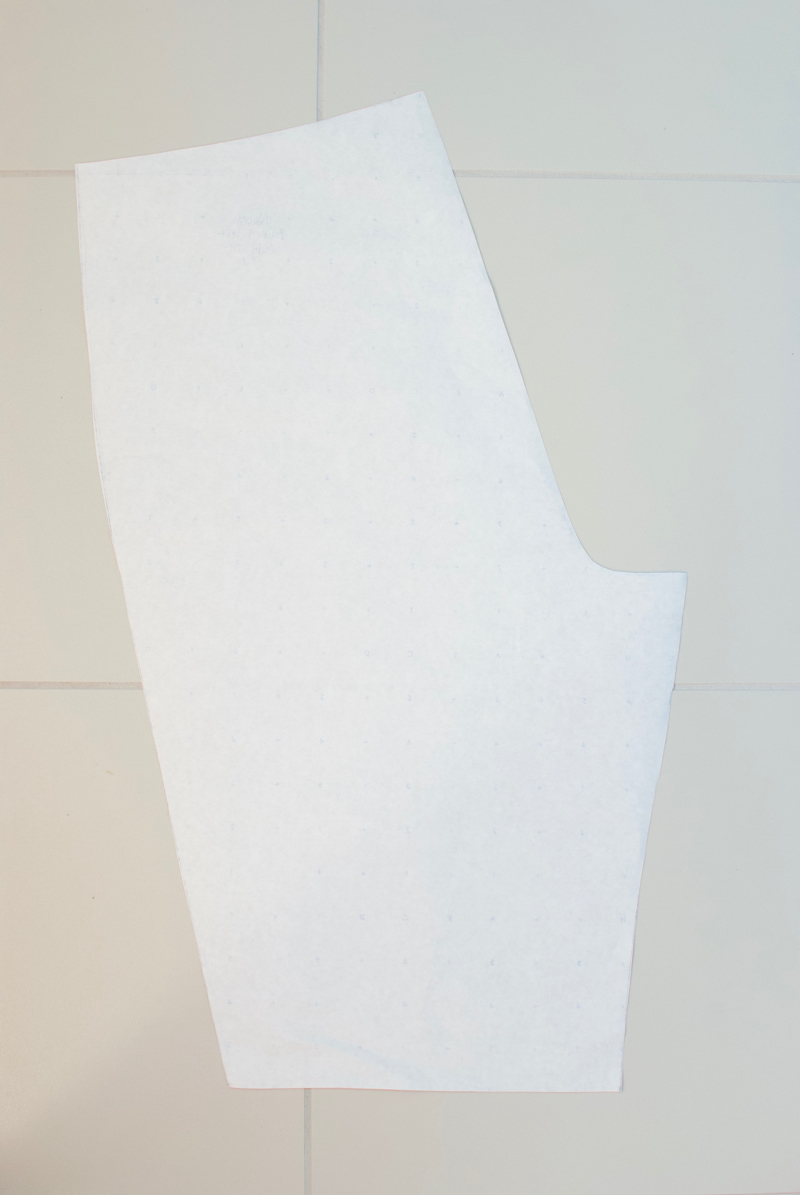
Since I already marked my side seam and inseam, I choose a leg and cut the front and back pieces apart. Once the front and back pieces were split, I traced them onto paper. This can seem a little tricky, and I wasn’t sure if I needed to try and flatten out the duct tape form or leave the curve bits. I eyeballed it and did my best at tracing. My advice, just go for it, because in the next step you can tweak things around if needed. Also, I found it easier to get everything traced and leave the crotch curve as the last thing to draw. Below are photos of my duct tape sloper on top of my tracing. In the end, I did try to keep the natural curve of the duct tape and only flattened things out when trying to trace the crotch curve.
FRONT LEG
FRONT CROTCH CURVE
BACK LEG
BACK CROTCH CURVE
REFINING FIT
I tested the fit of my new sloper by creating a muslin. I added ¾” around most of my seams with a few exceptions. Why ¾”, because I used ½” for my seam allowance and needed to add ¼” for ease since I wanted to use a non-stretch woven fabric for my muslin.
FRONT LEG
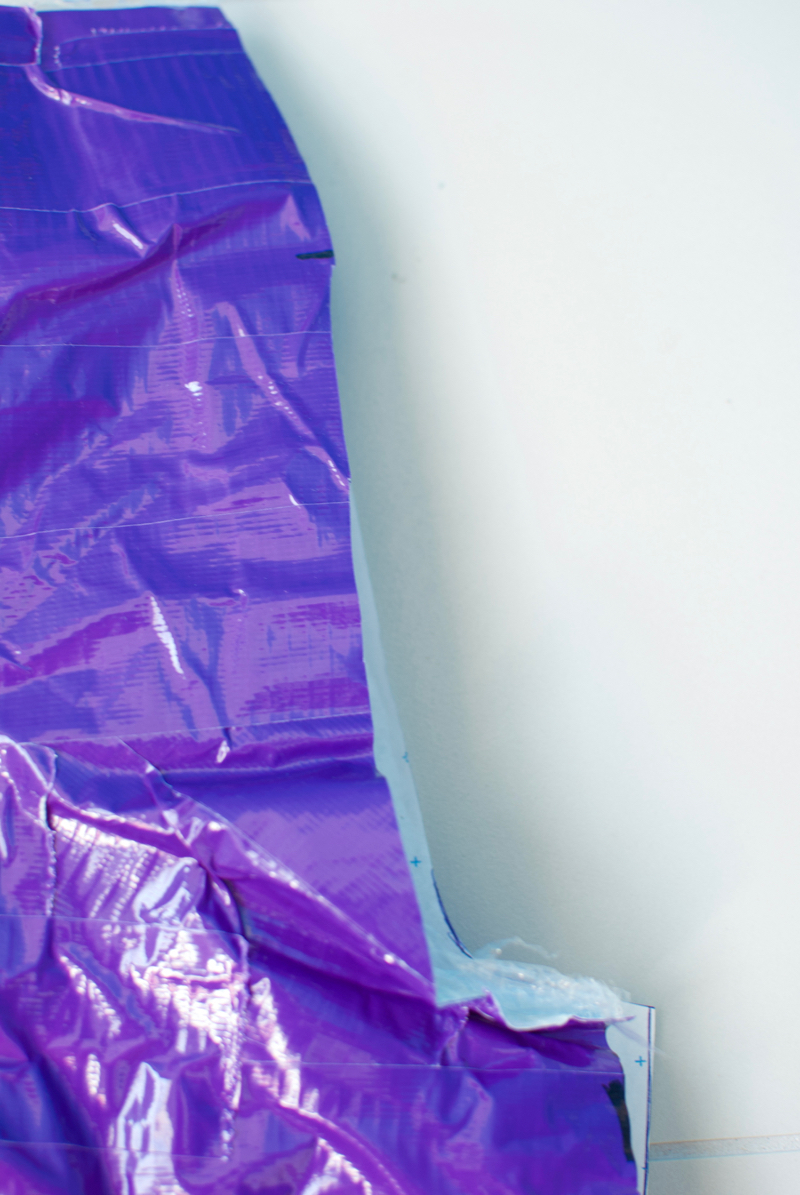
I left the waistline and knee line exactly where they were. I added ¾” to the side seam, inseam, and along center front but stopped when I got to the crotch curve. Don’t raise the crotch curve up, just blend your existing curve down to the inseam. Hopefully my diagram makes this clear.

BACK LEG
Again, I left the waistline and knee line where they were. I added ¾” to the side seam and center back but stopped when I got the crotch curve. Instead of adding just ¾” evenly along the inseam, I added 1-½” to the top of the inseam to give more length in the crotch curve and graded it back into ¾” along the rest of the inseam. Like the front don’t raise the crotch curve, blend it from center back into the inseam. Finally, based on my patterns, I added a dart to the back. I used the dart size and placement from the Chi Town Chino pattern, but you could use darts from any pattern you like.

Admittedly I had to make a few edits to my pattern, but they were super easy fixes. I initially didn’t trace the center back straight enough. Once I was happy with my fit, I was able to retrace my sloper, and now I have a pant sloper.

PROOF OF CONCEPT
I was able to do the same process and make my husband a pair of linen dress pants!


FINAL THOUGHTS
I’ve compared my sloper with previous patterns, Ginger Skinny Jeans, Emerson Pants, Lander Pants, Simplicity 8056, Chi-town chino, etc. and have made some revelations, mostly that I need to remake a lot of pants. But as I said in the beginning, making pants is no longer insurmountable for me. Moving forward, I will be showing you how I use my sloper with these patterns to get the perfect fit!


Thank you! I will look at your About post. I really like the detailed photos and explanations you have in your posts! I am an experienced sewer, but have never tried to adjust patterns before. In pursuit of pants that fit my teen daughter, it’s been somewhat of a revelation that there are so many factors to a good fit – but one can make fitting pants! Thanks!
LikeLiked by 1 person
Hi! This is very interesting! Would you use this method rather than the one you explain in “How I Draft Pants”?
LikeLiked by 1 person
I’ve just posted an “About” page on my blog to explain more about this site and how to interpret my posts. This post about a duct tape sloper is nearly 5 years old, and I’ve learned a TON since then. I would not use this method any longer, but at the time, it was a really helpful method to teach me more about fitting. My post about “How I Draft Pants” is 2 years old, and again there are things I would do differently now. But that post has led me to the point I am at now, using a mix of TDCO principles and my own methods (i.e., laser level) to fit clothes to my body better. Unfortunately, I also don’t have the same body I had 2 years or 5 years ago, and my learning journey has had to adapt. I hope this answers your question and encourages you to try new things, even if they don’t always work out perfectly.
LikeLiked by 1 person
I just found your post and I am intrigued! Can you please explain the rationale for not adding the 3/4 inch SA to the crotch curve? I see the drawings above but am having a difficult time visualizing how you added and where. Do you have a drawing that compares the block before and after the SA was added? Very interested in your process and can relate to the joy you experienced when you were able to actually see your crotch curve. Mine is quite illusive as well.
LikeLike
Ew I think Flickr chewed up my photos! I’ve updated the photos. I’m constantly learning about crotch fit and shape. I’m sure there are still edits I would make to this process, but I haven’t had to make a duct tape sloper in a long time. It might be helpful to check out Michele’s youtube (https://youtu.be/WEnJljEMi2E) video to help fine-tune your crotch rise and length.
LikeLike
Thank you so much! I appreciate the images and will follow your recommendation in my search for the holy grail…I mean perfect fitting pants. 😉
LikeLike
Hello! Using this post as reference for my own duct-tape sloper!
I was also curious about not adding SA to the crotch at the end of the curve. The YouTube link posted seems to be broken, it’s going only to a page saying the link is unavailable. I can’t seem to find it on my own.
Are you able to find a new link to it? Or maybe elaborate on how it helped you?
P.S. this post and the other ones about pants fitting having been super helpful in enlightening my journey for making the perfect pants. Hoping for some good results soon!
LikeLiked by 1 person
Hi. It looks like Michele took down her pant-fitting videos on YouTube (https://www.youtube.com/user/WinMichele4/videos). She used to have a whole series about measuring and fitting for pants. Unfortunately, I don’t remember exactly what was in those videos to help summarize the method. I too am still learning about pant fitting and some of my more recent posts about pant fitting are going to be more helpful? (https://handmadephd.com/2021/03/22/how-i-draft-pants-a-basic-pattern-block/). Hope this helps and best of luck on your pant fitting journey.
LikeLike
Wow! You did it again! I guess GEEK works amazing in your house! I LOVE what you just did!!!I have been following your pant adventures all year but this breakthrough is fabulous! I can’t wait to see how your sloper compares to some of the other patterns you mentioned. Either side by side or on top. You are excellent with the visuals, but this would really help me understand the light bulb moment.
While I may TRY this in the future, I am currently working on getting my upper sloper to fit properly. But I am very excited for you and LOVE what you did for your husband too! Mine would just melt if I made him linen pants! So, shhh! But, I will keep that in my back pocket too!
Again…you ROCK!!!
LikeLiked by 1 person
Wow – very cool! I can’t wait to see how this results in well-fitting pants.
LikeLiked by 1 person
I just copied and pasted your posting on my fb group (RTW Fasters 2018) so your following might just get a little bigger 🙂 I agree Melly should look at your post as well. I’m sure she’d love your method as well.
LikeLiked by 1 person
Thanks for sharing!
LikeLike
I have recommended your pants making process to a bunch of people because it is just SO helpful. I’m always HUGELY impressed by your determination and attention to detail. It’s magnificent 🙂 Congratulations on achieving this amazing feat! Melly Sews just uploaded a video on youtube yesterday re pants fitting that you might enjoy watching. Just search “Melly Sews” and her recent video re pants should come up.
LikeLiked by 1 person
I know I just saw her blog post and was like good timing I think she needs to do this process as well. She has way more followers than me.
LikeLiked by 1 person