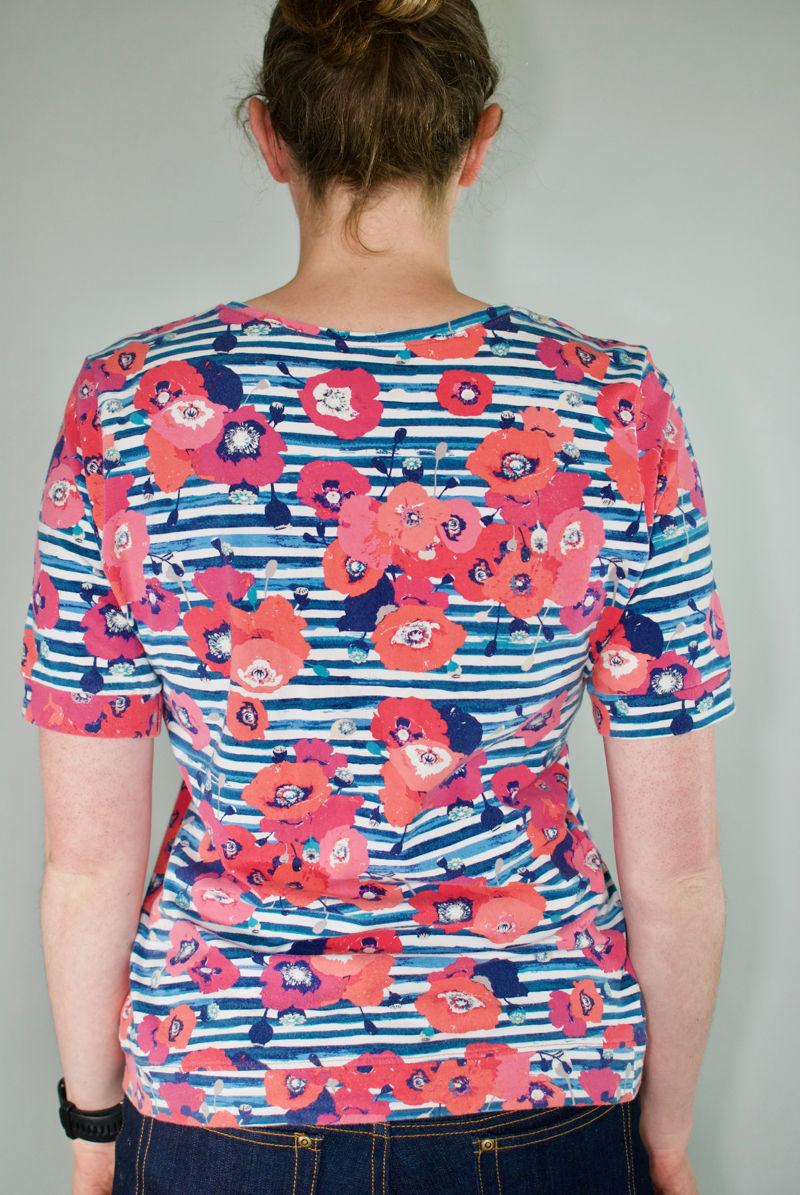
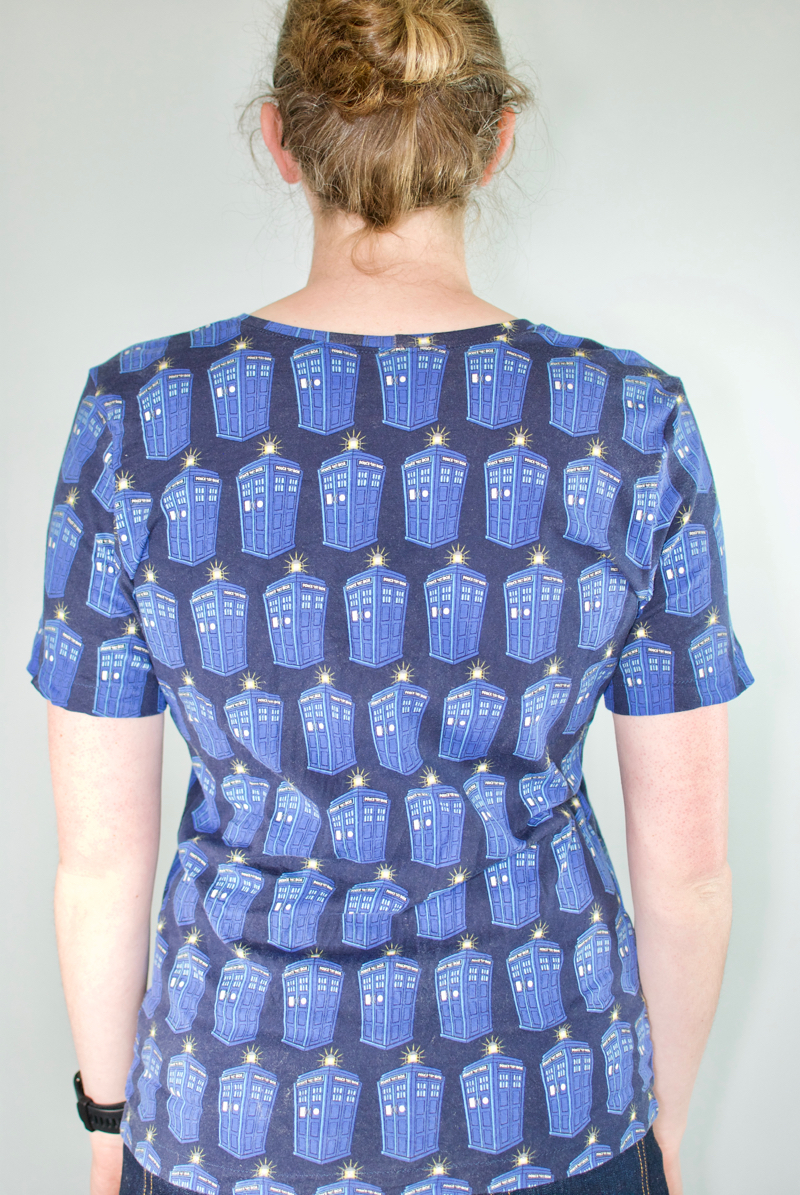
It wasn’t until I started taking photos of myself that I realized how much I was ignoring fit. Even if you aren’t a blogger, I think it is super helpful to take a lot of photos of your outfits so you can study and analyze fit. The first thing I noticed about my poor fit is all those unsightly wrinkles in the fabric and the fact that I will forever have a competitive swimmer build.
The fit of my shirt was exacerbated by changing the fabric to a merino wool jersey. Because merino wool jersey has much softer drape than cotton spandex jersey, the wrinkles on my back were far more noticeable.
I decided it was time to try and fix this fit as best as I could. I decided to make a swayback alteration. I didn’t find a lot of helpful tutorials online. Only one website discussed in detail how to alter a shirt pattern like a t-shirt. If you want to read the original description, check out this site: https://patternscissorscloth.com/2010/12/05/sway-back-alterations-my-analysis/
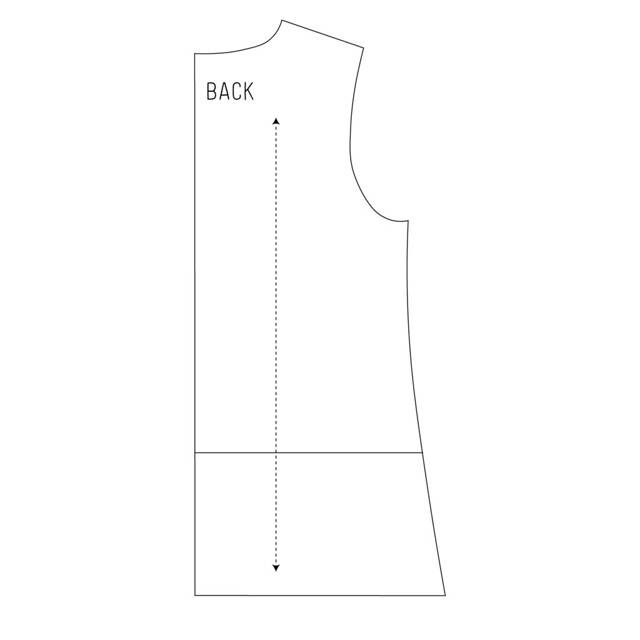
Let’s start with a tracing of my original back pattern. This pattern is mostly self-drafted. The first thing I did was cut along the waistline from center back to almost all the way to the side seam.
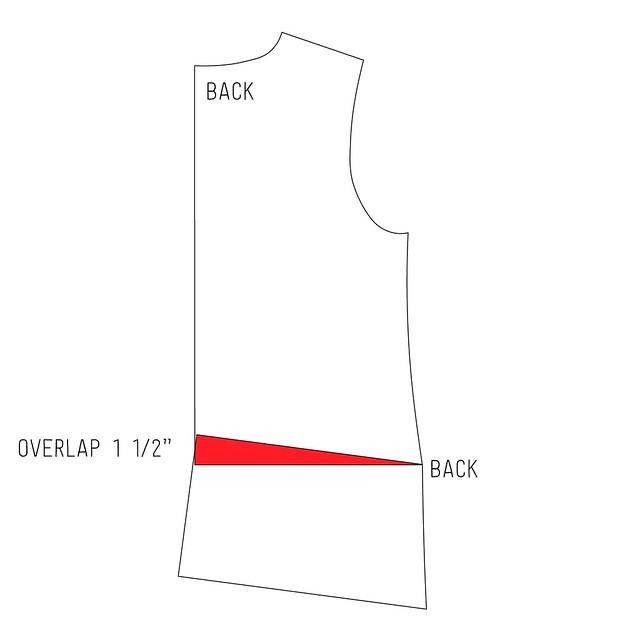
Next, I overlapped at center back. I wasn’t sure how much to overlap. I tried to have my husband help pinch out the excess fabric to determine how much to remove. I started by first overlapping by ¾”. That fixed a lot of my fit issues, but I felt I could overlap and do the full swayback alteration again. Here’s how ¾” overlap looks. I know I have my diagram above labeled 1½” and that’s the final adjustment I made after I determined ¾” wasn’t enough.
After I did my overlap, there’s a bunch of things to do to make the alteration work right. The first thing is to re-draw center back. Draw a straight line from the neckline down to the hemline.
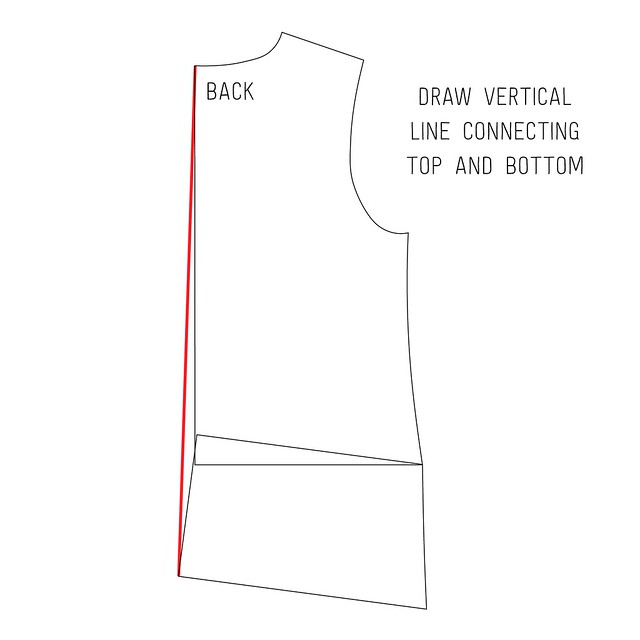
Parallel to the new center back line is also the new grainline. Make sure center back is now straight up and down. Next, extend the center back line down and draw a new hemline perpendicular to center back.

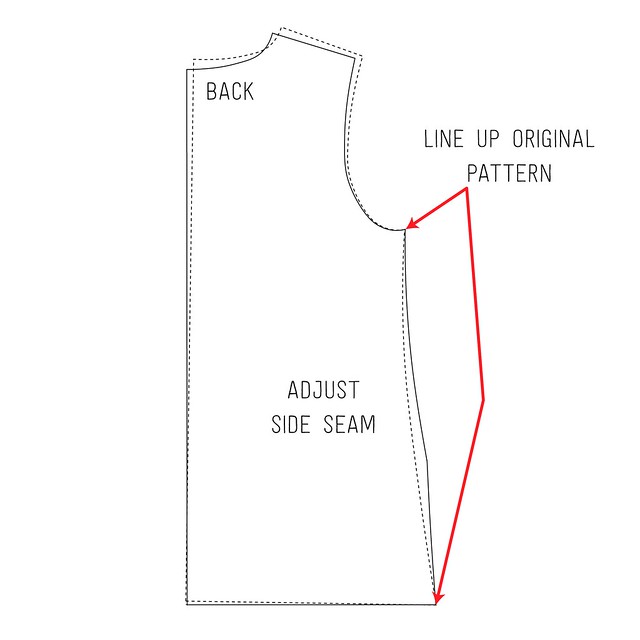
This alteration results in a lot of excess width, so the side seam needs to be redrawn. Line up the top of the side seams at the armhole and bottom of the side seams at the hemline. I followed the dashed line of my original pattern and this gave me my new side seam.
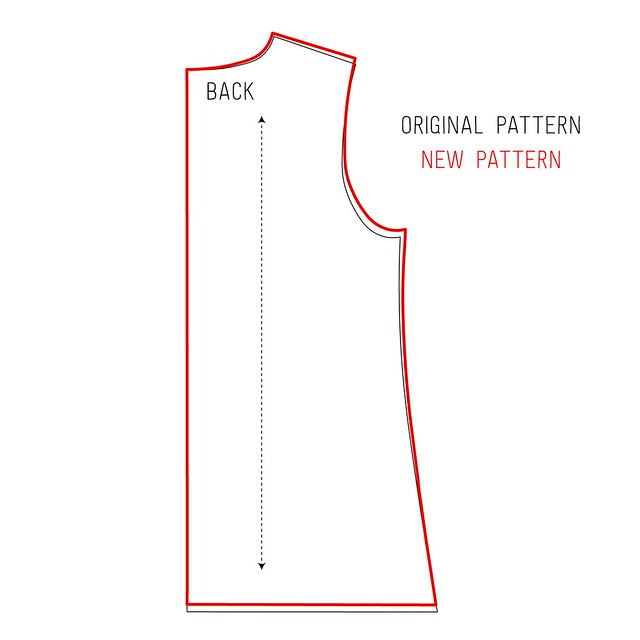
The thing to notice with this alteration is that the hemline should be higher, as well as your armhole. As much as I understand this alteration, a swayback alteration needs to raise up your hemline without changing the length of your side seam. In this pattern adjustment, the hemline is raised and to compensate for the loss of length in the side seam, the armhole is adjusted. Pretty nifty.
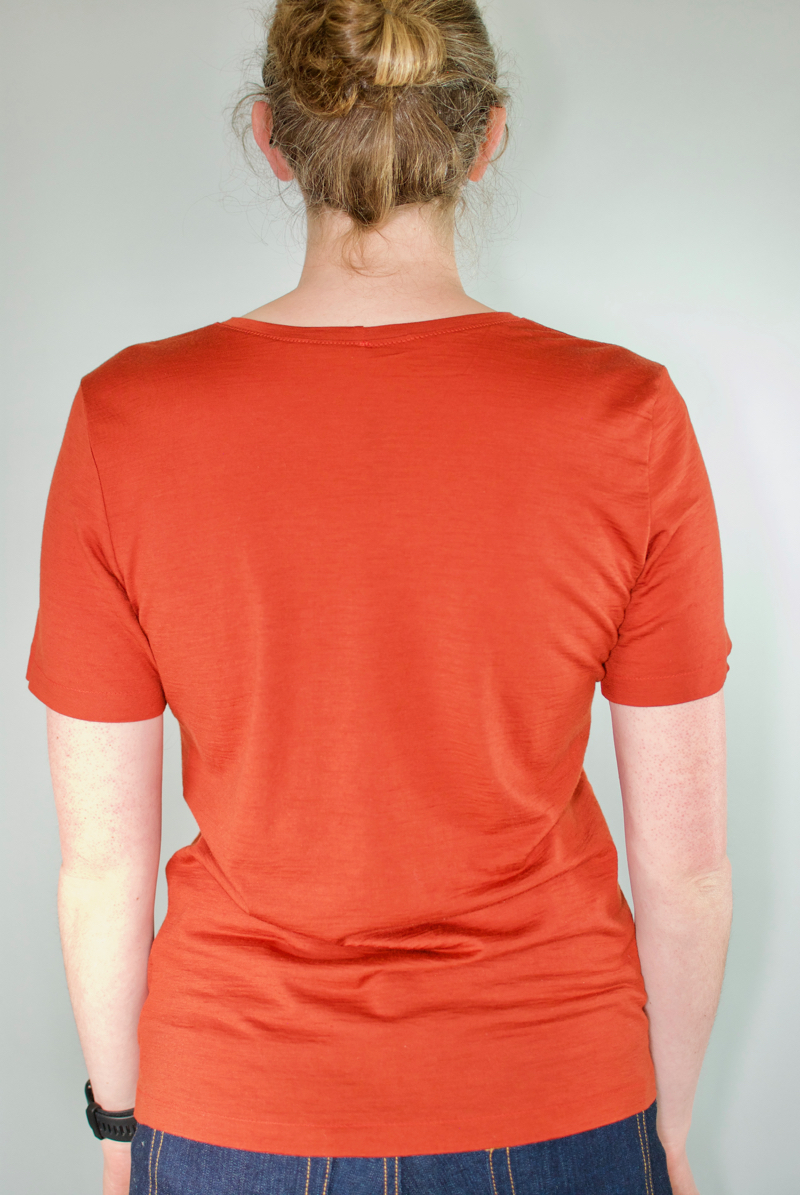
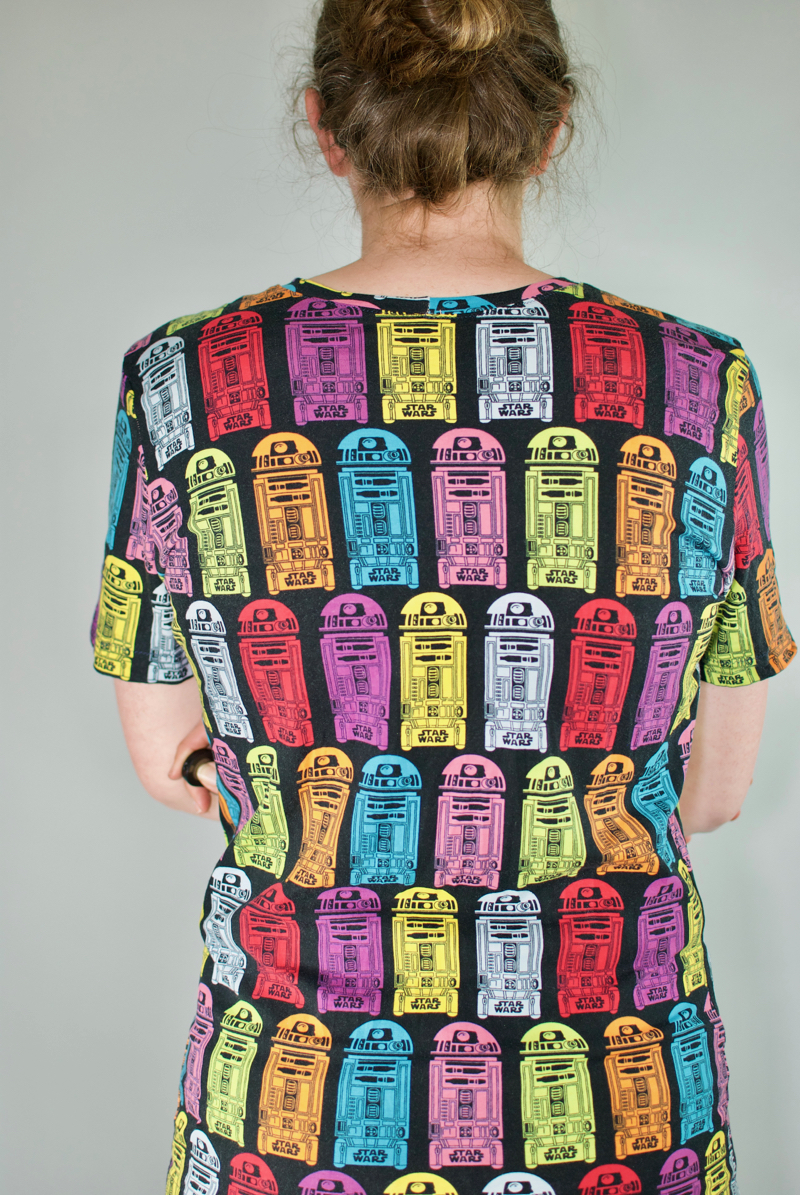
Does the adjustment work? I would say yes. It may be hard to see in my R2D2 shirt.
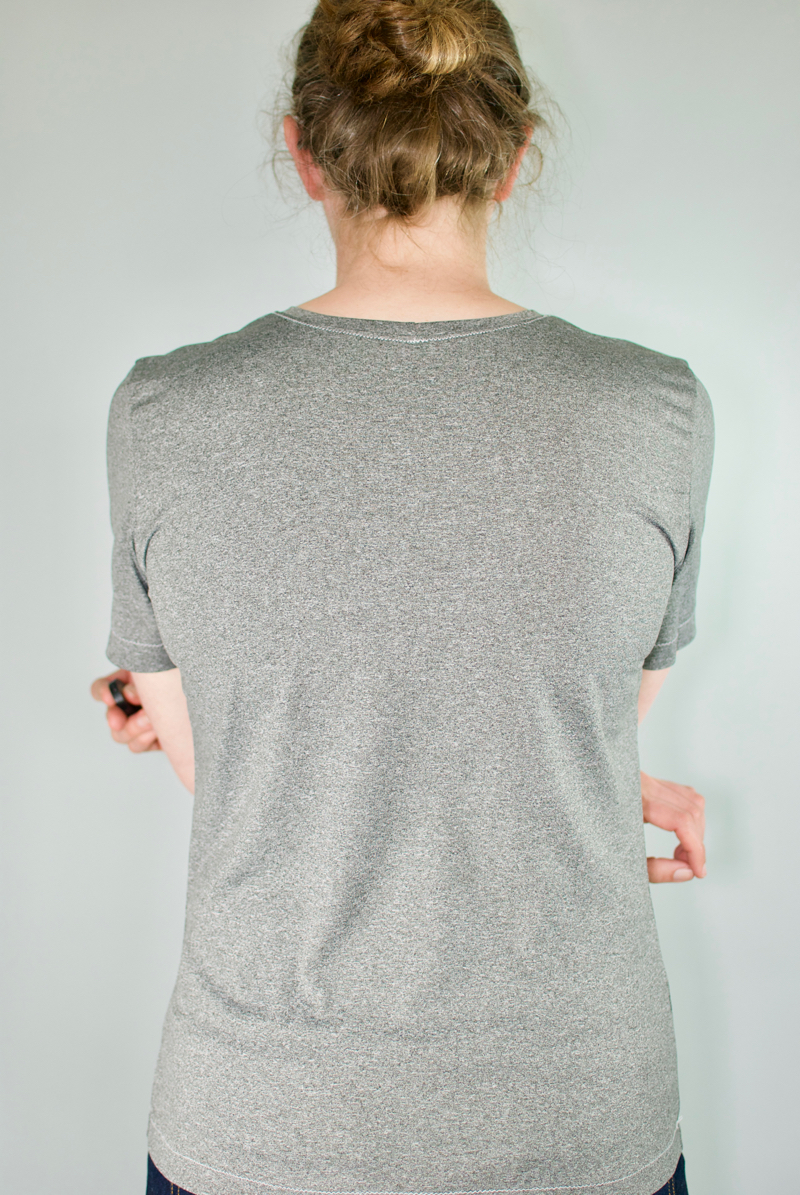
But without a doubt you can tell how much better the fit is on one of my workout shirts.


I was just working on a knit top for myself and needed a reminder of how to….your post came up when Googled “Sway Back Adjustment in knits” So cool! I remember how this helped me before…that’s how long it’s been since I’ve made myself a knit top! Thanks again! 😉
LikeLike
Ah thanks! I’m glad this blog is helpful! Best of luck on your shirt.
LikeLiked by 1 person
Sway back adjustment here too! great post.
LikeLiked by 1 person
Yes, I am too. I picked up a really old (1948) dressmaking book that showed how all fitting adjustments can be done as outside contour changes. Overlaying original and adjusted pattern really demonstrates how this is true.
https://www.biblio.com/book/home-dress-making-simplified-etc-hall/d/869440576
LikeLiked by 1 person
This is a really useful adjustment. Seeing before and after overlaid is most helpful.
LikeLiked by 2 people
Thanks. I’m such a visual thinker that it helps me see the edits as well. Otherwise I can never really wrap my head around how the alterations work.
LikeLike
I was a little confused at first…but I re-read it twice and the second time it made perfect sense! I had help making this adjustment on a dress I am currently working on. My 3rd muslin almost fit and my local shop girls came to the rescue with this exact fitting adjustment. I really like how you overlap the new pattern and the original pattern! That’s when the light bulb went off for me! As always, GREAT explanations and visuals!!! 🙂 ❤
LikeLiked by 1 person
I’m still a little confused as well truthfully but the adjustment works for me so I go with it. The adjustment makes more sense when your back piece has a center seam or zipper. Best of luck with your adjustments!
LikeLike
This is a great resolution – I’m glad my tutorial worked for you!
LikeLiked by 1 person