Time to make the dreaded pattern adjustments. From experience, making pattern adjustments really do need to be done one at a time, because the adjustments you make can have a cascading effect on the rest of the fit. Let’s get right to it, here are the key fit issues I talked about in my first post:
- Gapping waistband at center back seam but waist length in general good
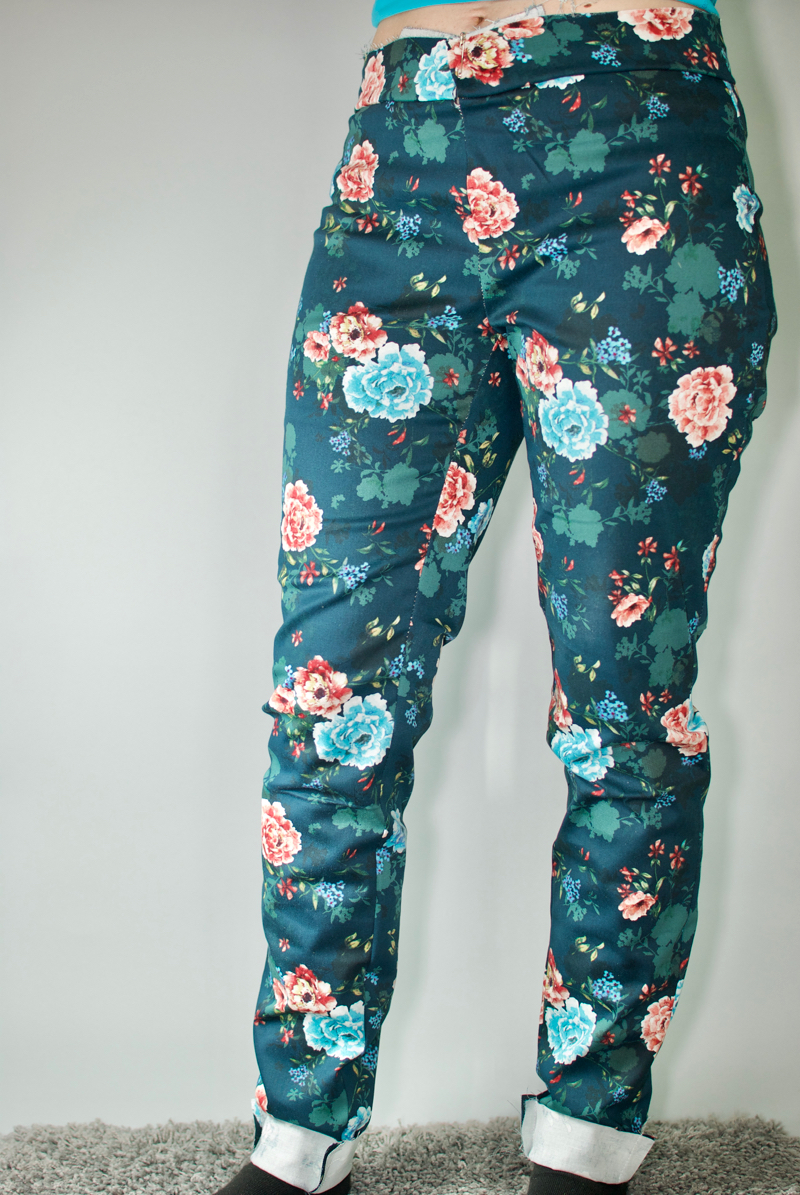
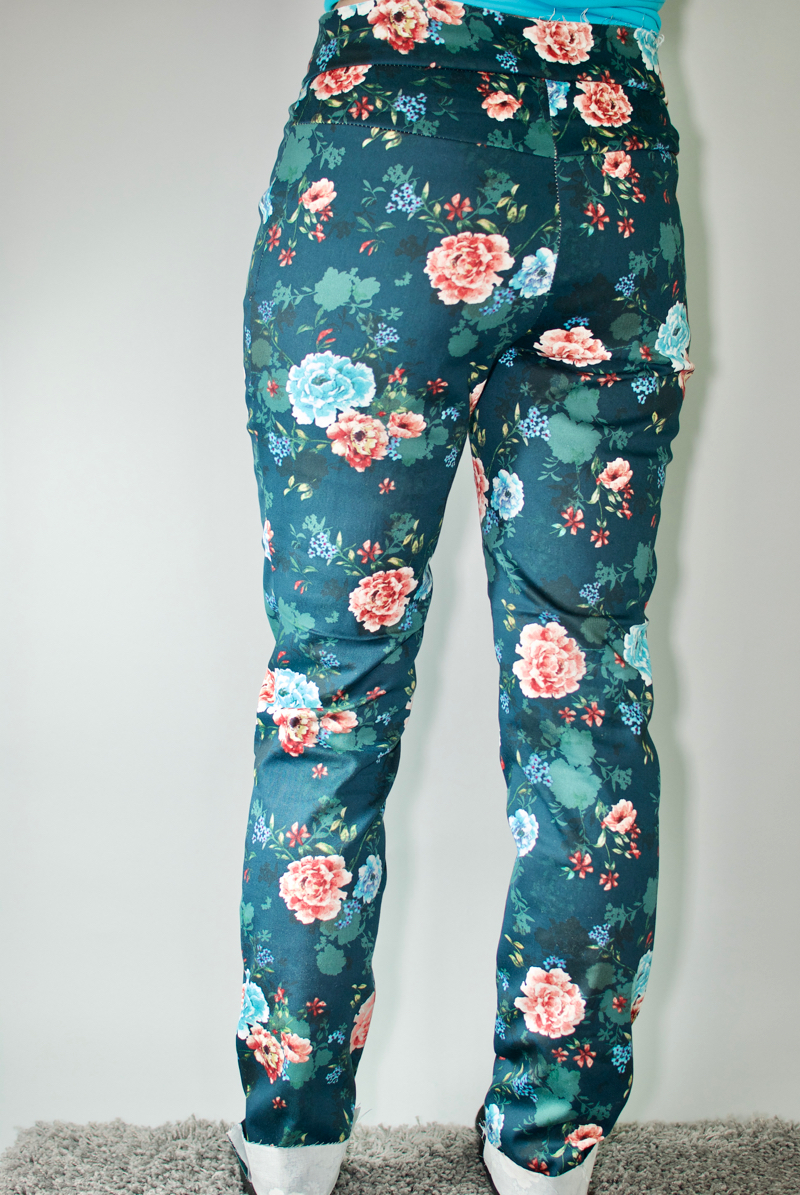
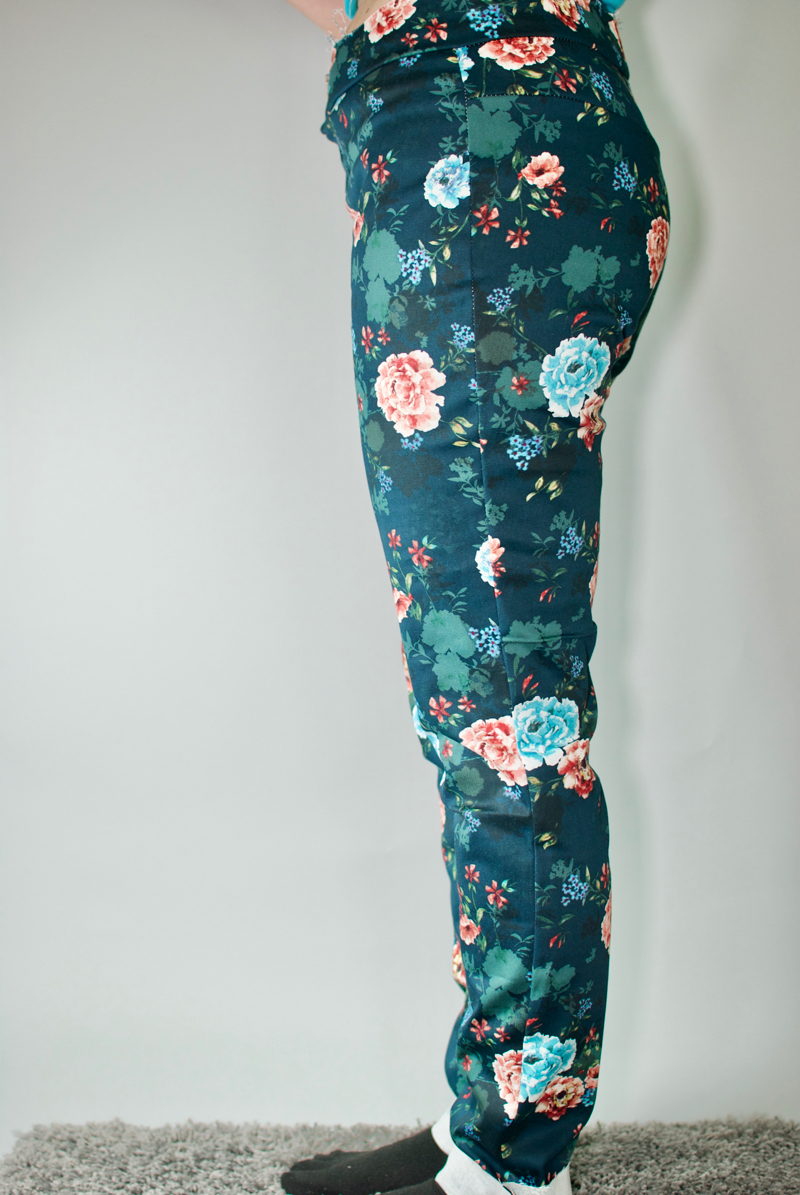
- Pants are too high waisted, warbling fabric along side seam
- Small excess fabric around the back derrière
- Unsightly twisting and wrinkling around the knees and tight around calf
- Overall length is way too short
How do you know what edits to do first? Trial and error? Guess? Learn from experience? I decided to tackle the high rise/warbling side seam first.
Is a swayback adjustment needed?
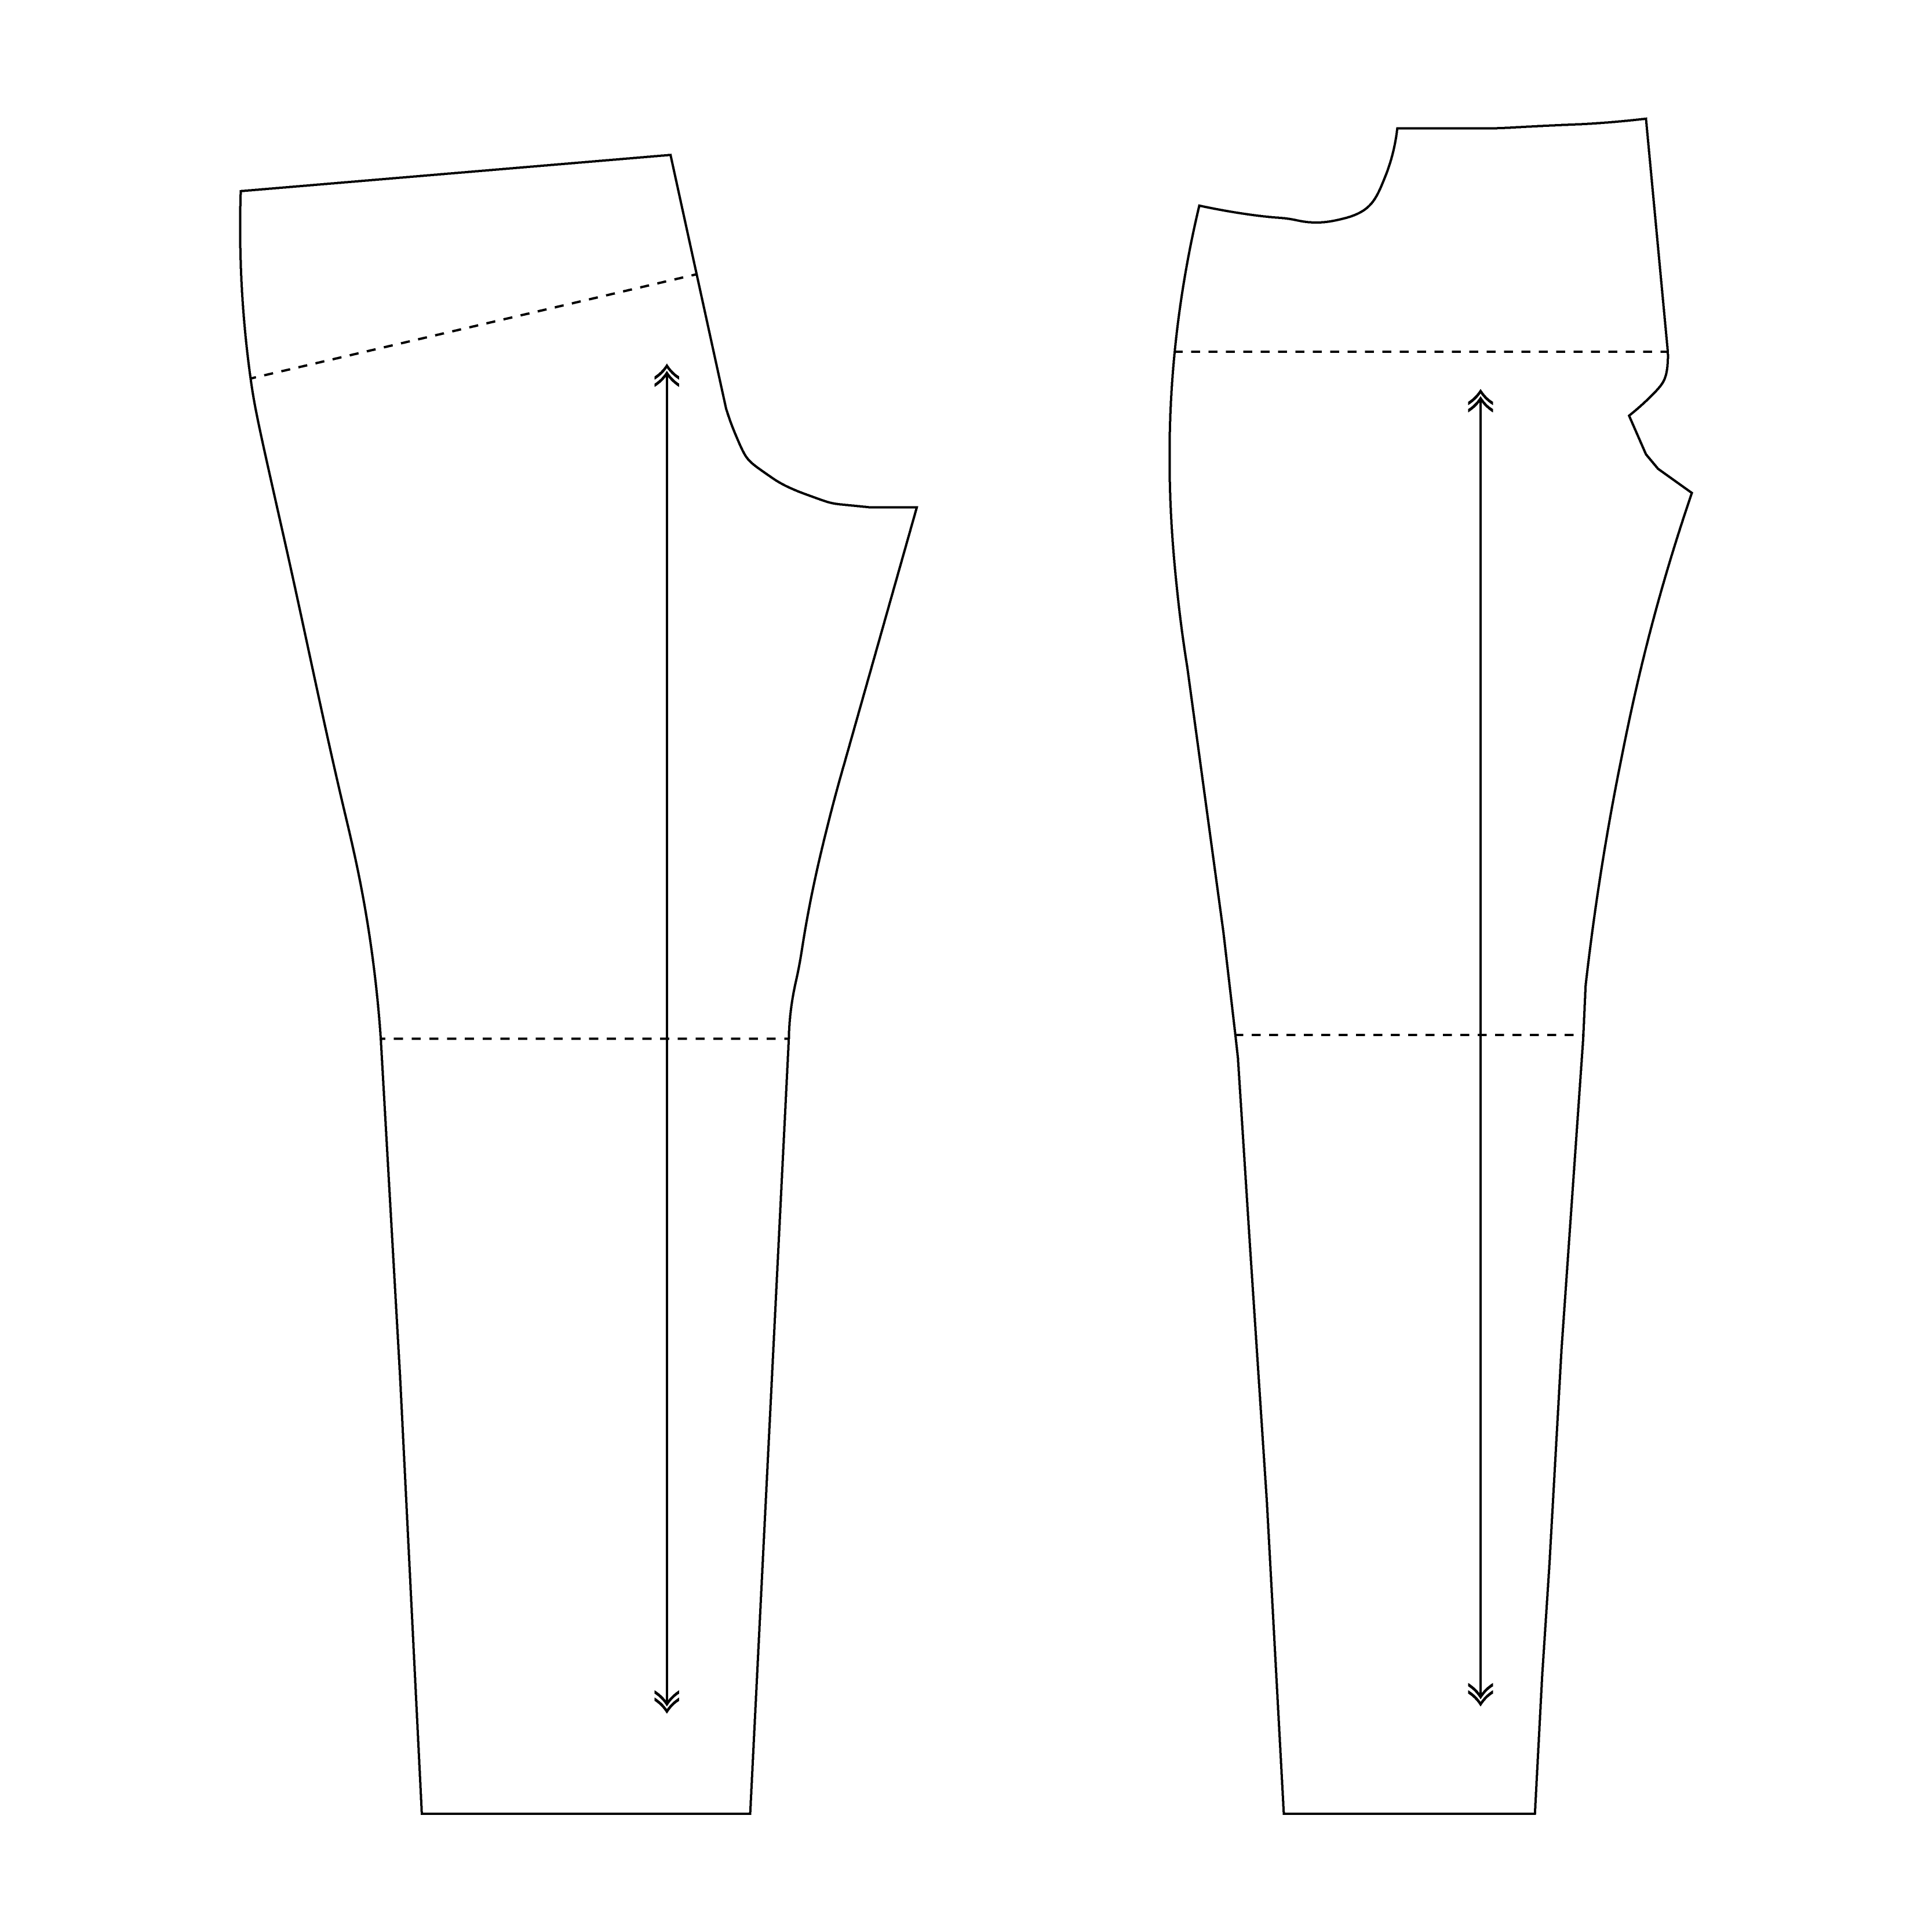
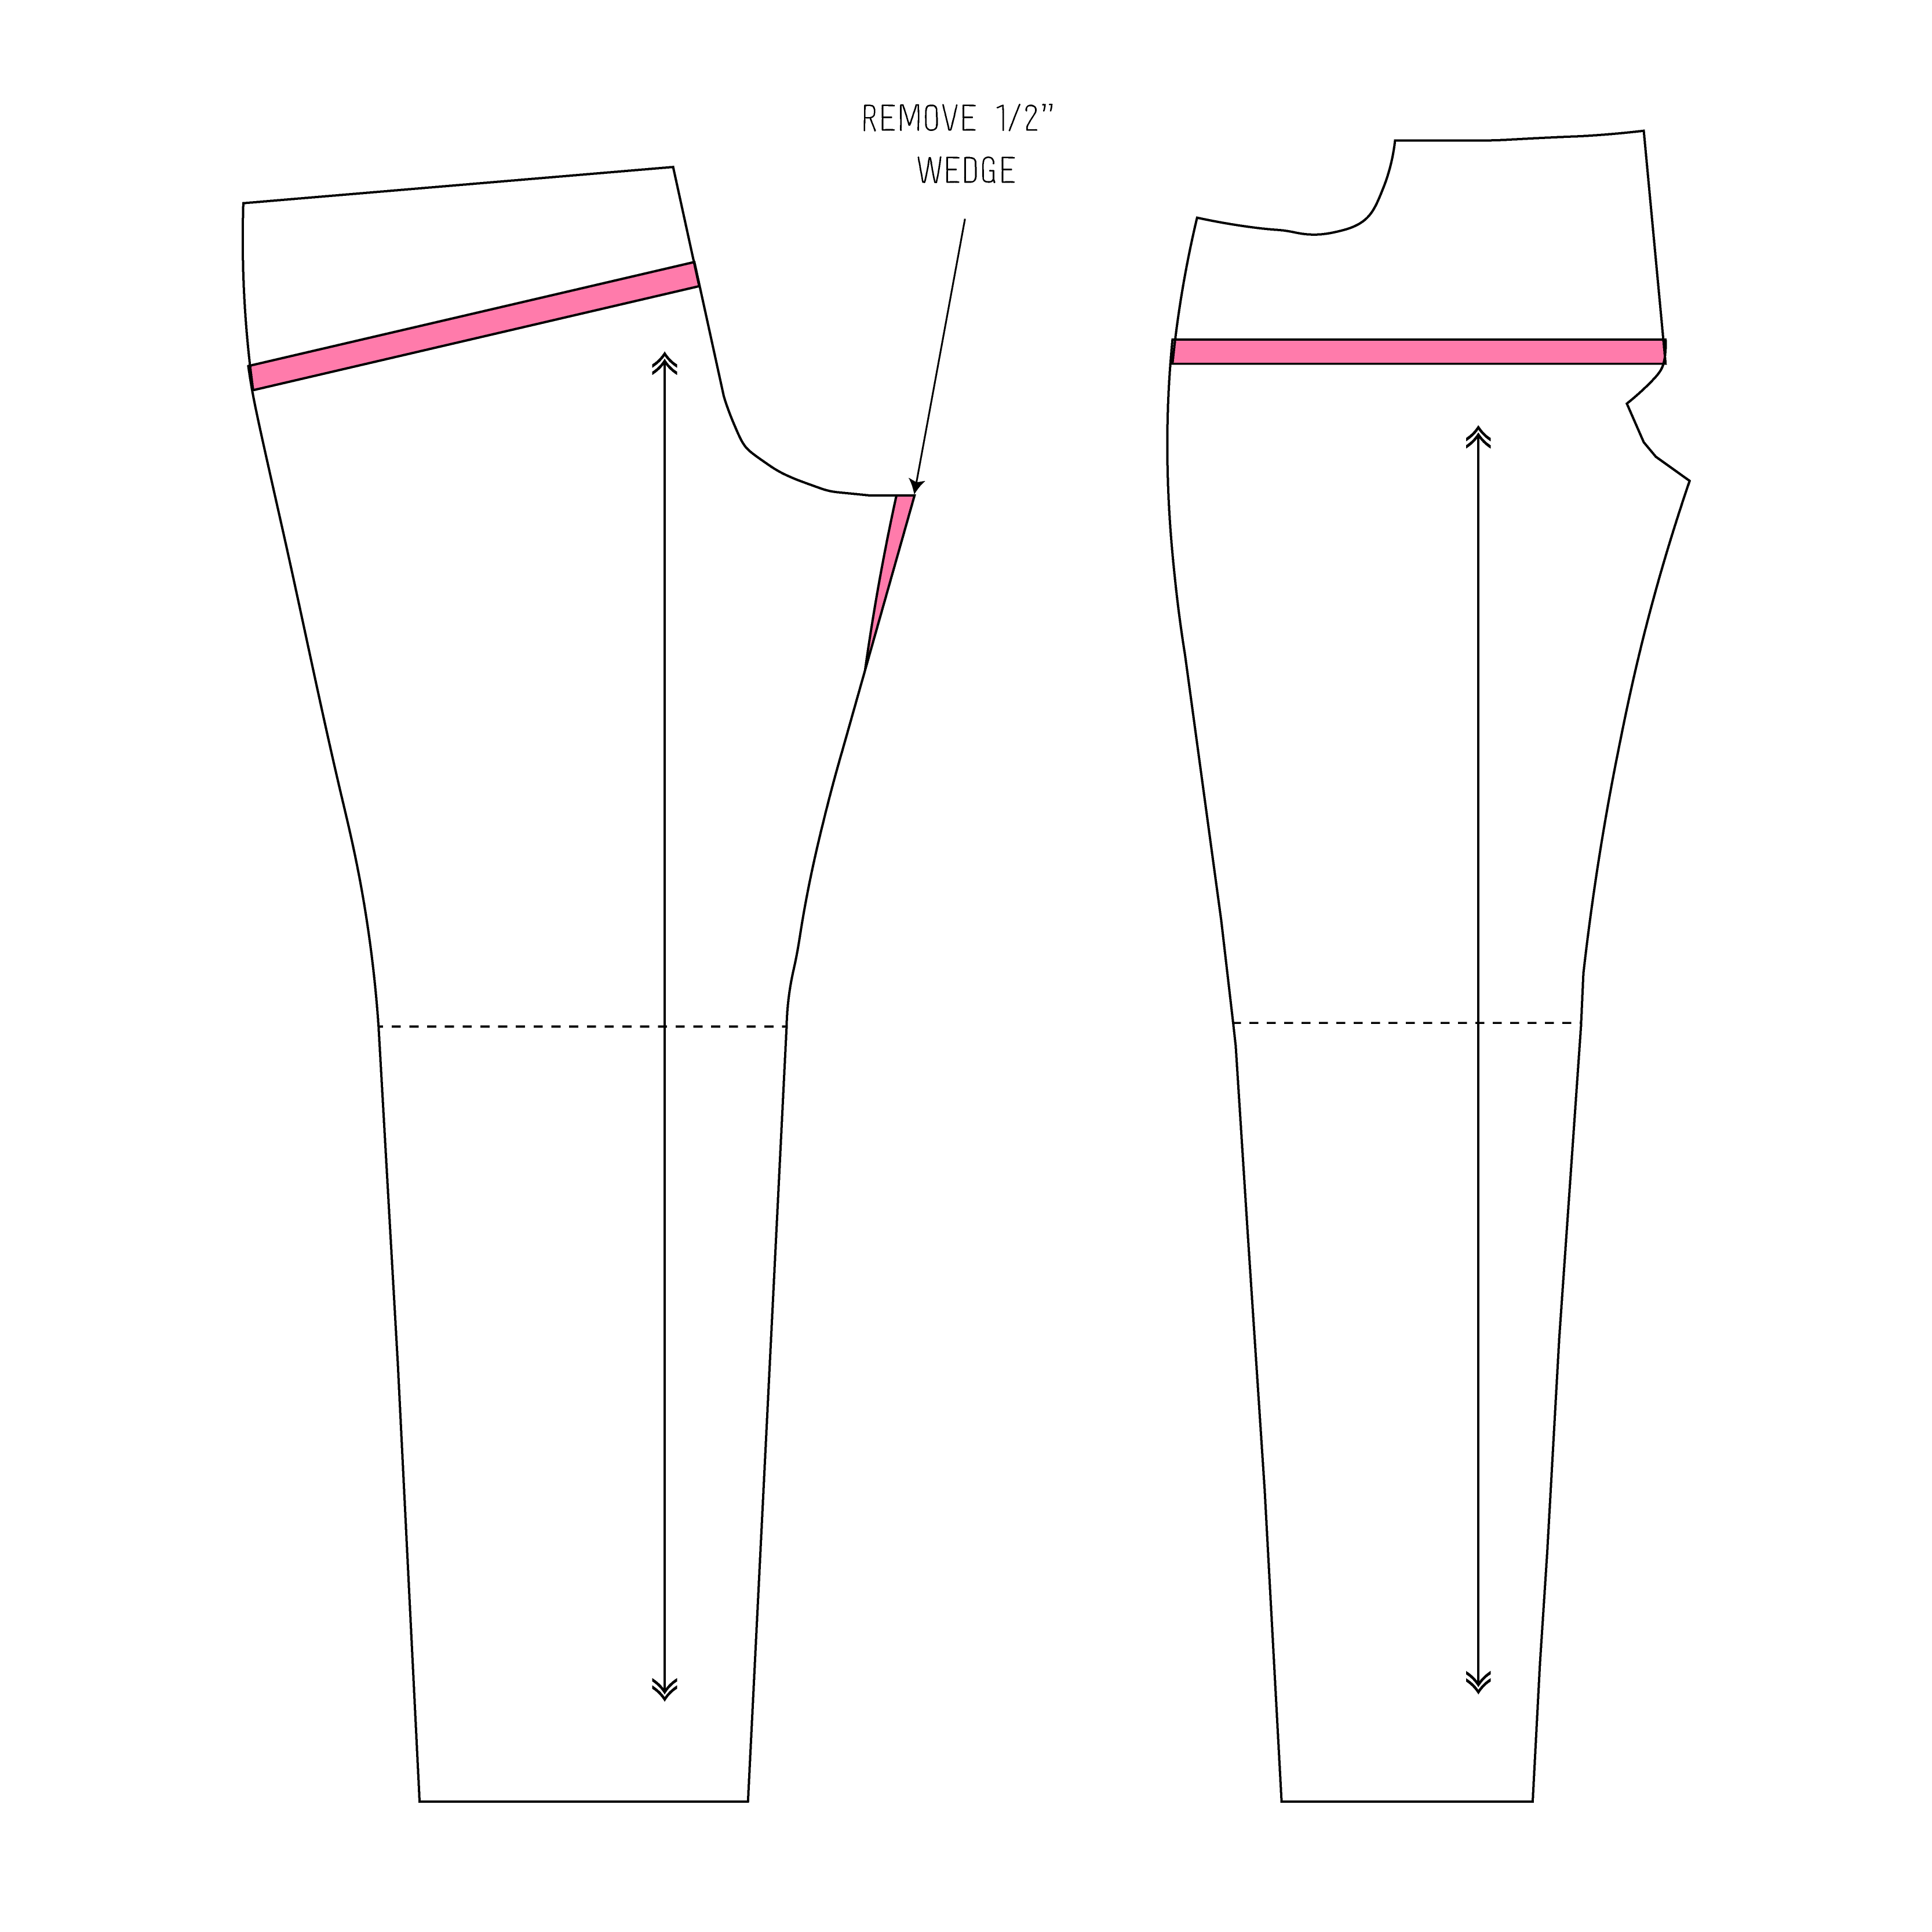
For the sake of clarity, I decided to draw up some diagrams showing my edits. I didn’t think pictures would turn out from my basement sewing room. Here are the front and back pattern pieces I started with for muslin #1.
The first edit I made was to cut along the line provided for you in the pattern and reduce the overall crotch length by ½” on the front and back pieces.
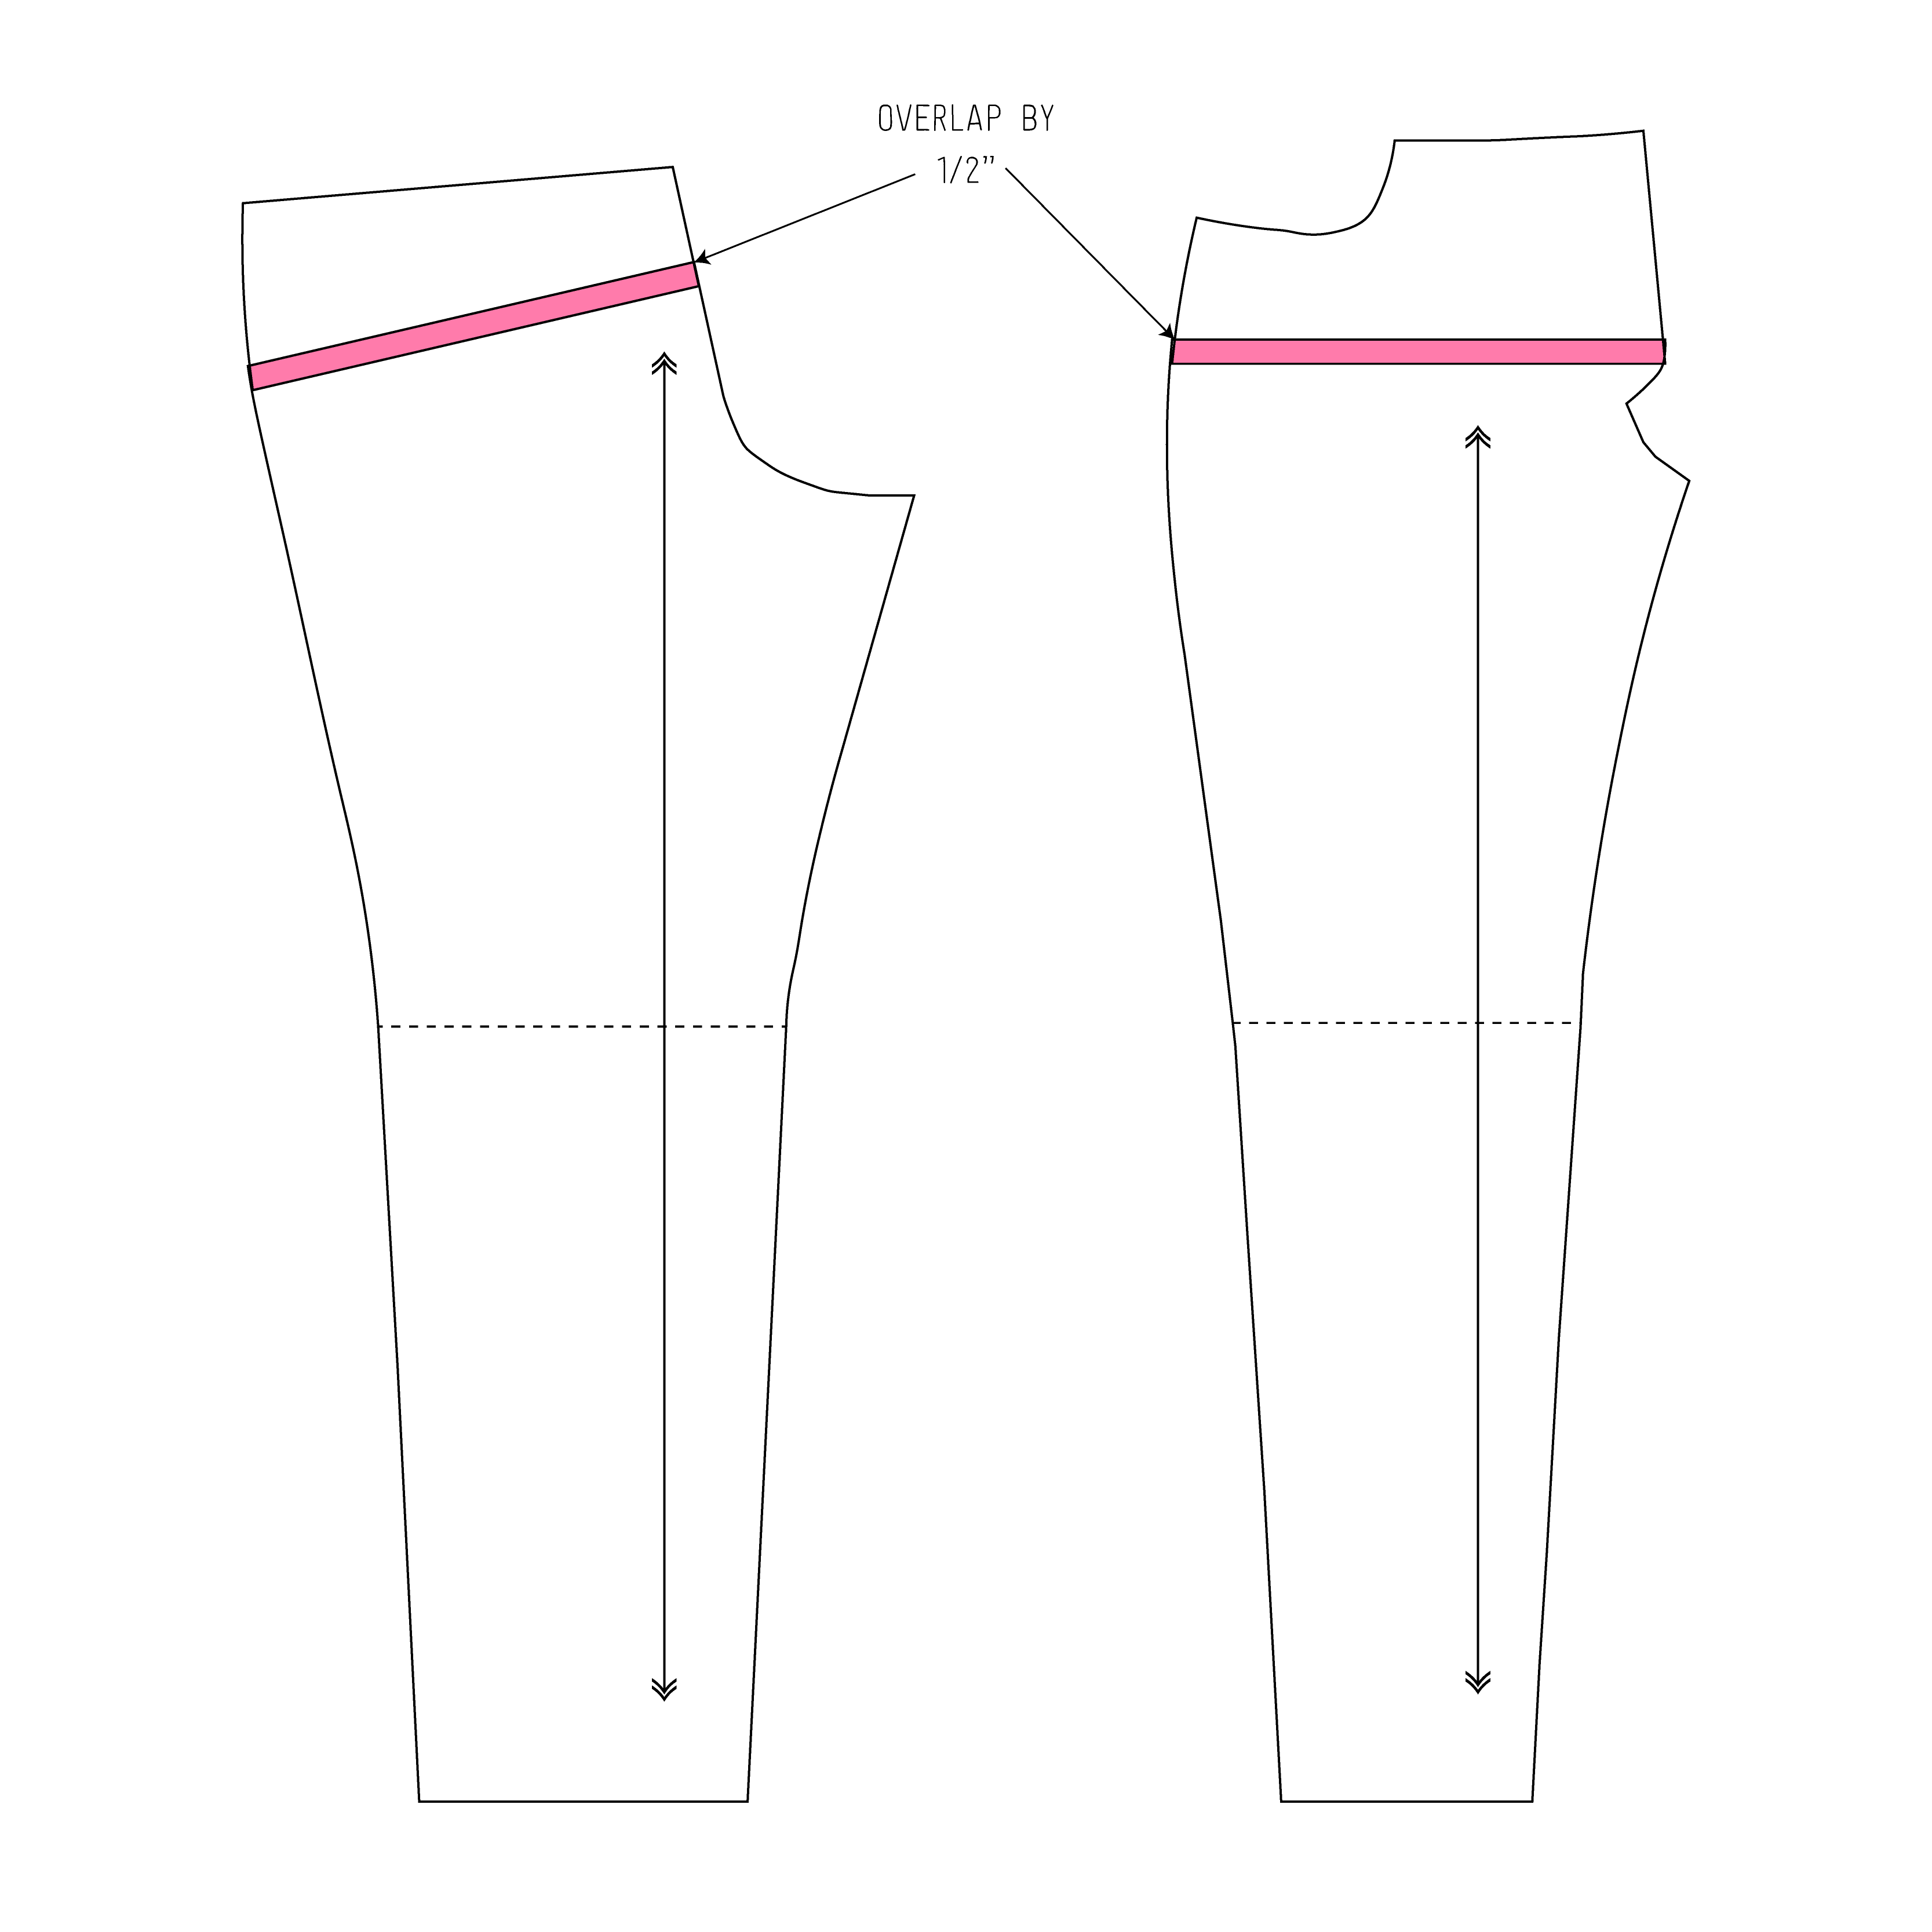
One of the reasons I wanted to make this edit first, was because the adjustment will change where the back yoke and waistband sit on my waistline. If I made the swayback adjustment first and reduced the overall crotch length second, then my waistband would no longer be in the same place. From experience, then the waistband is too tight.
By making just this simple adjustment, I found that the gapping along the center back seam nearly went away! And, bonus, the warbling fabric along the side seams also disappeared. Just because you have gapping around the waistband, doesn’t mean you need to make a swayback adjustment. It may actually indicate that your pants aren’t sitting in the optimal location.

Thin Thigh Adjustment
This next alteration is hard to describe. After I fit my waist, belly, hips, and crotch, then I try to fit my legs. It’s super hard to decipher or understand the difference between derrière and upper thigh. The crotch line up is important when fitting your derrière. The crotch line down is important for fitting your thigh. As impossible as it seems, I’ve witness people making pants that had it too tight around their buttock and simultaneously too baggy and loose around their upper thigh, which resulted in weird fabric pooling right below their derrière. If your pants fit great around your derrière, but you still have pooling around your upper thigh just below your bum, then you might want to make a thin or thick thigh adjustment.
This is why I worry about getting crotch length fitted correctly and enough room around my derrière before I worry about anything below that point. I know a lot of people mistake the wrinkles around the derrière as something they need to adjust with the butt part of the pattern.
I still struggle with these edits myself, so don’t get frustrated if you can’t figure it out the first time. When I first started making pants, I thought my draglines indicated that I needed to make a low butt adjustment. I would curve the back crotch area more and more and more, but that never fixed the issue. It is not only draglines that matter, but the direction of those draglines and whether the lines indicate too much or too little fabric. I still confuse whether someone needs a low butt vs. a thin thigh adjustment.


With experience, I know I need to do a thin thigh adjustment, because right where I take my wedge, I am able to pinch out that fabric when I’m wearing my muslin. Once you get used to contorting and realizing there’s that flap of fabric, then that’s something you’ll notice in all pants as you work through adjusting.
This is why I prefer to work with patterns a size larger than maybe is needed. I find it easier to wear the pants inside out and start pinching out the unnecessary fabric. Yeh, I poke myself with needles all the time trying to hold my adjustments, but I find it a lot easier than trying to “imagine” larger pants. Don’t be afraid to go up a size!
Tall Drink of Water
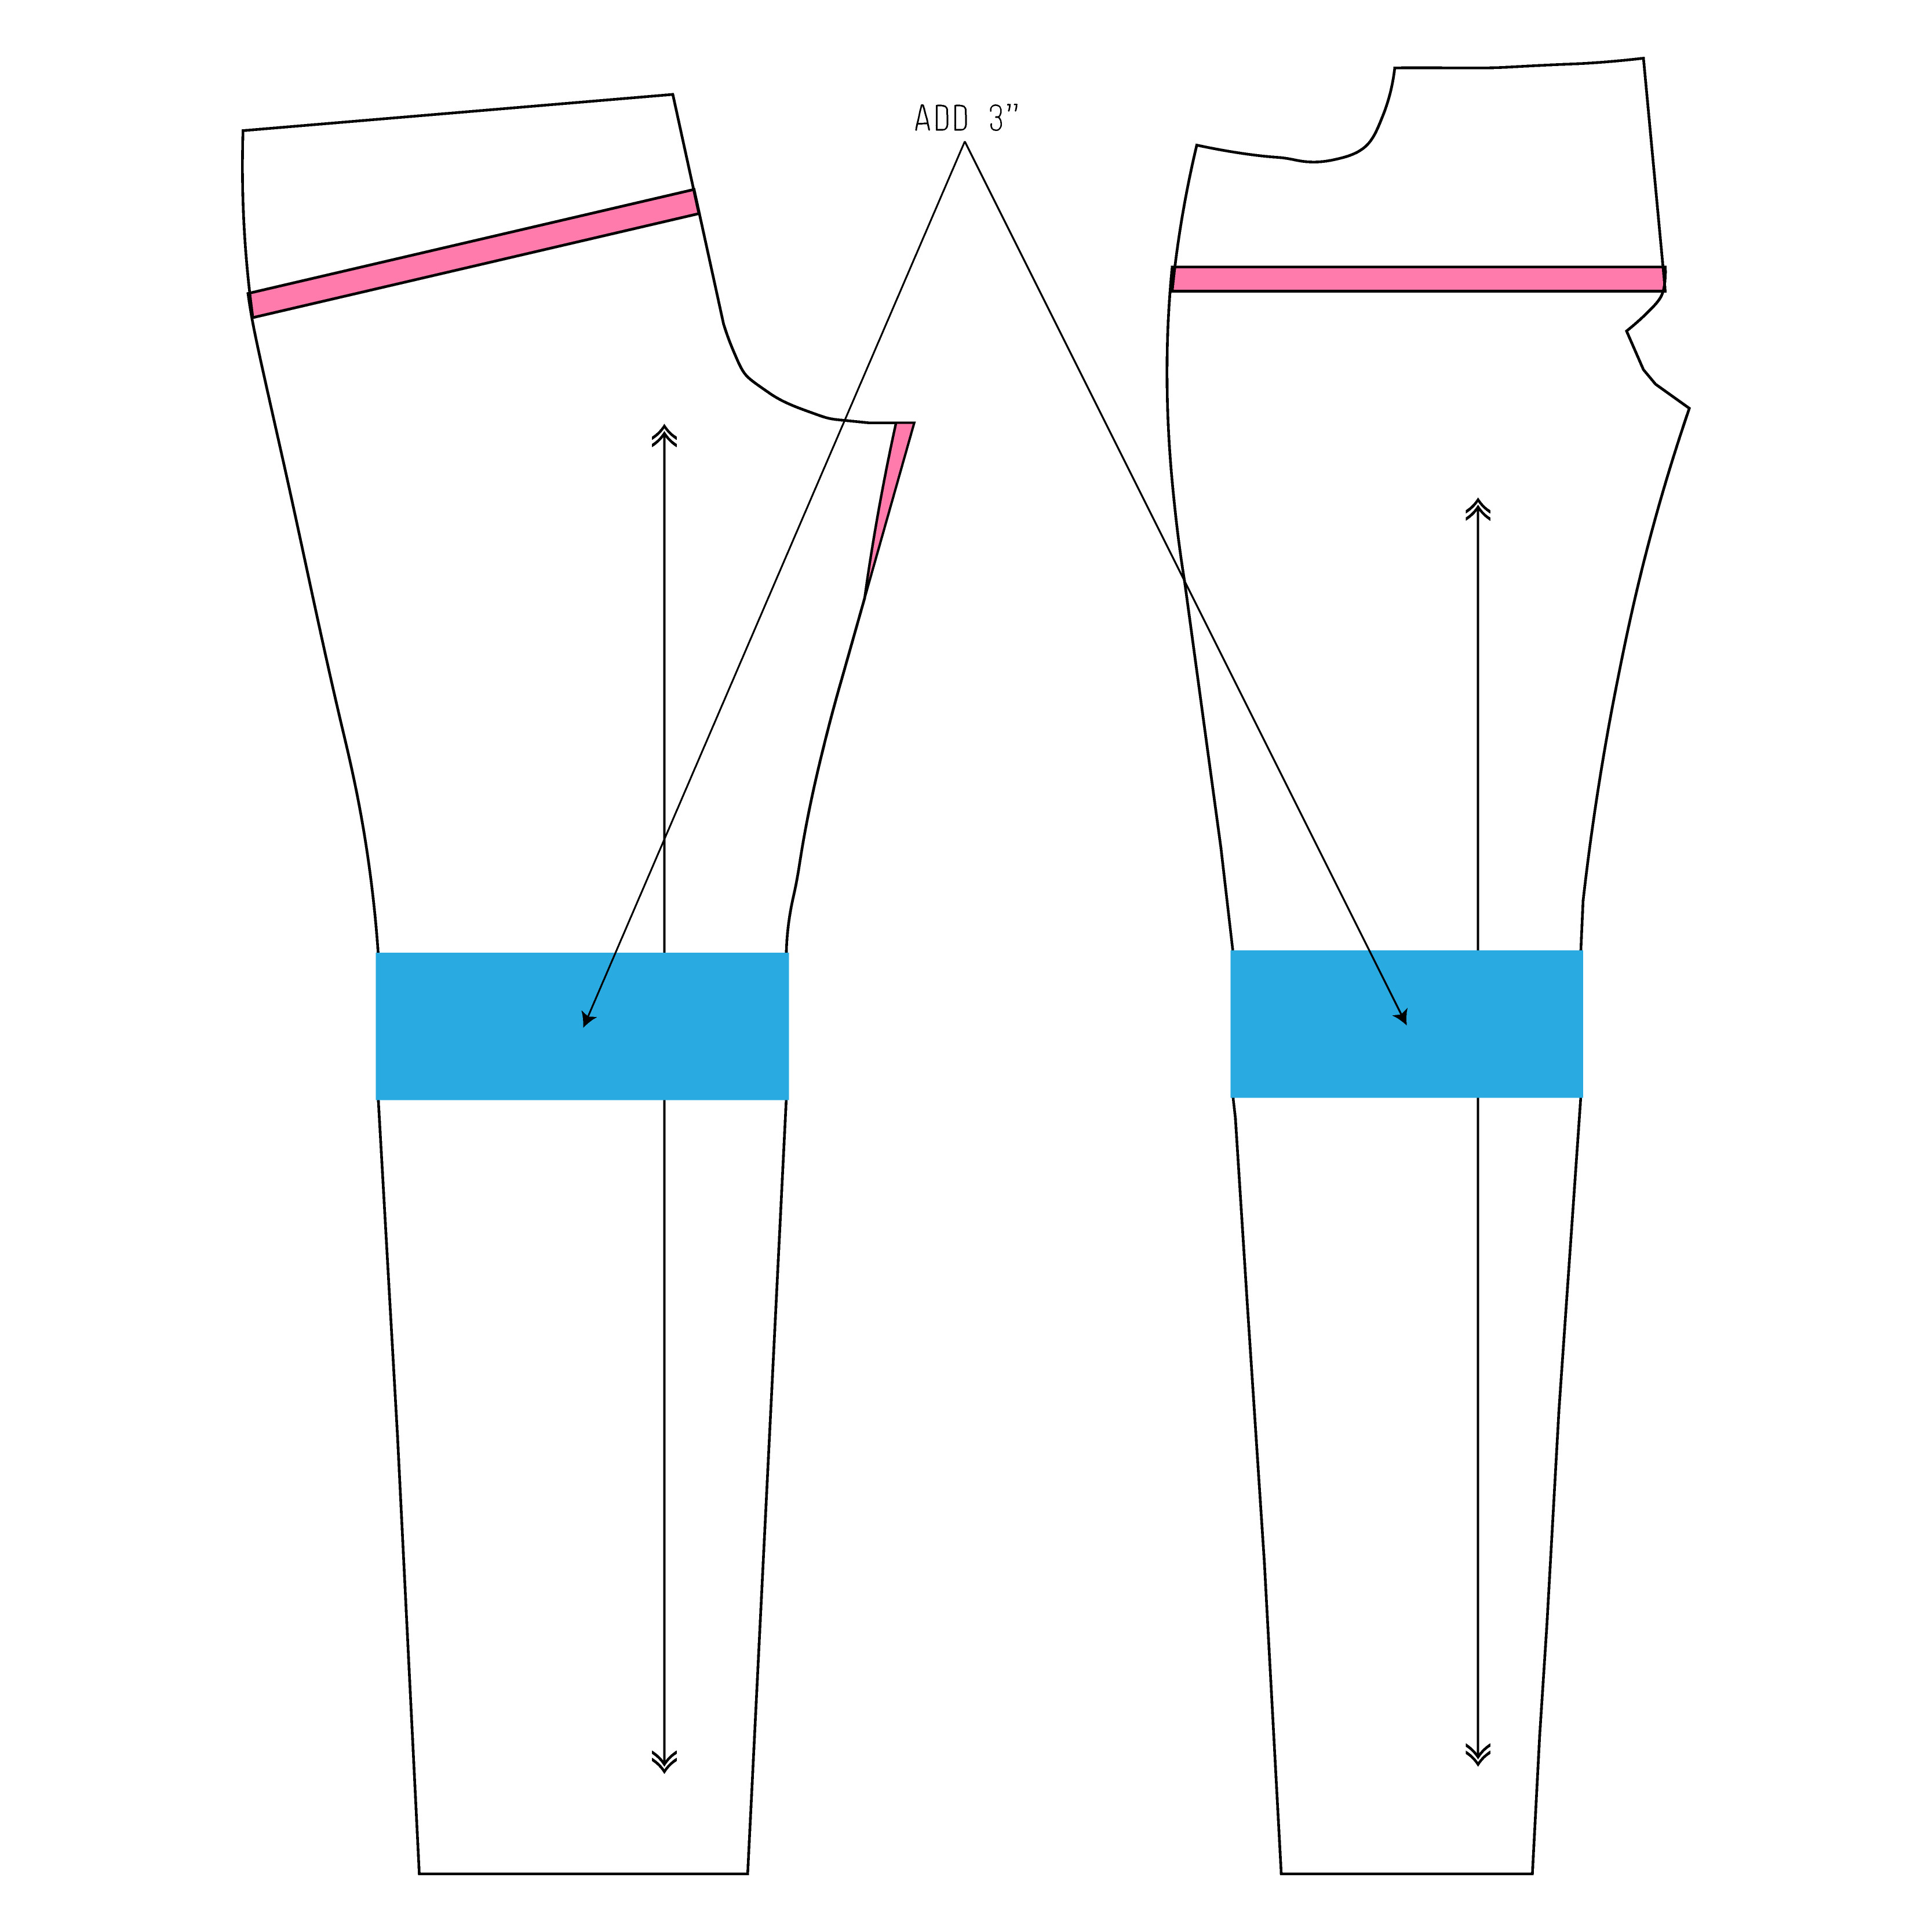
Before I make edits to my calf/knee area, I wanted to get the right length of my jeans. The pattern states that the inseam is 32″. My measured inseam in 35″ (barefoot). Thank goodness I only wear barefoot style shoes. I measured my muslin and in fact, I really did need to add 3″. It is super satisfying when the pattern and my measurements come out correct.
Last But not Least Full Calf Adjustment
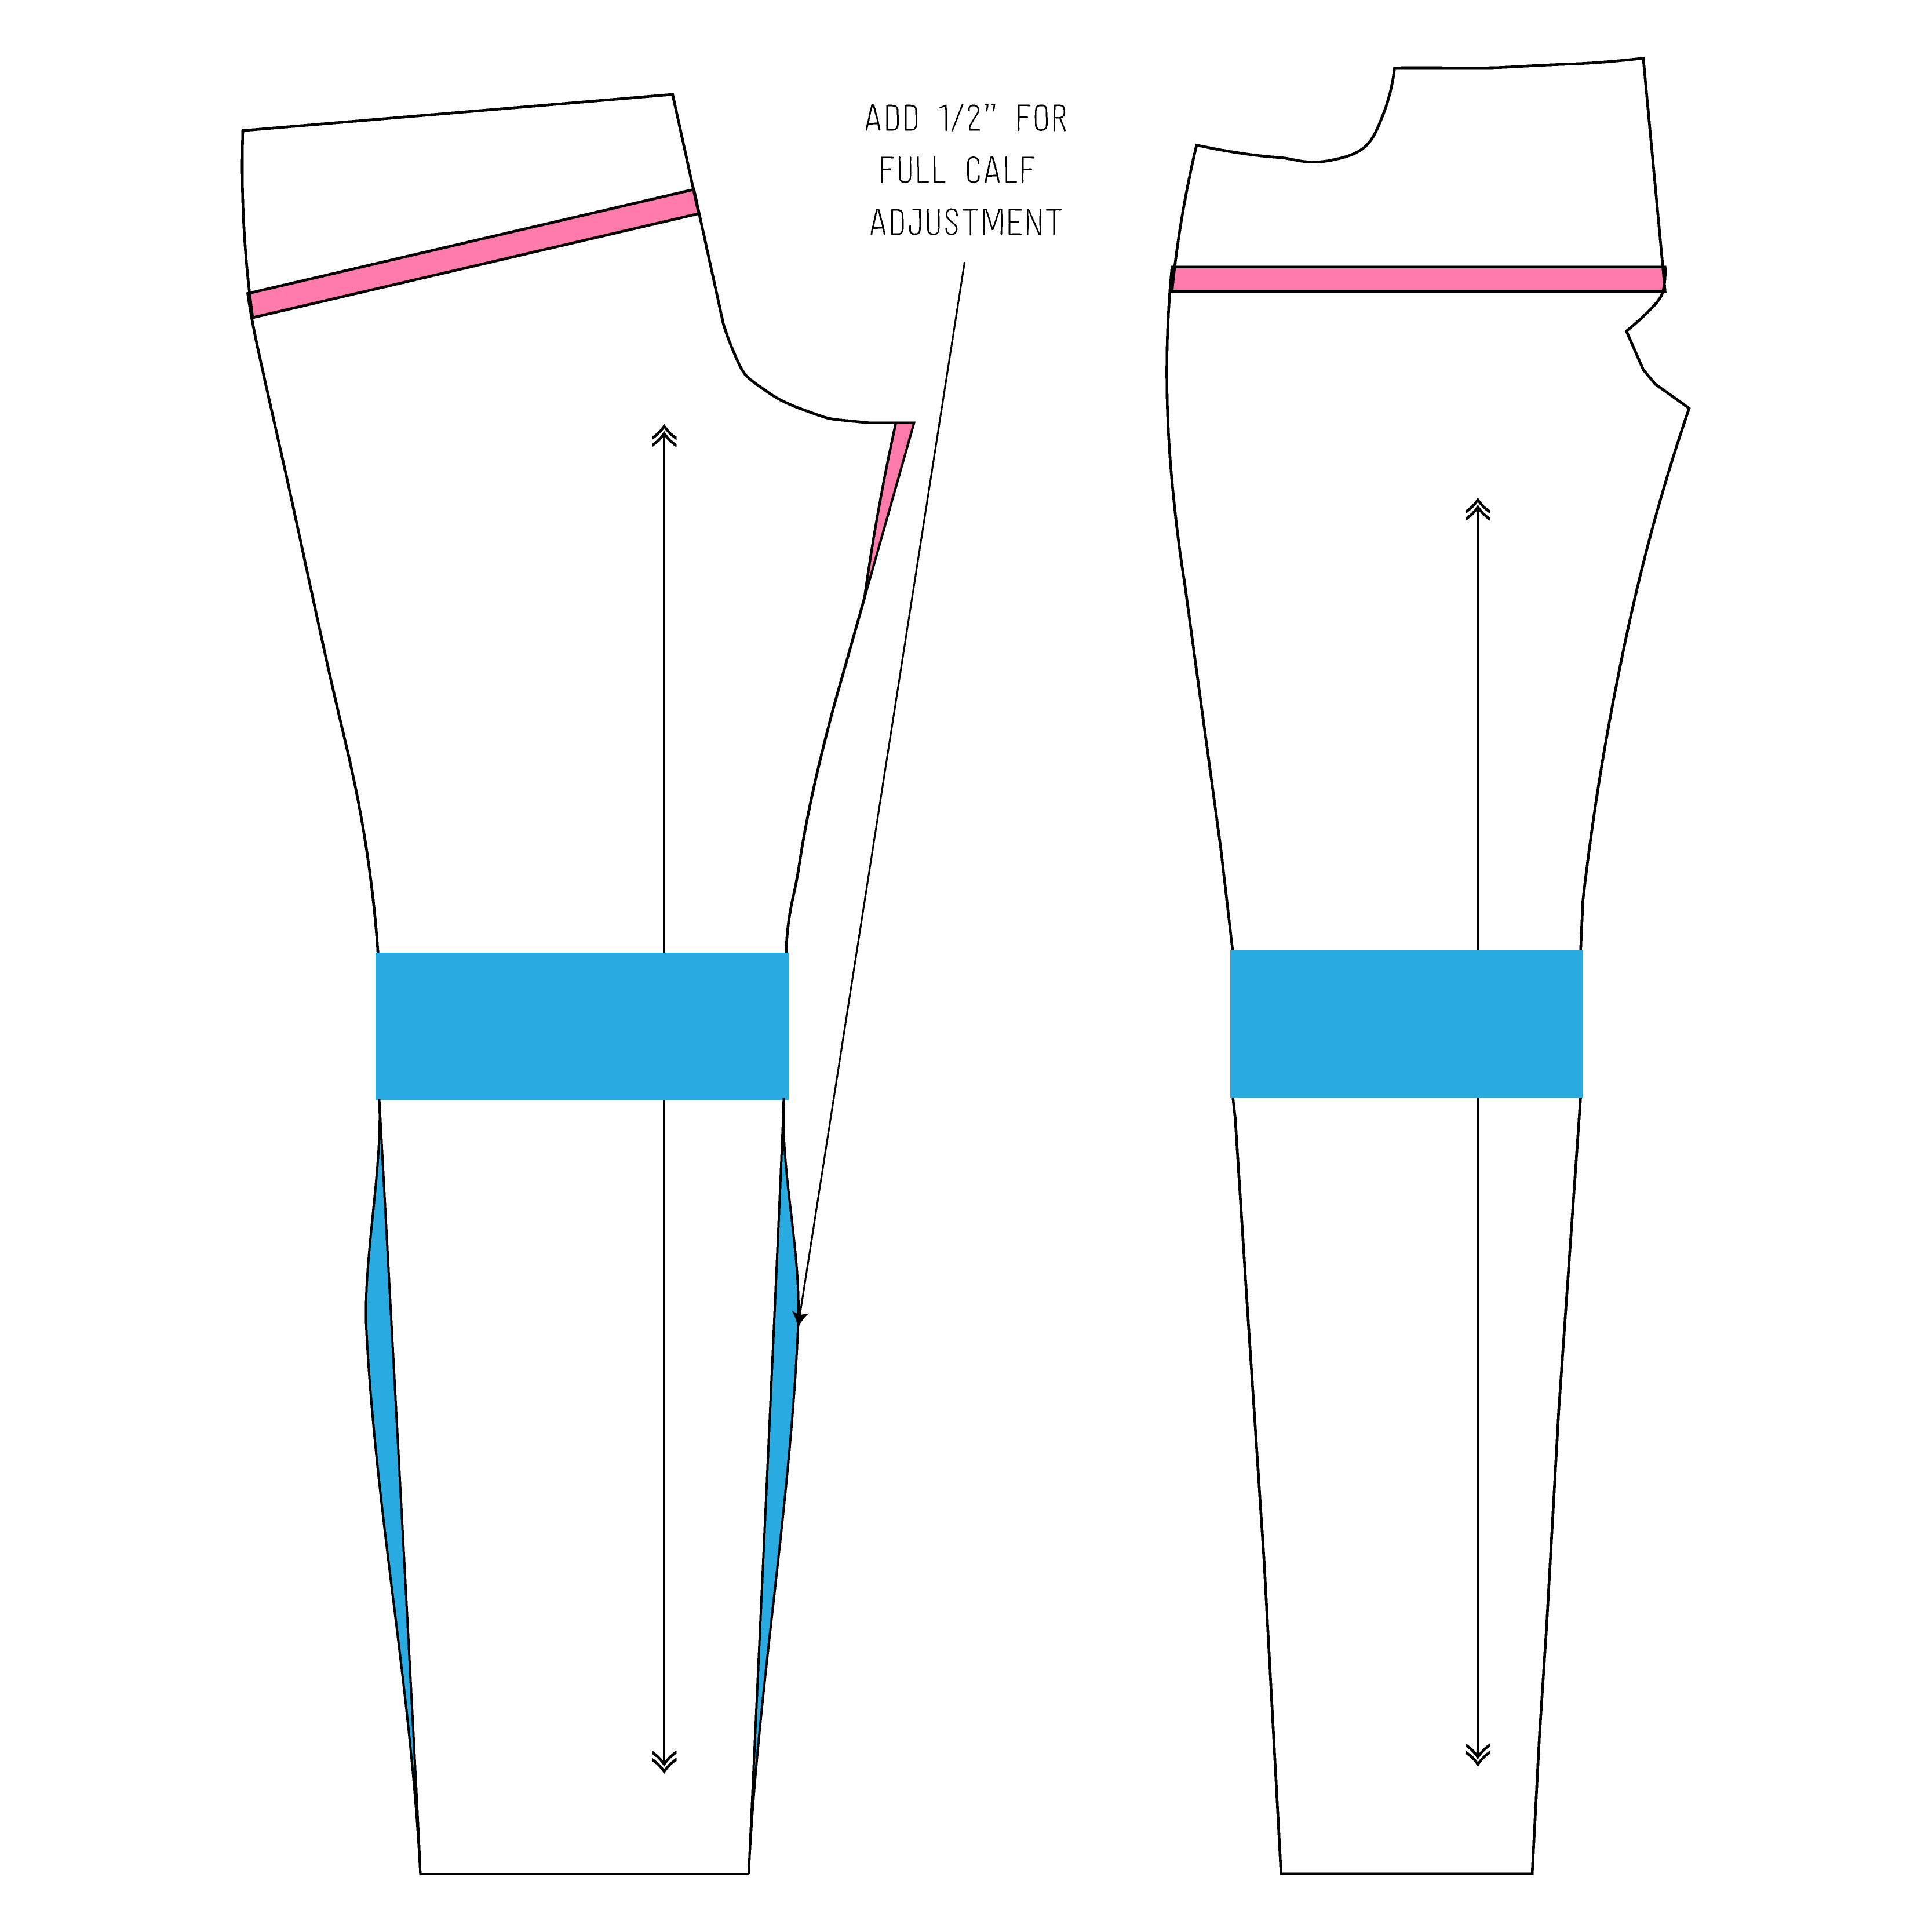
I used the slash and spread method and did a full calf adjustment. Can I just say that I’m super proud of having to make this adjustment because all that hard work of hiking in barefoot shoes is totally paying off! Enormous calves mean I have strong feet and ankles.

With this adjustment, you will widen the ankle opening, so I graded back to the original ankle width after adding in some room in the calves.
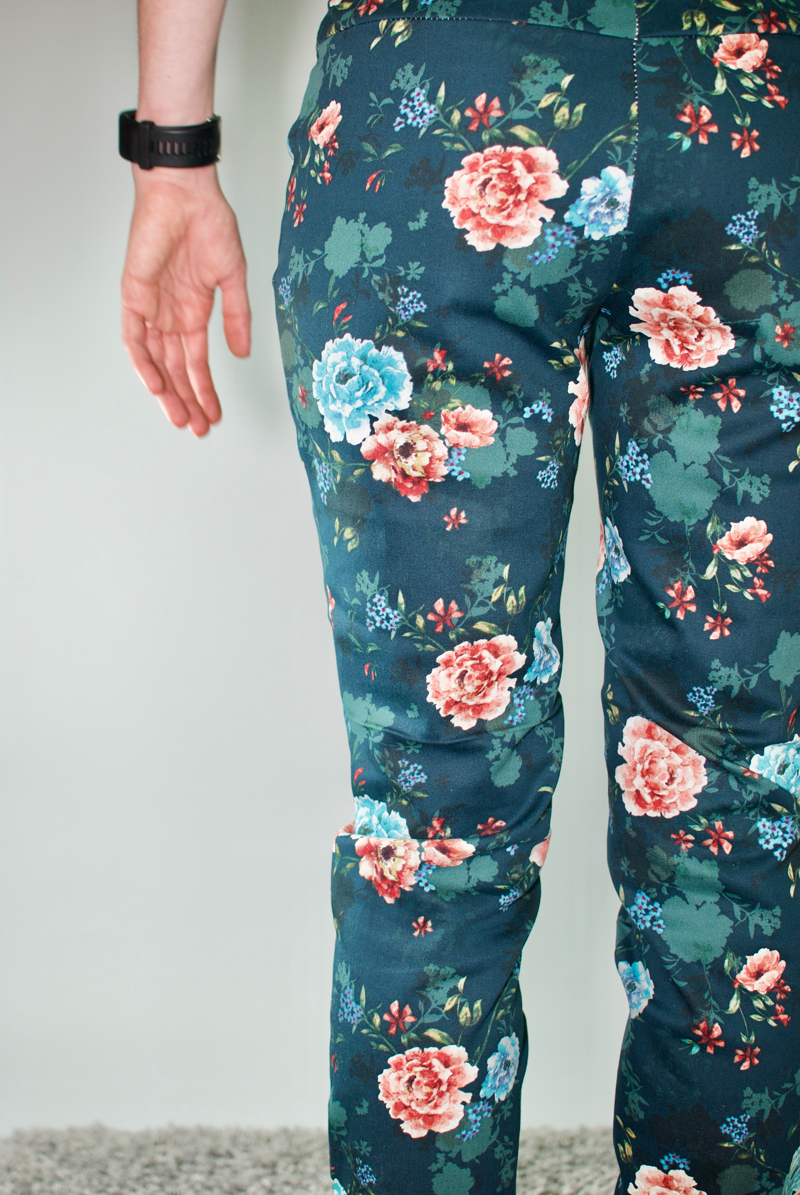
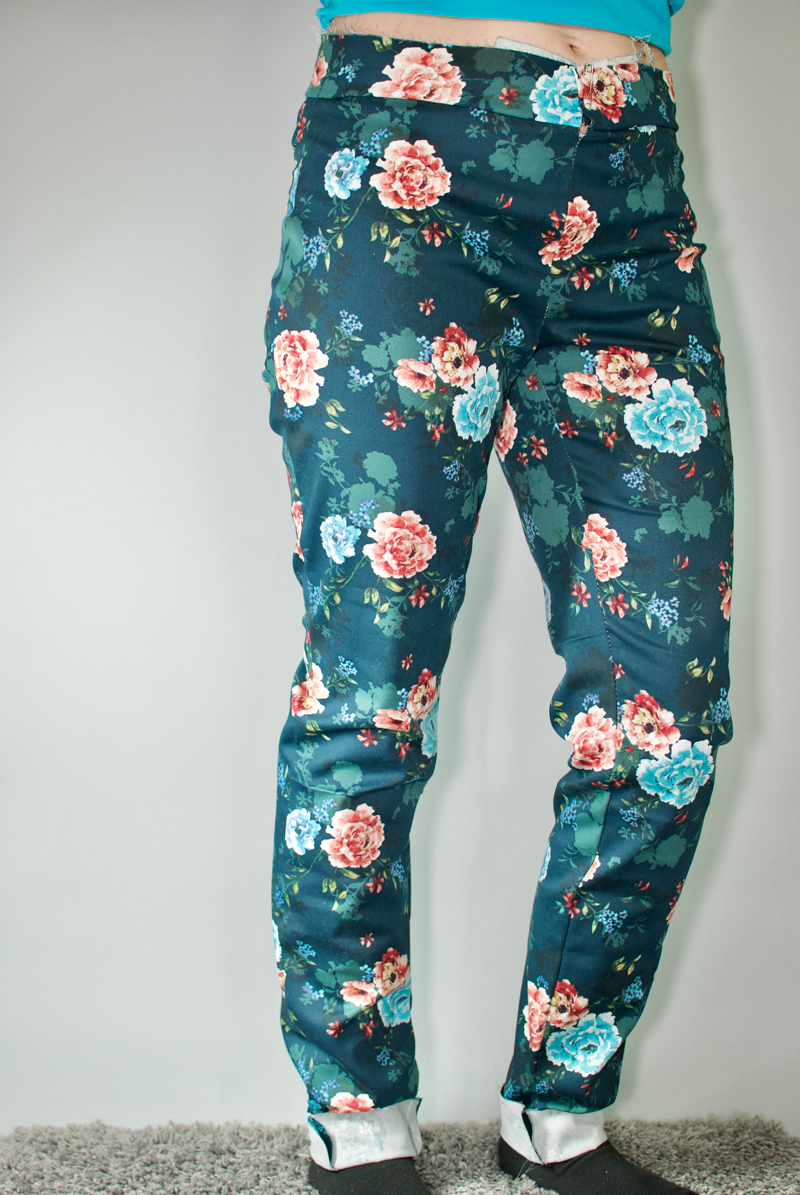
Spoiler alert! Notice that the twisted fabric originates from the inseam of the pants and twists around my leg. Now I have to figure out if I need a bow legged or knock kneed pant adjustment?!
Summary of Alterations
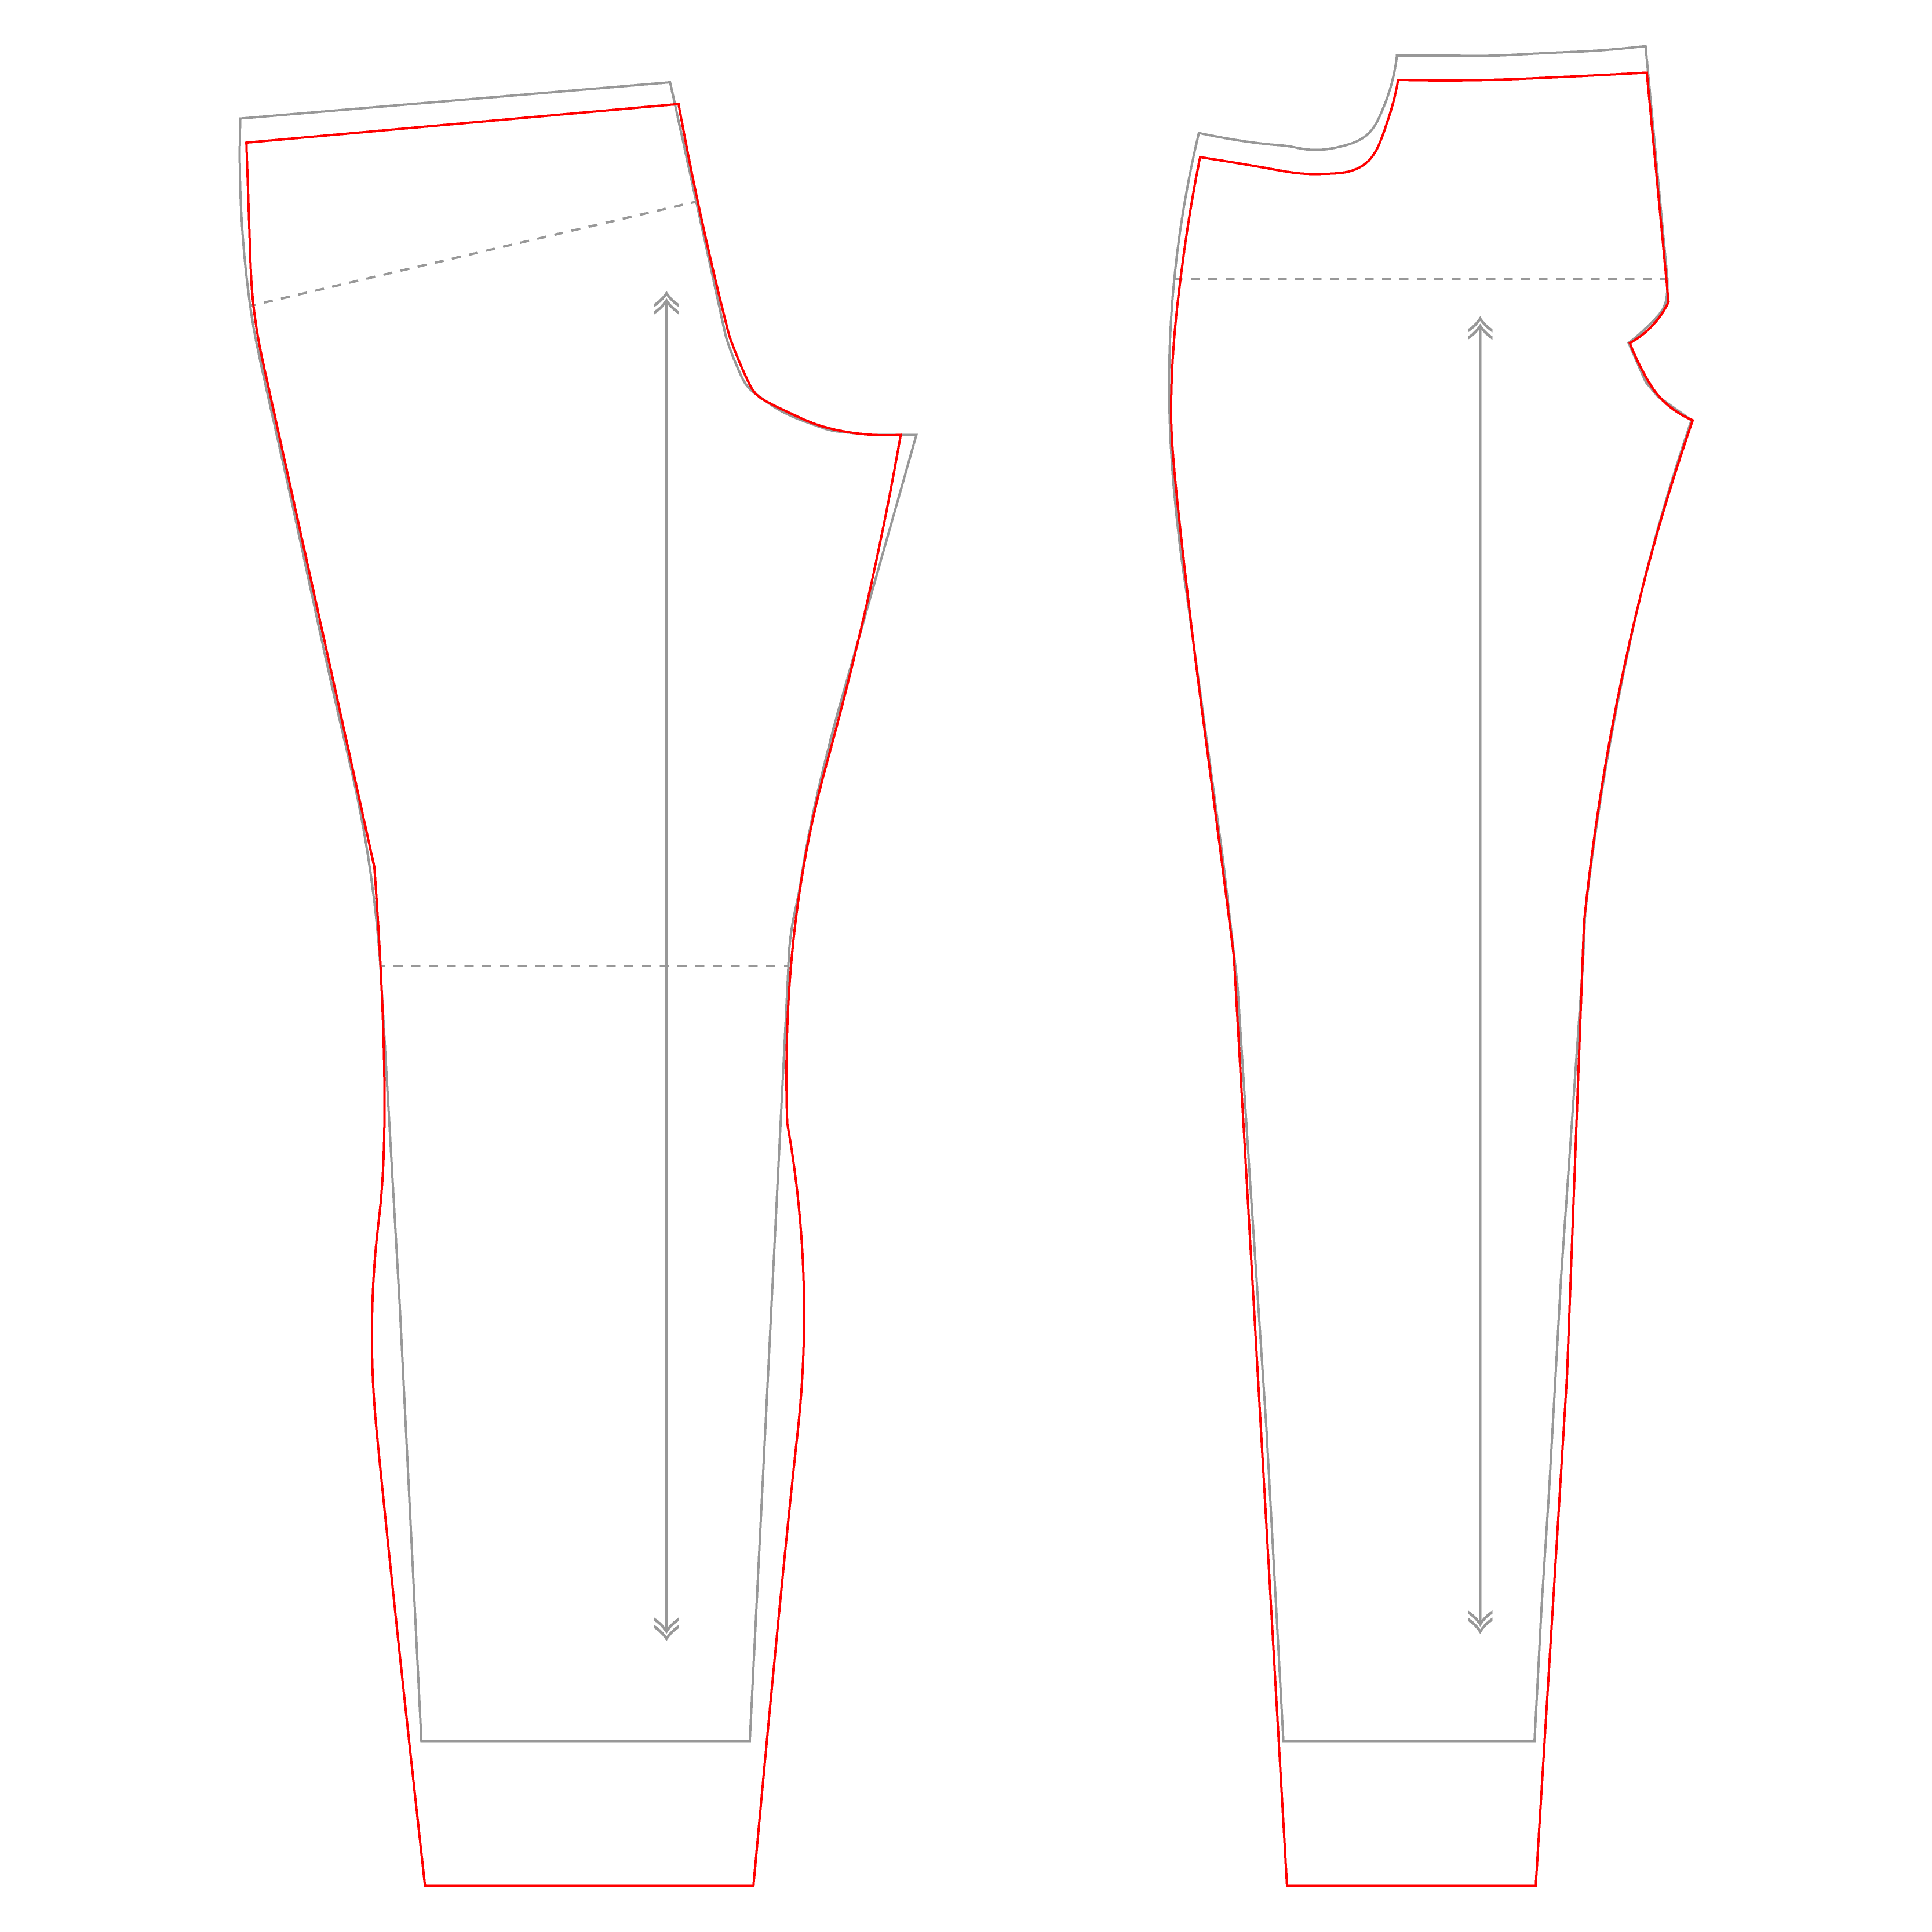
The original pattern is in gray with my new pattern after all the adjustments in red. I don’t need to make changes to any of the other pattern pieces, thankfully.
Where do I go from here?
So the only other issue is the calf twisting and I have to fix it, so I’m going to make a third basted muslin. I said I was going for slow, methodical thoroughness. Stay tuned for muslin #3 and how I fixed the calf twist…


Wow! Only sewing for 3 years and you have figured out which drag lines call for what adjustment???How amazing! what a great example you show of how to fit AND in what order. Your drawings are excellent! Thank you for providing such detail! This is definitely a go to guide for people working on this project! I can’t wait to see your next fitting! I love this!!!
LikeLiked by 1 person
Just learned from practice, since I think I’ve made almost 2 dozen pants for myself over the years! Thanks so much for your kind words!!!!
LikeLiked by 1 person
I love these posts. The detail is great and I’m learning so much by reading them. I’m still a newbie at sewing and don’t have plans to make jeans anytime soon… but when I do get around to it, I am definitely going to come back to your posts!
LikeLiked by 1 person
I did not think making jeans would ever be possible. But I’m living the dream! I’ve only been sewing for three years so don’t be afraid to try difficult things and challenge yourself.
LikeLike
I can’t thank you enough for this WONDERFUL post – I’m bookmarking this for future help/reference! You have a similar shape to mine – I have long legs, thinner thighs, small bottom 🙂 – I’m 63 so our shape is different but bone structure similar. I have a thicker waist (always have), and my calves will never be as robust again (despite all the exercising I do!) but certainly doing the alterations you’ve demonstrated here would probably go a long way towards making my pants fit much better.
LikeLiked by 1 person
You’re welcome and thank you so much!!!
LikeLike